you can cook
  • You Can Cook!
  • About Me
  • Recipe Box
    • Appetizers >
      • Buffalo Chicken Dip
      • Cream Cheese Appetizer
      • Sweet and Salty Nuts
      • Thai Peanut Sauce
    • Beverages >
      • Blueberry Lemonade
      • Cosmopolitan
    • Breakfast >
      • Apple Pancake
      • Homemade Granola
      • Peanut Butter Cup Smoothie
      • Stick-to-your-ribs smoothie
      • Veggie Omelet
      • Yeasted Waffles
    • Main Dishes >
      • Beef Stew
      • Chicken Fajitas
      • Choley
      • Grilled Chicken
      • Low and Slow Chicken Breasts
      • Roast Turkey
      • Rub for Pulled Pork (and other meats too!)
      • Salmon Burgers
      • Simple Homemade Mac & Cheese
      • Simple Red Sauce
      • Steak and Potato Salad
    • Sides >
      • Bacon-Roasted Brussel Sprouts
      • Creamy Polenta
      • Homemade Potato Chips
      • "Magic" Salad Recipe
    • Soup >
      • Apple Cheddar Soup
      • Butternut Squash Soup
      • Chicken Noodle Soup
      • Creamy Tomato Basil Soup
      • Smokey Beef Chili
    • Sweets and Treats >
      • Almond Cake
      • Apple Crisp
      • Bruna Kakor
      • Butterscotch Pecan Sandies
      • Chocolate Fudge Brownies
      • Chocolate Mousse
      • Compost Cookies
      • New York Times Chocolate Chip Cookies
      • Pumpkin Pie
      • Salted Caramel Sauce
  • Classes
  • Contact Me
you can cook

Don't Be Fooled!

3/21/2016

Comments

 
Picture
When I moved into my first apartment, I thought it would be great to have a few pots of herbs on my balcony. I didn't know what I'd use, but somehow sage captured my imagination. I was lucky enough to purchase the last plant at the garden center and it grew large over the summer. By October, I had still not used my sage and so I decided to roast a chicken and stuff it with some homemade dressing.

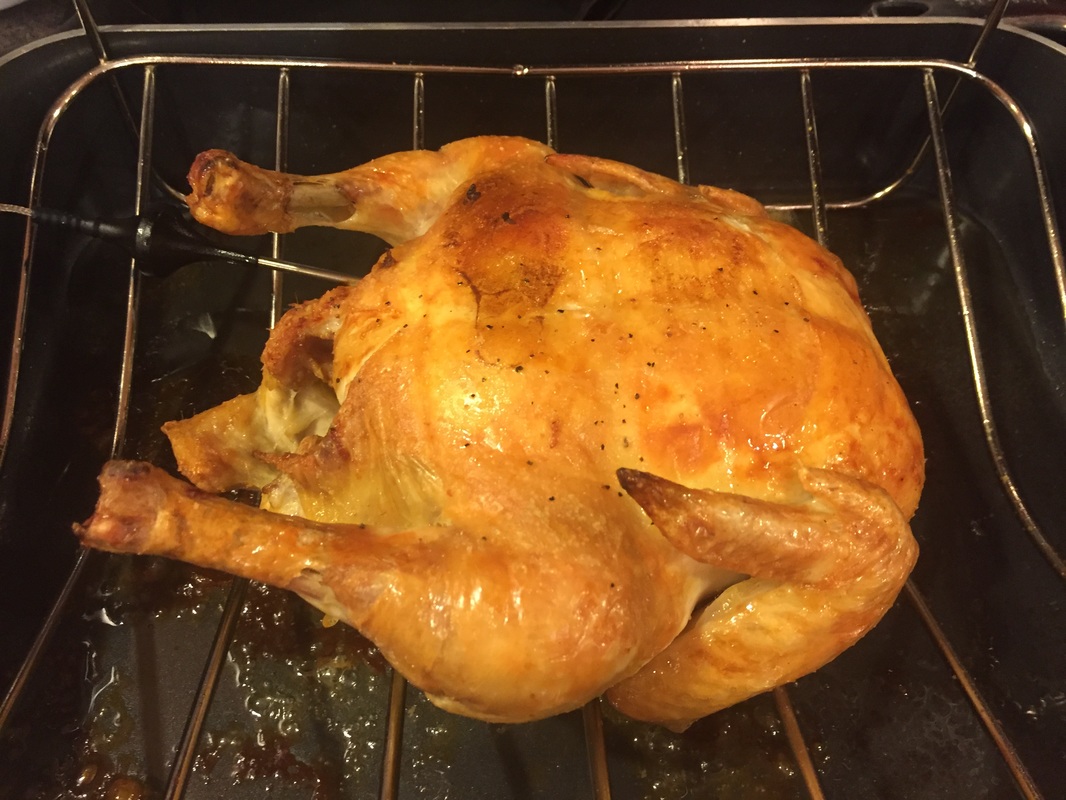
I harvested my sage and chopped up what I thought was an appropriate amount. Stirring the sage into my dressing, I decided that it didn't quite have the taste I wanted, so I added more, and after another taste, more again. When my dressing was almost green with sage, I decided I'd added enough and stuffed my chicken. The chicken baked to a shiny golden brown, and I proudly served both the bird and its contents.

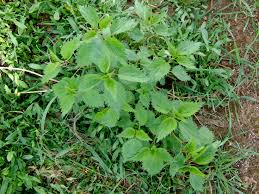
"What is this?" my husband asked, pointing to the dressing. "It's homemade dressing, with sage from our balcony." I replied. He tasted cautiously. "That's not sage." We both tasted, and confirmed that he was right. After looking up sage in a plant book, I confirmed that I had lovingly nurtured a weed which I had then used to stuff a roast chicken. Surprisingly (given that he is a decent cook himself) he continued to eat my food with no further reference to this potentially dangerous error. 

While this early attempt at raising herbs was a misstep, there is something to be said for having a few pots of them outside your kitchen door - and this month and next are a good time to start. Most herbs are basically weeds (my "sage" notwithstanding), and are very tolerant of Darwinian gardening. If you'd like to try growing an herb or two, buy some cheap clay pots, potting soil, and one or more of the following perennial herbs:
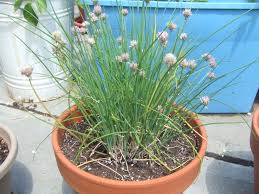
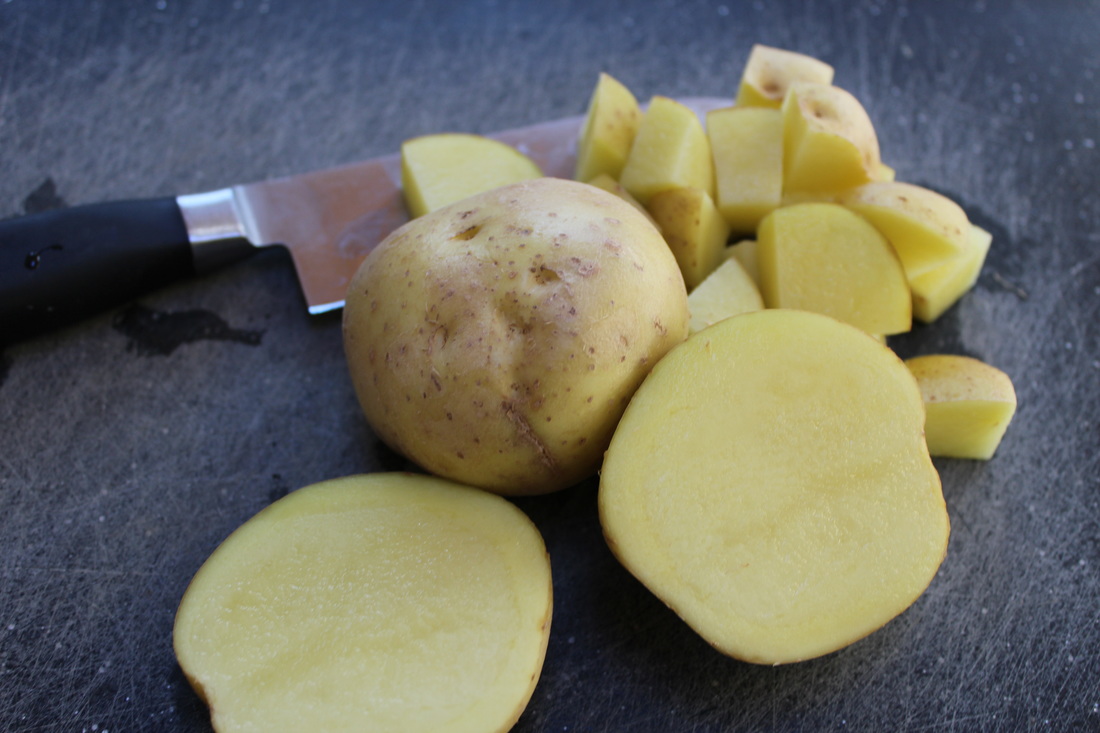
- Chive (onion taste, pretty edible flowers in the spring, can also be used in landscaping. Great on potatoes or eggs)
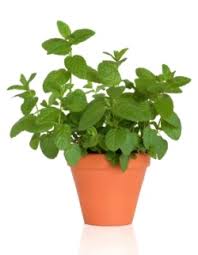
- Mint (extremely invasive - grow only in a pot!  Delicious in summer drinks or as a garnish)
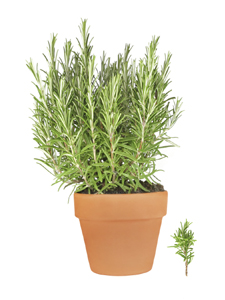
- Rosemary (1 - 2' tall, bring indoors below 20 degrees. Try adding to grilled chicken marinade)
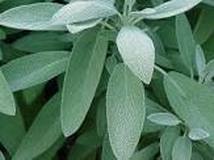
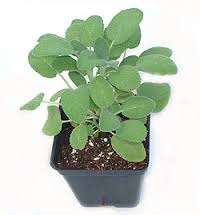
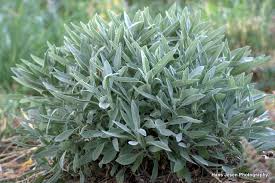
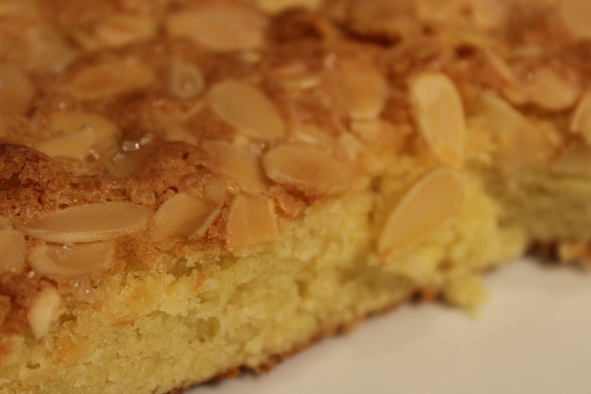
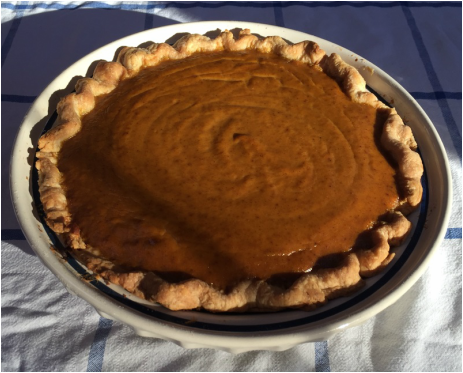
- Sage (pretty gray-green leaves on a 12" tall plant; try it in Butternut Squash Soup)
- Thyme (tough little 6" creeping plant; also great in grilled chicken marinade)

Chive
Mint
Rosemary
Thyme
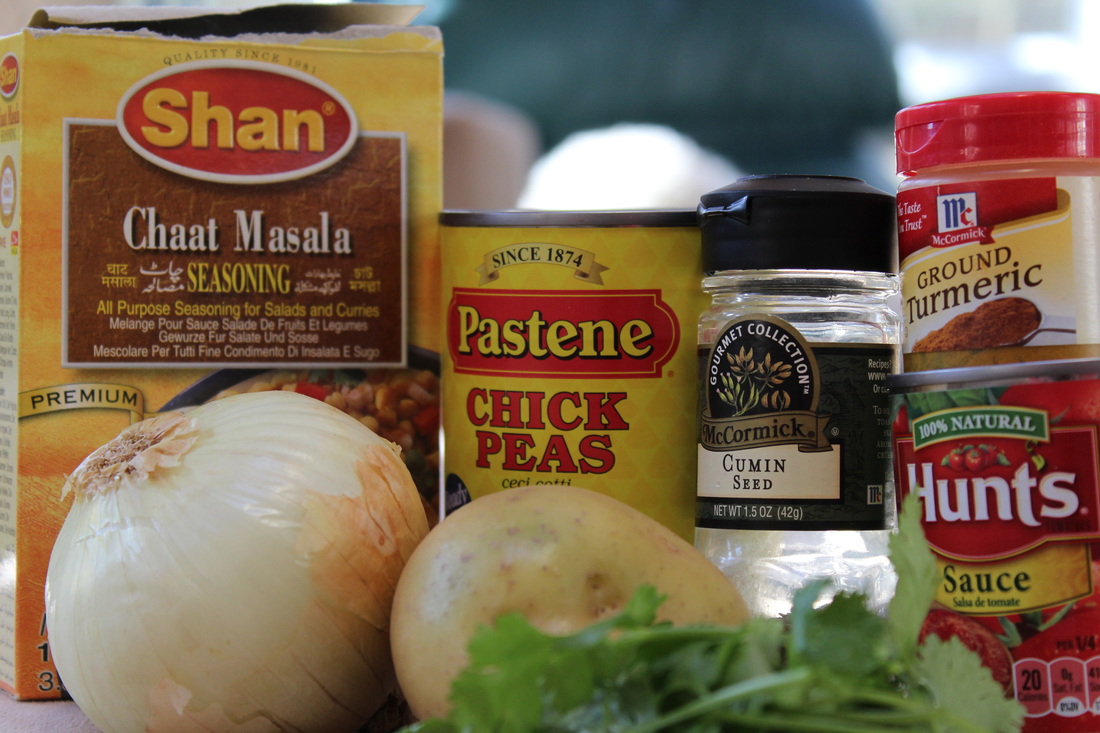
You will be surprised how much these herbs improve the flavor of your cooked food, and the initial plant costs about the same as buying a single package of cut herbs in the grocery store. All you need is a partly sunny location and a discerning palate. But don't buy the last plant unless you know what it's supposed to look like. Here are more photos to help:
Sage
Random Weed
Mature Sage Plant
​​If you would like to see my recipes, tips and adventures in cooking every week go to www.ucancook.net and enter your email on the right side. Alternatively, email me at chrisd.williams@yahoo.com and I will set you up!
Comments

Around the World Pot Luck

2/1/2016

Comments

 
Picture
Several years ago, I was fortunate to be part of an amazing professional team. What we did is less important than who we were: mostly middle aged women from all over the world. Long before I started there, the team had a tradition of a monthly "goody table" on the third Thursday of the month to celebrate birthdays and anniversaries. But this was not an event that the words "goody table" would bring to mind. This was a solid 50+ linear feet of tables lined up with food worthy of an international food festival. In short, I was an eager participant in a monthly potluck larger than any I have ever seen before or since.

While the 100+ people in the group brought dishes from every continent except Antarctica, there were a few that I remember especially well. There were two women from Mexico who would bring 1/4 sheet pans full of hand-rolled breakfast burritos made with eggs, salsa and chorizo. There was a man from the Philippines who would bring a small vat of pancit. And there was a woman from India, Mala, who always brought Choley.

Choley is the best buffet dish ever: it is inexpensive and easy to make, it can be served hot or at room temperature, most of the ingredients are pantry staples, it's not too spicy for New England tastes, and people really like it. I've never taken choley to a party and come home with leftovers. Added bonus: it's a vegetarian main dish, a rare bird at most pot-luck events.

Choley is a mixture of chickpeas (garbanzo beans) and potatoes in a very mildly spicy tomato-based sauce with chopped onions and cilantro sprinkled on top. It's great on it's own, but add a side salad and a piece of naan (you can buy delicious naan at most supermarkets, including my local Marketbasket), and it's a healthy, hearty and delicious meal.

There is one special ingredient, "Choley Spice" or Chaat Masala, pictured above. It can be purchased in a well stocked supermarket (the Hannaford's in Lowell, MA has it) or an Indian Grocery store (Google "where is the closest Indian grocery store"). It is inexpensive and keeps for a long time without refrigeration.

When I left that group, I was presented with recipes for many of these dishes, and love to make them. But the one I come back to again and again - for the reasons above - is the choley.

Thank you Mala! It was a privilege to work with you and I think of you often...especially when I make choley for dinner.

Chris

PS: if you love Indian food like I do and would like to learn more, Shilpi Rajan (based in Andover) gives cooking classes at her home. You will emerge much more knowledgeable and extremely full, since a typical class involves preparing and enjoying an entire Indian meal with your classmates. For a schedule of Shilpi's upcoming classes, see her website www.EZCompliments.com.

​If you would like to see my recipes, tips and adventures in cooking every week go to www.ucancook.net and enter your email on the right side. Alternatively, email me at chrisd.williams@yahoo.com and I will set you up!
Comments

A Tale of Stale

1/27/2016

Comments

 
During a Halloween party several years ago, a lovely friend brought a package of frosted cookies from a local grocery store. They looked delicious, but with a LOT of food on hand, I quickly put them in the cabinet above my refrigerator for "later". For some reason, "later" didn't come until the following August, when I pulled them out while looking for my grandmother's china. It was just before dinner and I was hungry so I did the thing I was told in college chemistry to NEVER do: I tasted the experiment.

That little nibble was actually delicious! So much so that I quickly finished the cookie, and then was horrified by the implications of what I'd done. I waited for a full 24 hours, expecting symptoms like vomiting, stomach pains and shortness of breath...but nothing happened. That cookie was still edible (quite tasty even) nearly 10 months after purchase. In spite of their deliciousness, I quickly disposed of the remaining treats, afraid I might succumb to temptation again.
Picture
Here is a label for cookies very similar to those I so foolishly ate. Not to overstate the obvious, but there are a lot of ingredients listed that you and I don't cook with.

When we make our own desserts, we don't use chemicals that keep our treats fresh for 10+ months, so the desserts need to be made just before we eat them in order to taste great. Preparing a dessert the day before is fine, and for something like a tiramisu or cheesecake where the flavors need to blend, two days before can be even better. But when you make something a week early and "pop it in the freezer" (even homemade ice cream) it will simply not be as good.

I became convinced of this when I took a platter of tiny cupcakes to an event at my church. The cupcakes had been in the freezer for a couple of months, but had been made from scratch and well-wrapped and frozen as soon as they'd cooled. I'd topped them with my daughter's fresh homemade strawberry buttercream, which is a topic for it's own post - it's unbelievably good. But after the event, several of my cupcakes had gone uneaten, and many more were in the trash (most with the buttercream licked off). I might have had a different result had I brushed the tops of the cupcakes with simple syrup before frosting them, but once I tasted the leftovers, I knew: their time in the freezer had left them with an off-putting, stale flavor.

I would hate for anyone to feel bad about taking a homemade dessert to a party or event, but you might consider making a simple dessert rather than concocting something complex in advance and freezing it. Alternatively, prepping the ingredients - toasting the nuts, combining the dry ingredients, etc. in advance will make quick work of the actual recipe when you do make it. Since the cupcake incident, I've learned that freezing leftover cake batter (instead of a baked cake) can work well: seal in a ziploc, squeeze the air out and freeze flat. Once it thaws (about 4 hours at room temperature for sandwich-sized ziplocs), you can clip off one corner of the bag and quickly fill cupcake pans. In the case of my sad little cupcakes, preparing new cupcakes from a boxed cake mix would have also been a substantial improvement.

Here are a few quick and simple desserts:
​Almond Cake (15 minutes plus cooking time)
Apple Crisp (20 minutes, including peeling the apples, plus cooking time)
Chocolate Fudge Brownies (5-10 minutes  plus cooking time, allow 3 hours to chill)
​Chocolate Mousse (10 minutes plus 1 hour to chill)

A plate of fresh-made chocolate chip cookies are always a hit, and will taste amazingly better than purchased cookies or those made from pre-made dough. My favorite recipe uses butter flavored Crisco - hardly a health food - but because the butter-flavored Crisco is actually dairy-free it can be made vegan by using vegan chocolate chips (Trader Joe's chocolate chips for example) and substituting almond milk for the milk. For extra deliciousness, sprinkle each cookie with a pinch of kosher salt before baking.

Dessert has only one purpose: to taste fabulous. If it fails at that one thing, it's not worth eating.

Sweet dreams,

Chris

If you would like to hear about all my recipes, tips and adventures in cooking, go to www.ucancook.net and enter your email on the right side. Alternatively, email me at chrisd.williams@yahoo.com and I will set you up!

Comments

Adventures in Cooking: The Perfect Waffle

1/18/2016

Comments

 
Picture
When I was about 9 or 10, I discovered the wonders of Bisquick. Amazing stuff, it could be used to make biscuits, dumplings, oven-fried chicken, pancakes, muffins and best of all waffles. Hot, fresh and drowning in 2% maple syrup and real butter (I'm from Wisconsin), they were everything my little carb-loving heart could desire. My family was of like mind, and tucked into them right along side of me, praising my delicious creations.

Fast forward to a 2013 vacation on Nantucket with my family. My brother and sister-in-law, foodies (among many other delightful characteristics) from Seattle, prepared waffles one morning. Their recipe was not Bisquick, but a throwback recipe, "Marion Cunningham's Yeasted Waffles", the winner of a best-of-breed waffle contest on the Blog Orangette which is run by a Seattle restaurateur. Drenched in real maple syrup, not only did they taste fabulous, but the process of making a simple batter at night and cooking it in the morning was appealing as well.

The only problem with these delicious waffles is that the recipe, which dates from the early 1900's, was designed to be made in an old-school waffle iron, producing a rather flat waffle, and like almost anyone who has purchased a waffle iron in the last 20 years, I have a Belgian waffle iron, which makes tall, fluffy waffles. So my delicious yeasted waffles were coming out all flat on one side. Now it's simple enough to turn them over before serving (who among you hasn't given your kid a grilled cheese sandwich burnt side down??), but I wanted to completely fill the waffle iron with fluffy deliciousness.

Picture
Picture
Surely, it couldn't be that hard.

The basic ingredients are few: butter, flour, yeast, milk, sugar, salt, eggs and baking soda. 

Given that this is a very runny batter, I started by simply adding more flour. The result? A bisquick-style waffle, that looked really good and tasted, well, kind of like it's Bisquick predecessor. Adding less milk gave the same result.

Next, I tried doubling the number of eggs (more protein, yay!). The resulting waffle was quite delicious, but just as flat as his less-eggy cousin.

The next add was more baking soda. Unfortunately, instead of creating a "recipe", I concocted more of a "science experiment" by adding 1/2 tsp. baking soda to a 1/2 c. of waffle batter. The resulting waffle was still flat as a pancake, as well as being completely inedible. So they were good for dieting (it is January after all) but not so good to actually eat.

It was my 15 year old daughter who finally solved the puzzle. She makes light, airy pancakes out of -- wait for it -- Bisquick -- by separating the eggs, whipping the egg whites and folding them back into the batter. When she pours the batter into a hot skillet, they rise up faster than a pancake in an ihop commercial. And they actually taste really good.
Picture
So here is the secret to the best waffle you will ever eat, without having to serve it bad-side-down: whip up the egg whites and fold them in.

One note: to me, one of the things that make this recipe so attractive is that you prepare it the night before with a minimum of effort and expend even less effort to add two eggs in the morning and make fresh waffles. If you prefer less effort, you should absolutely make the original recipe - it's fabulous. And if you are a bright-eyed and bushy-tailed morning person who wants an adventure in cooking, by all means, separate the eggs, whip the egg whites and fold them back in. You will be delightfully rewarded for your extra work.

Tastefully yours,
Chris
Comments

The 70's are calling and they want you to try fondue!

1/11/2016

Comments

 
Picture
On a bitter cold night, there is nothing better than sharing some serious comfort food with a group of friends. The problem with much comfort food however is that it takes a good deal of time and planning to prepare. Now, I have no problem spending two days to make a couple of loaves of sourdough bread or a really intricate chocolate torte, but we are all looking for simpler ways to entertain. For that, I'd like to raise up a child of the 70's, the humble fondue.

I'll bet that most of you could - either by asking your parents or visiting a well-stocked antique store - lay your hands on a fondue pot. If those sources fail you, Amazon will provide. The question is, what can you do with it? I want to share two fondue recipes that will have you swapping stories over bubbling pots of cheese and chocolate in less time than it take to text your friends and invite them over.

A word about fondue forks: you can make do without them. For cheese fondue, you can substitute long toothpicks or thin italian breadsticks, and for chocolate, marshmallows speared on tiny pretzels sticks work much better than a fork, and the long toothpicks work well for dried fruit or poundcake. That said, if you get your hands on some of the wooden handled, color-tipped forks, go wild! Just don't put them in the dishwasher - the 70s were all about hand-washing.

To start your fondue party, serve a salad following my "magic salad" rule of one fruit, one nut and one cheese (suggested combinations are with the recipe). Serve with a simple vinaigrette - given the main course and dessert, you will want to start on a lighter note.
Picture
The main course is of course cheese fondue. While there are many ways to make cheese fondue, I prefer to keep it simple: use a bag of good quality pre-grated cheese, a bit of chopped onion, some beer and a couple of tablespoons of flour. The recipe comes together in under five minutes, and - bonus - your guests can help you prepare it!

The next question is what to dip? Start with sliced apples (Granny Smith work well) and cubed french bread, and if you like, include thin italian breadsticks, par-cooked broccoli or even lightly microwaved mushrooms (dry well before serving). This is not an exhaustive list - after all, what doesn't taste great with a bit of cheese?

For dessert, clean your fondue pot of any leftover cheese and pile in chopped dark chocolate. Add cream and stir until melted; then stir in a few tablespoons of liqueur. The recipe for chocolate fondue has many permutations; I'm sure you can think of several just while reading!

For a dessert fondue, consider dipping mini-marshmallows speared on thin pretzels, fruit that has been washed and well dried, pound cake, or animal crackers for kids. For the more adventurous, chunks of cheesecake, thin crisp cookies, dried fruits, or even a toasted nut or two or two are delicious. Like cheese, what doesn't taste good dipped in chocolate?

One more thing about fondue: it's not considered good form to drop things into the fondue pot, in fact, if you do this, you are supposed to kiss the person to your left. So do take care when planning your seating arrangements...we've heard some stories about those wild 70's, and who knows if fondue played a role?

Happy dipping,

​Chris

If you would like to hear about all my recipes, tips and adventures in cooking, go to www.ucancook.net and enter your email on the right side. Alternatively, email me at chrisd.williams@yahoo.com and I will set you up!

Comments

Back Pocket Dessert: Quick, Simple and Tasty

1/4/2016

Comments

 
Picture

​Now that the holiday rush is over and the decorations put away, isn't it wonderful to spend an evening with friends? I mean seriously, what else is there to do this month? You really don't need a reason; last fall, I invited friends over and we shared a bottle of good wine to celebrate one's job loss, another's awful job and the third quitting her job. It was fabulous.

But when such lovely occasions arise, the question - if you're hosting - is what to serve? My main housekeeping strategy is one I call "lowering my standards" (I got this good advice from my mother), but even I need to clean the place when people are showing up, and this all takes time. This is where a "back pocket dessert" really comes in handy. A true back pocket dessert should be able to be produced in 15 minutes or less including hands-on time and cleanup, made with stuff you already have in the house and taste fabulous. Now my staples may be different than yours, but I'd like to share one of my favorites: Almond Cake. This delicious cake has only 7 ingredients: almond flour, butter, eggs, sugar, almonds, almond extract and flour. Obviously this is not good for anyone with a tree nut allergy, but for the rest of us, it's great! The ingredients mix in one bowl, and aside from the chore of cutting a circle of parchment to put in the bottom of your cake pan, the cake is in the oven in about the time it takes to preheat it - and your friends will swoon over this dessert. It tastes like marzipan made into a crispy, buttery cake; you can even add some liqueur or top it with sliced almonds and sugar (as in the photo above) if you want to take it to the next level.

Picture
A couple of words about almond flour. This ingredient (I buy the Bob's Red Mill brand at the grocery) is simply ground up nuts, but is the key to several other great recipes including a flourless queen of sheeba torte and french macarons. If you celebrate Passover, this flour will allow you to make amazing flourless desserts for the holiday. Because almond flour is just ground almonds, it's kind of expensive, but you don't use a lot at one time and it keeps for a solid year in the freezer. My only caution is that people who are allergic might not expect ground nuts in a cake or cookies, so make sure you let everyone know. Anaphylactic shock is a terrible way to end a friendly gathering.

Besides quick preparation time and amazing flavor, another advantage to this back pocket dessert is that it's super portable. Since it's baked and transported in a cake pan, you could just about punt it over a goal post and it would still look and taste great. Several years ago, I brought a torte that I had spent a couple of hours glazing in three colors of chocolate to a holiday party. I had made the torte in a springform pan, removed the rim to glaze the torte and then placed the glazed torte on a plate for transport. I drove to the party with my seat all the way back, the plate with the torte between my legs. Everything was fine until I realized I had almost missed a turn, so I banked the torte with my knees and made a right...but then realized a quick left immediately followed! As the car lurched up the steep driveway, the torte skidded off the plate, flying towards the (vacant) passenger seat. I reached out my hand and palmed it right back onto the plate. After parking the car, I looked down. My hand was clean, but my beautiful, 3-color, watermarked chocolate torte had a giant handprint covering the entire top! I quickly went into the party, and when the hostess asked me what I'd brought, I told her "flying chocolate torte". We still laugh about that, but thankfully once the first couple of pieces were cut, you really couldn't tell. With this almond cake, you turn it out to remove the parchment but can return it to the pan for transport; safe in the pan, it could go to a party under the seat of your car and as long as it didn't get dirty, it would be perfectly good! So ideal.

So rather than think too much about the long nights, brutal cold or massive piles of snow, call a couple of friends, give your house a cursory cleaning, and make yourself an almond cake. It goes well with coffee, fresh berries, whipping cream or all three, and is good at any time of day your friends can join you. Please do this; you will have a wonderful time! 

Chris

Comments

The One Tool Every Cook Should Own

12/26/2015

Comments

 
Picture
Like many of us, I learned to cook in my mother's kitchen, using my mother's kitchen knives. And what knives they were! She had purchased them from the Cutco Company upon the occasion of her marriage in 1961. One of the best features of these knives - and key factor in her purchase decision - was that they *never* needed to be sharpened. I started cooking when those knives had seen about 15 years of daily use. New to the kitchen, I thought it was normal to "cut" fresh vegetables by sawing them to little shreds while holding your knife in a white-knuckled grip. Although my mother very sadly passed away in 2002, my dad still uses those knives. And they have not been sharpened to this day.

Fifteen years into my own marriage, my Chicago Cutlery knives (a wedding gift) had made a few trips to the knife sharpener. Wanting a more convenient and cost-effective solution, I attended a knife sharpening seminar at Williams Sonoma. After watching a lengthy demonstration of a $300 electric knife sharpener, I pulled a friendly-looking clerk aside to ask what other choices there were (I may have used the phrase "a knife sharpener for real people"). He was refreshingly honest and pulled out a hand-held device encased in plastic. It cost $20.99, and he told me that he used it himself and it worked really well. I bought one, and have had razor sharp knifes ever since.

You might think that a $15 (the price has gone down!) knife sharpener should not be used on your good knives, and I'd ask you to check with the store you purchased from if you are concerned. But as long as your knife is not serrated (serrated means it has little teeth, like a bread knife) and is honed from steel (not stamped), it can be sharpened. You do not want to sharpen stamped knives or ceramic knives (photos below), but any other knife with a steel cutting surface will work (see the photos at the bottom)

These are knives that CANNOT be sharpened using a knife sharpener.
Stamped
Ceramic
Serrated
To use the sharpener, draw it through the "coarse" V-shaped channel about 10 times (a few more if the knife is extremely dull to start), and then draw it through the "fine" V-shaped channel about 10 times. Pull the knife through the channel in one smooth motion, handle to tip. After you've done this, try to cut the edge of a piece of paper; if the knife slides through easily, it's sharp! If it does not, draw it through the "fine" channel another 10 times. Once you've done a couple, this will take no more than 1 minute per knife. Here are a couple of photos of knives that can be sharpened (note that the blade and handle are different materials). The knives on the left are 25 year old Chicago Cutlery, and on the right, a Wusthof 5" chef knife (the workhorse of my knives). I sharpen these knives at least once a month, and use the one on the right nearly every day.
These are knives that CAN be sharpened with a knife sharpener.
I can't promise you that your onions will chop themselves, but I can tell you it will go faster and you'll enjoy your chopping a lot more. If you'd like to order one of these extremely useful devices (or give yourself a gift you wish you'd received for the holidays), you can find it here.

I've posted a video to the You Can Cook Facebook timeline as well, because seeing is believing, and I was shocked at how easy this was to use and how much it has improved my knives...and by extension my enjoyment of the time I spend in the kitchen. Stir fry, anyone??
Comments

Caramel Sauce: The Quest

12/1/2015

Comments

 
Picture
Have you ever embarked on a quest? A plan to do something amazing and remarkable? Something that could change the world? Anyone who has ever watched the Princess Bride (and if you haven't, you should), knows the power and worth of a quest.

My quest, began in 2007, was to make the perfect caramel sauce. I had tasted the delights of such a sauce at an upscale restaurant, and knew that I had to learn to create my own. This quest led me through at least 20 recipes, several pieces of special equipment, countless 10 pound bags of sugar, and a considerable number of scorched, grainy or runny failures.

The plot thickened in 2008 during the financial crisis. I was testing investment strategies, and with the market swinging wildly, sometimes the best thing to do with a position was to "SOH", or sit on hands. For me, the best way to get away from the crazy market volatility was to make caramel sauce. I made vats of caramel sauce between September 2008 and April 2009. We had ice cream every night, brownies infused with the stuff, ate it with apples and pretzels, stirred it into our coffee and gave it away as Christmas, hostess and teacher gifts. I never let my supplies of sugar, butter and cream run out and bought mason jars almost every week. My quest had become an obsession.

With all of this making of caramel sauce however came a true mastery of the craft that I'd like to share. There are so many uses of caramel sauce (see above), and it really is amazingly better than even a good quality jar like Mrs. Richardsons (do NOT pop the lid on the Kraft version - you won't want to anyway when you read the list of ingredients). It's true that butter, sugar and cream are not healthy foods, BUT if you chose to eat unhealthy food every so often - and we all should occasionally - shouldn't it be the best-tasting, freshest unhealthy food possible?

A few more things about caramel sauce: it's fast, it's simple, and there are no special tools other than a heavy-bottomed pot and your own good common sense. It takes only 4 ingredients and keeps (refrigerated) for three months. Doesn't that sound like a recipe you should have in your back pocket?

My recipe for salted caramel sauce (including a video of the preparation) is in the recipe box.

Sweet dreams,

​Chris
Comments

Pumpkin Pie: Good, Better and Best!

11/23/2015

Comments

 
Picture
With Thanksgiving on the horizon, I'm thinking about my pies. After all, dessert is my favorite part of the meal, and with a smaller family gathered around our table, I have to be quite choosy; nine guests mean that I can have two pies at most. And one of them MUST be pumpkin.

The "Good" recipe is the one on the back of a can of Libby's pumpkin; you can find it on-line here. If you make it with a pre-rolled crust, it's almost always better than a pie you purchase, in fact, it's quite good! Cool the pie slowly to prevent cracking and once cool, refrigerate for at least 3 hours before serving. 

The "Better" recipe is one that makes a few changes to the recipe above, most notably substituting half-and-half for the evaporated milk but using the same crust. Because it makes a thicker custard than the Libby's recipe, this pie rarely cracks after baking. It is also less bland, with more intense pumpkin and spice flavors. The recipe requires no more time than the Libby's recipe above and has the same number of ingredients. To make the "Better" pie, use a pre-rolled crust and fill it with this pumpkin custard, beginning the recipe at step 5. 

For the "Best" recipe, you will need to make your own piecrust (this King Arthur Flour piecrust is great), and pre-bake ("blind bake") it. I cannot lie, this will take some time, but when you make your own crust, it has a buttery flavor and a lightness that a pre-rolled crust will never achieve. When you blind bake the crust, it becomes crispy under the velvety soft custard. Most pies have a thin, limp bottom crust which is a shame, given that the bottom crust has the same amount of fat and calories as it's delicious top-crust cousin. When you serve this pie, it will come cleanly out of the pie pan and when you cut it with your fork, the crisp bottom crust will flake away. To make the "best" pumpkin pie (pictured above), make your own crust and follow my pumpkin pie recipe. As with all three pies, cool completely and refrigerate at least 3 hours before serving; serve with whipped cream or (if you must) Cool Whip.

When my mother prepared Thanksgiving dinner, it was a big (and stressful) production. I've never really thanked my brother for taking over the preparation of the turkey for her; he had this amazing baste and would cook the turkey on the Weber grill, not only preparing the bird but also creating a lovely outdoor haven where we kids could go and drink beer (Thanks Mark!). Mom really enjoyed putting a homemade pumpkin pie on the table, but for her making homemade crust was a bridge too far. If like Mom, you don't enjoy these adventures in cooking...then don't do it! Thanksgiving is about family and friends; the food is just the vehicle for bringing us all together. We can bond over any of the pies above, a pie from a box, or no pie at all. 

Happy Thanksgiving to you and your family,

Chris

Comments

The Trouble with Turkey...And How To Solve It

11/16/2015

Comments

 
Picture
"Mommy, this white meat's dry."

I was only about 12 years old, but I still remember the look on my mother's face when my 4 year old cousin blurted out those words during a lull in the Thanksgiving dinner conversation. Although I could tell that Mom was extremely unhappy, I knew that my preschool-aged cousin had stated an inconvenient truth: while not quite at the level of a Chevy Chase Christmas Family Vacation turkey, this was one dry bird, and there was not enough gravy in all of Milwaukee to hide that fact.

The first turkey I roasted on my own was for my husband and I. There was a promotion at the grocery: save $200 in receipts, and get a free turkey! Given that there were just two of us, it took a good long time to save those receipts and by the time we were ready to pick up our prize - just days before Thanksgiving - the only turkeys left were 25 pounds and up. At first we were excited by our bargain, but the enormity of the "deal" began to hit when we sat down to eat the roasted bird - just the two of us - and could barely see over the top. Let me say that the bird was not the most moist (probably due to my fears about cooking it completely) and we had a very long, dry winter.

At this time of year, nearly anyone who writes about food has all sorts of tips on how to ensure a moist juicy bird. It's really confusing, and you could find yourself practically making mandalas of turkey feathers on your kitchen floor if you followed them all. I have prayed many times to the moist turkey gods, and decided that I needed instead to hone in on a small number of things that actually matter and move on. So here is my list:

1. Buy a fresh (never frozen) bird.
2. Roast it breast side down for the first 30 minutes.
3. Cook it only until it's done.
4. Don't stuff it (sorry).
5. Let the bird rest for at least 15 minutes before eating.

Buying a fresh bird is easy; it says "never frozen" on the label. And here's another inconvenient truth: since some enormous percentage of turkeys are sold during the last two weeks in November, exactly when do you think the frozen turkeys actually got that way (here's a hint: do you think the turkey industry times their crop so that every turkey is ready to harvest in late October)? Another benefit: fresh turkeys often have far less injected water which not only bulks up frozen turkeys and increases their price but can add an off-putting, chemical taste. I've seen frozen birds that have up to 12% "added juices" - i.e. water, salt and preservatives. Fresh birds, which commonly have 3% or less added juices, can be purchased starting the weekend before Thanksgiving.

Roasting breast side down to start is a little more trouble, but so worth it. Breast meat has much less fat and because it's on top of the bird as it roasts, the juice that it does have drips down onto the thighs. By starting the bird upside down, you reverse this process and by flipping it after 30 minutes, you allow the top of the bird to become brown and crispy, just as if you had cooked it "right side up" the whole time.

This recommendation leads to two questions; first, how am I supposed to know which side is up AND how the heck am I supposed to flip a slippery 450 degree turkey???

The easiest way to tell which side is up is that the tail (a small, hard, diamond-shaped protrusion near the large cavity) is on the bottom. Also, if the bird is right side up, the large cavity would be also to hold stuffing without the stuffing falling out. Thus, if you put the turkey in the roasting pan "upside down" (to start the cooking process), the tail will be on the top and the opening of the large cavity will be less visible. See the pictures and video in the recipe below for more detail.

Flipping a turkey is a bit tougher. For some, the way to go is to make two giant wads of paper towels and use that to grip and flip the slippery bird. Being a bit of a green-freak, I can't bear to waste paper towels this way, so I usually use two clean dishtowels; I also enlist my husband to help me. With two sturdy spatulas and two absorbent cloth towels we can turn the bird over safely and pop it back in the oven. See the video in the recipe below for more detail; unfortunately, our family of three cannot eat two turkeys in two weeks, so I made my video with a chicken (sorry!).

Cooking it until it's done is simple: use a meat thermometer and cook ONLY until the thermometer (pierced into the thickest part of the turkey thigh) reads 165 degrees. See the recipe video for the thermometer placement, and read my post on dry chicken here for more information about thermometers and why they matter. The little plastic thermometers that come in many birds are useless, and I usually remove them before cooking.

I'm sorry to say that while stuffing the bird leads to GREAT tasting stuffing, it leads to not-so-great tasting turkey. The reason is that a stuffed bird takes longer to cook, leaving the outside (especially the breast) meat dry. Stuffing baked in a covered dish, especially made with a bit of turkey or chicken broth, is a tasty alternative that - bonus! - is a lot less hassle than un-stuffing a turkey cavity just as you are trying to serve the entire meal.

Finally, please do let the bird rest; after all, he's had a tough day. Take the turkey out of the oven and put a little sheet of foil on top to keep it cozy (this is often called "tenting") for at least 15 minutes. Believe it or not, scientists have tested this (scientifically!) and found that while the bird is resting, it's lovely juices are being re-absorbed into the cells of the meat, making that turkey all the more delicious when you finally do make the first cut.

Just flipped
Fully Cooked
Under a tent
For an actual recipe with instructions for cooking a turkey, click here.

Years ago, I worked with a strict vegetarian who became a great friend. I once asked her what she ate for Thanksgiving, and she said that with all the sides, Thanksgiving is the best holiday ever for vegetarians! So if worst comes to worst and you accidentally cook a turkey so dry it could be an extra in the next Christmas Family Vacation movie, open more wine, make sure your cat is safely away from your decor, check that no one is smoking stogies near an open sewer and pass the sides. I'm quite confident they will be delicious!
Comments
<<Previous
Forward>>
    Picture

    Author

    Chris, cooking instructor, disability advocate and mom. Food geek and passionate believer in fresh, simple and homemade.

    Enter your email address:

    Delivered by FeedBurner

    Categories

    All
    Best Practices
    Chocolate
    Common Sense
    Cookies
    Cool Tools
    Dessert
    Entertaining
    From The Garden
    Healthy
    Holiday Cooking
    Kitchen Adventures
    Quick
    Snack
    Taste Test!

    RSS Feed

    Archives

    June 2016
    May 2016
    April 2016
    March 2016
    February 2016
    January 2016
    December 2015
    November 2015
    October 2015
    May 2015
    February 2015
    January 2015
    November 2014

    The typeface at the top of this page is Goudy Old Style, the same typeface used in my first copy of The Fanny Farmer Cookbook. My copy is a successor of The Boston Cooking-School Cookbook, first published by Fanny Farmer in 1896. It was one of the first cookbooks to use the standard measures that are common today.