you can cook
  • You Can Cook!
  • About Me
  • Recipe Box
    • Appetizers >
      • Buffalo Chicken Dip
      • Cream Cheese Appetizer
      • Sweet and Salty Nuts
      • Thai Peanut Sauce
    • Beverages >
      • Blueberry Lemonade
      • Cosmopolitan
    • Breakfast >
      • Apple Pancake
      • Homemade Granola
      • Peanut Butter Cup Smoothie
      • Stick-to-your-ribs smoothie
      • Veggie Omelet
      • Yeasted Waffles
    • Main Dishes >
      • Beef Stew
      • Chicken Fajitas
      • Choley
      • Grilled Chicken
      • Low and Slow Chicken Breasts
      • Roast Turkey
      • Rub for Pulled Pork (and other meats too!)
      • Salmon Burgers
      • Simple Homemade Mac & Cheese
      • Simple Red Sauce
      • Steak and Potato Salad
    • Sides >
      • Bacon-Roasted Brussel Sprouts
      • Creamy Polenta
      • Homemade Potato Chips
      • "Magic" Salad Recipe
    • Soup >
      • Apple Cheddar Soup
      • Butternut Squash Soup
      • Chicken Noodle Soup
      • Creamy Tomato Basil Soup
      • Smokey Beef Chili
    • Sweets and Treats >
      • Almond Cake
      • Apple Crisp
      • Bruna Kakor
      • Butterscotch Pecan Sandies
      • Chocolate Fudge Brownies
      • Chocolate Mousse
      • Compost Cookies
      • New York Times Chocolate Chip Cookies
      • Pumpkin Pie
      • Salted Caramel Sauce
  • Classes
  • Contact Me
you can cook

Impossibly delicious - and simple - vegetables

5/16/2016

Comments

 
Picture
Picture
I've often started my posts with stories of cooking disaster; an overcooked turkey, a failed salad made of shredded brussels sprouts, and the time I stuffed a roast chicken with a weed I believed to be sage. But with roast vegetables, I have no failures to share because it is almost impossible to do it incorrectly.

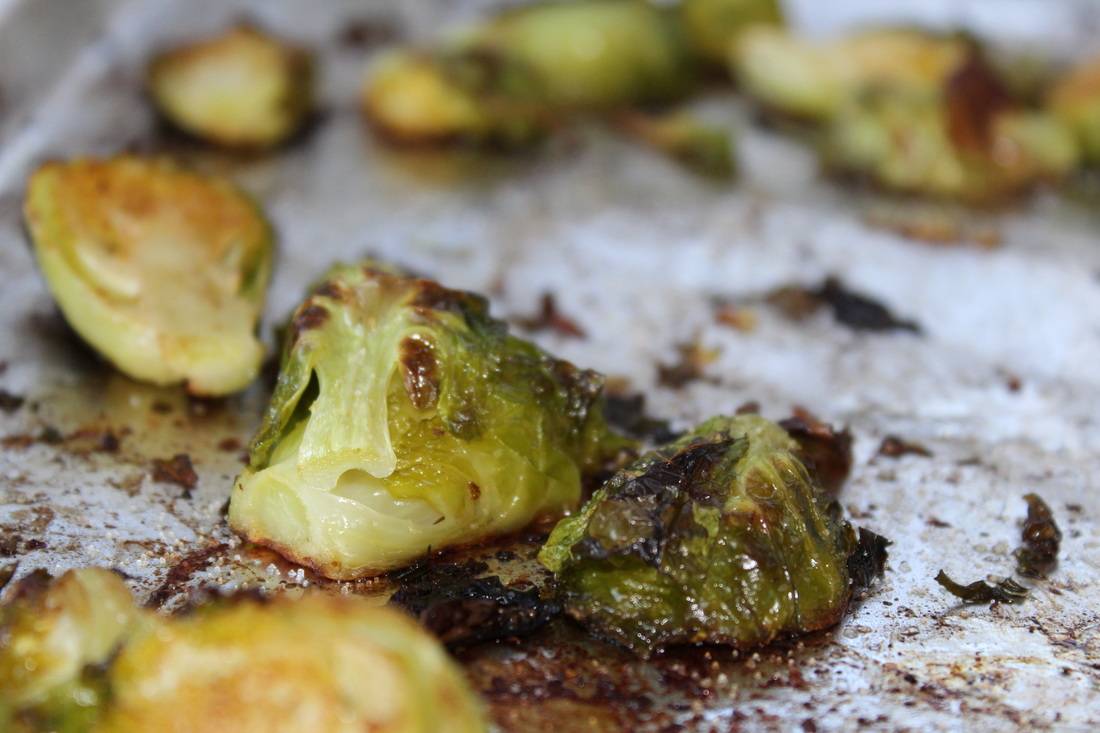
The basic recipe is simple: line a cookie sheet with foil, place evenly cut, clean dry fresh vegetables on the sheet and toss lightly with olive oil and salt. Making sure they are no more than one layer deep, bake at 450 degrees for 12 - 20 minutes, until the vegetables are crisp-tender (i.e. you can pierce them with a fork).

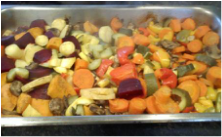
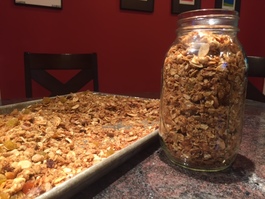
My son (21) attends the Riverview School in Sandwich, MA and in his dorm, they cook dinner together most nights. He recently send me a picture of the roast vegetables he prepared for his dorm. If a bunch of young 20-something men can cook roast vegetables - and enjoy eating them - you can be pretty sure you can cook and enjoy them too.

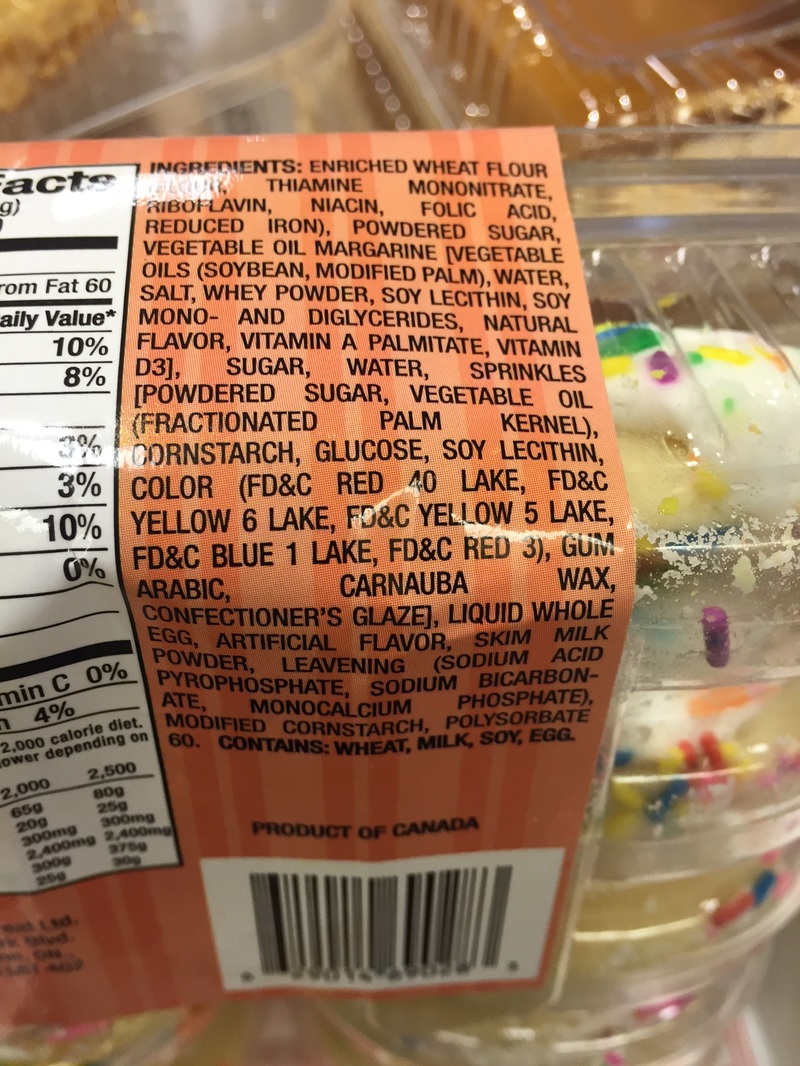
A word about salt. Salt has a bad name, and part of that is well-deserved. If you look at the back of a can of soup, frozen dinner or many other prepared foods, the amount of salt per serving is shocking; sometimes as much as your entire recommended daily intake. However, when you cook food that is REAL (i.e. not manufactured), adding a bit of salt is often a crucial step for great flavor. So when you make this recipe, add more than a pinch; unless you're on a salt-restricted diet, it's not going to hurt you.

Here is a partial list of vegetables that taste great roasted:
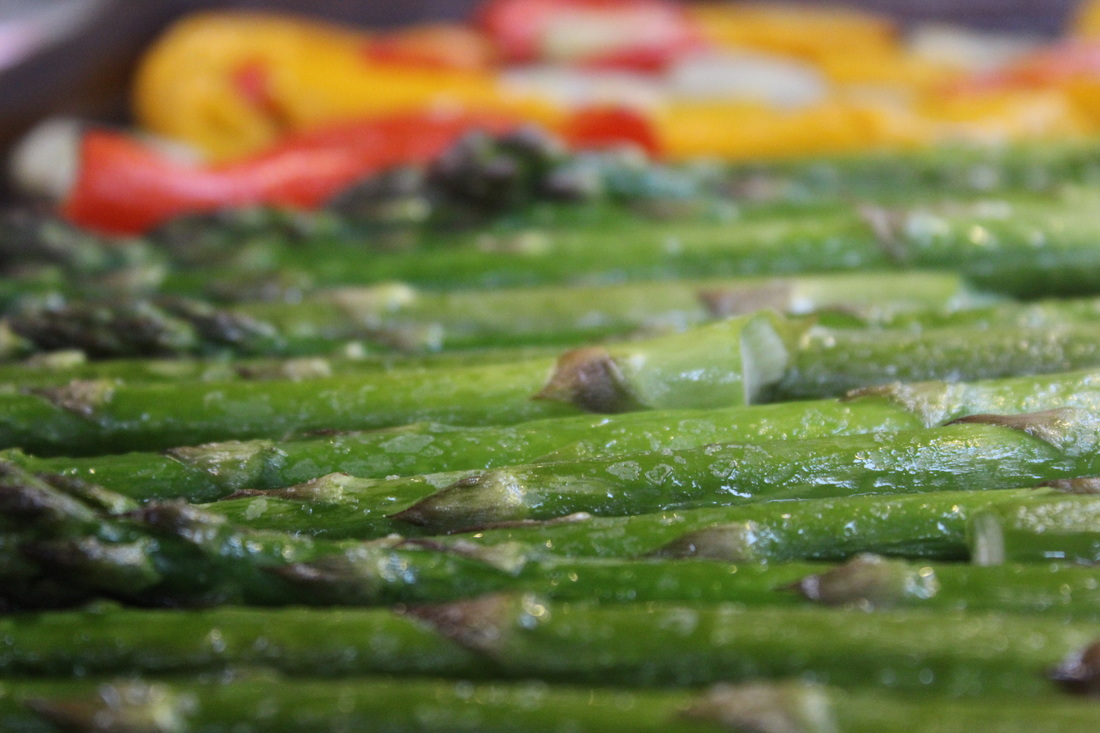
  • Asparagus (snap off woody base of stem, usually about 1", and roast whole)
  • Beets (boil until the peel slips off and cut to 3/4" cubes)
  • Broccoli (break into equal sized florets, about 1")
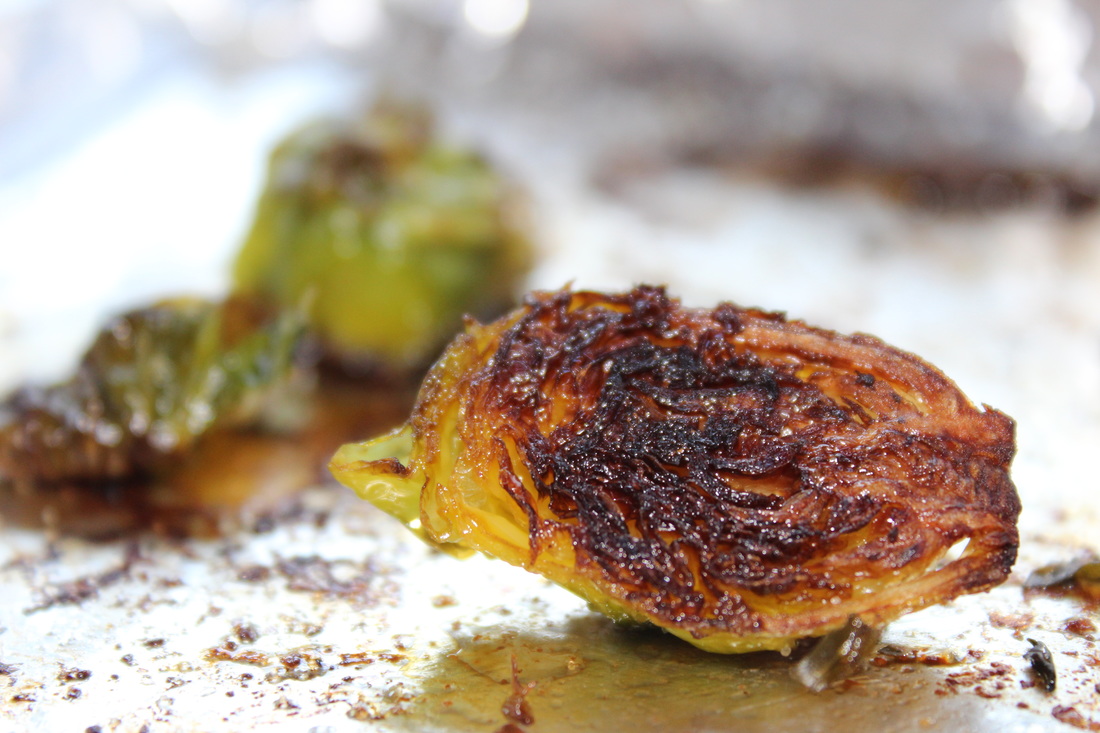
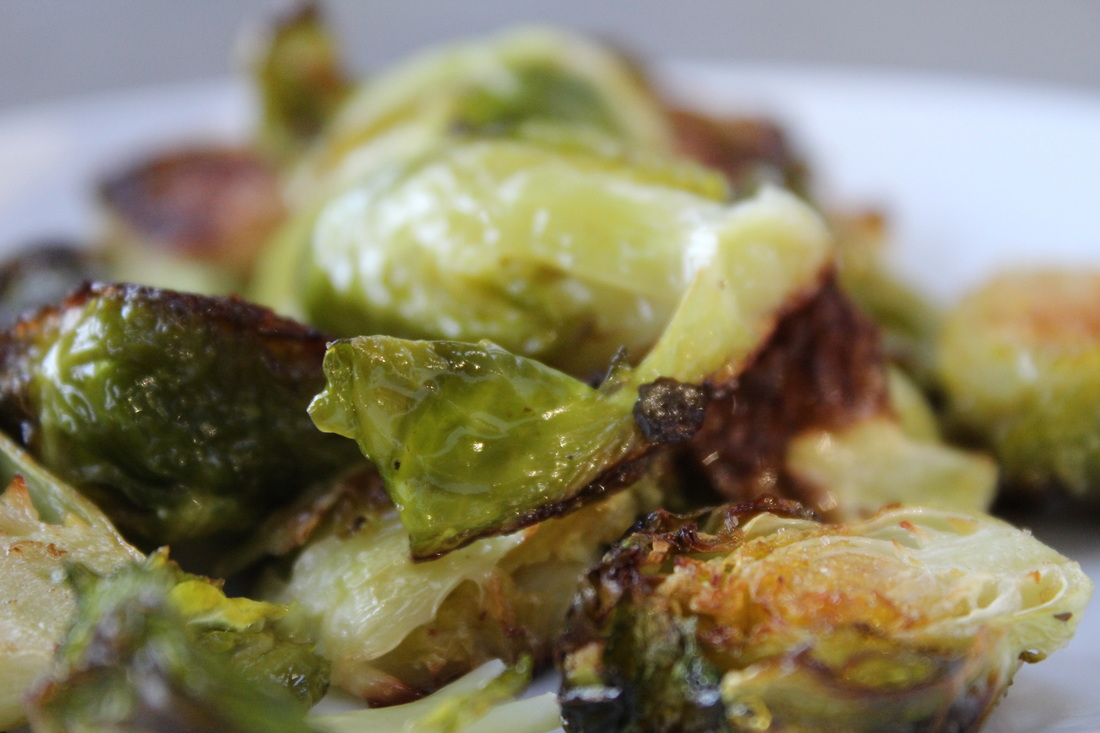
  • Brussels sprouts (trim and halve, also see my recipe for brussels sprouts roasted with bacon)
  • Butternut squash (peel and cut into 3/4" cubes)
  • Carrots (cut into 1" pieces, peel if desired) 
  • Cauliflower (break into equal sized florets, about 1")
  • Garlic (peel and trim end but leave bulbs whole)
  • Onion (peel and cut into 3/4" pieces)
  • Parsnip (peel and cut into 3/4" pieces)
  • Potatoes (especially the waxier types such as red, blue or yukon gold; cut into 3/4" cubes)
  • Sweet Potatoes (peel and cut into 3/4" - 1" cubes; they cook more quickly than regular potatoes, so cut the sweet potatoes larger if roasting together)

Picture
This technique is great for when you have guests; it looks elegant but is very simple (and if you are spending time on the main course, the veggies need to be quick and easy). Buy a few of the vegetables above, and wash, dry and cut them up. Put in a ziploc bag and toss with oil and salt up to 1 day in advance. Preheat your oven to 450 degrees, and 20 - 30 minutes before you plan to serve dinner, pour the vegetables from the bag onto a lined jellyroll pan in a single layer and slide them in. Remove when done, and pour into serving dish. The only caveat with this is that if you are using vegetables whose color might bleed (beets, red onions, multi-colored carrots), bag those separately. A beautiful array of roast vegetables is a dramatic and delicious add to any meal.

Another way to do this is on the grill. If you have a grill basket, you can use that, but if not, do what countless generations of scouts have done: roast them in a foil packet with a couple of holes punched on each side.

Here are some great combinations:
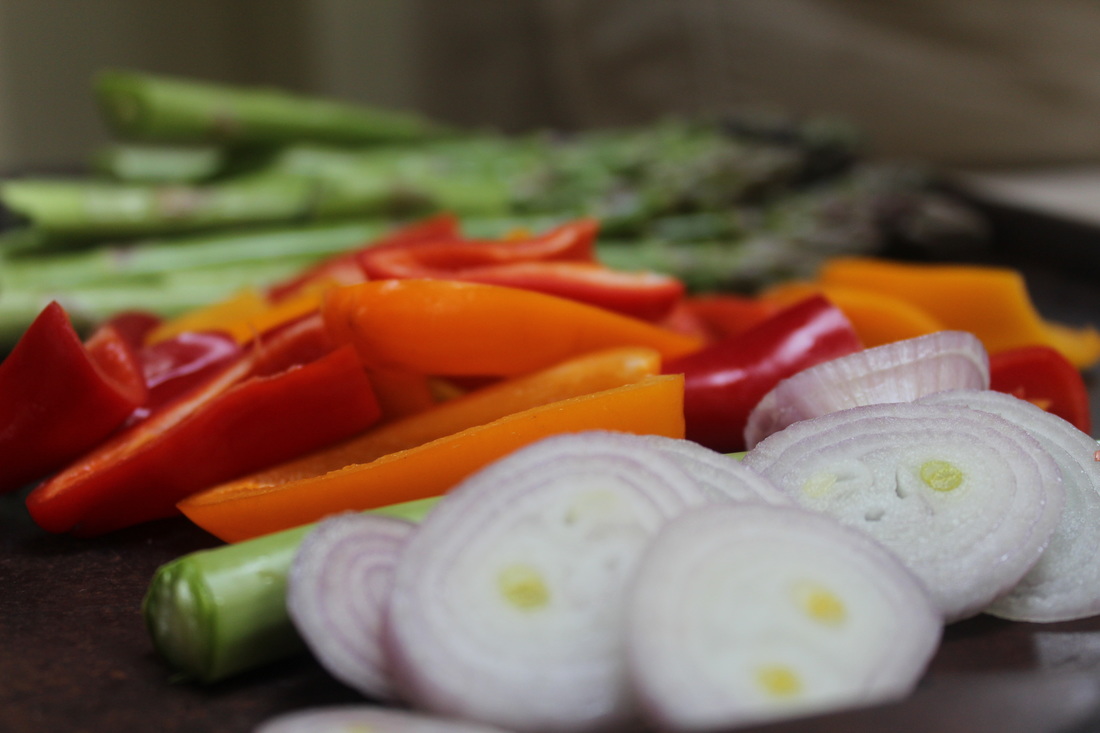
Asparagus, multicolored peppers and shallots (pictured before roasting below)
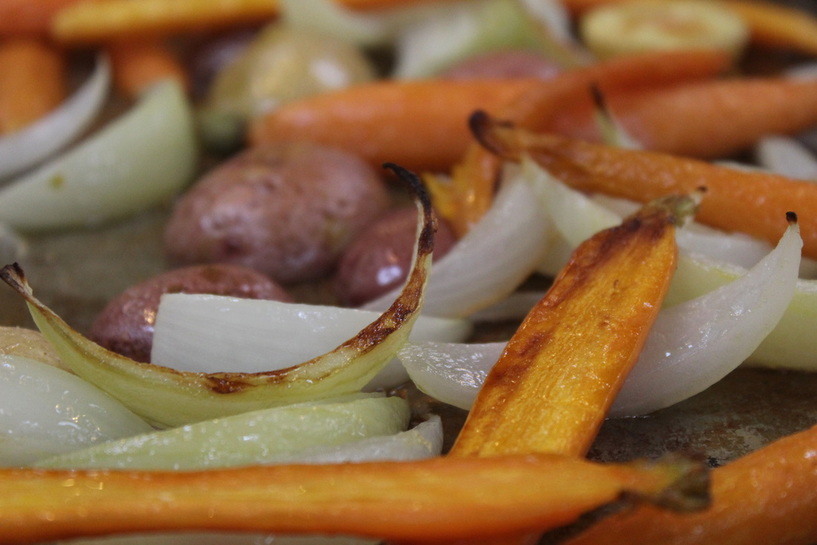
Potato, carrot and onion

Beets, white onion, butternut squash 
Butternut, carrot, parsnip and red onion
Sweet potato and white potato ("crazy taters")
Red, white and blue miniature potatoes (you can buy this mixture)

My personal favorites are asparagus, multi-colored carrots (just trim off the top) and broccoli. I have eaten an entire pound of asparagus prepared this way; ditto for farmstand carrots.
Picture
If you've read this far, you've probably just spent more time reading than it would take you to prepare a pound of roast vegetables. With farmer's markets starting up (or having started if you live in a lovely warm place), there is no better way to celebrate each delicious bite. Buy a couple of interesting new vegetables - or even some reliable old ones - and give it a try. You won't be disappointed!

​​If you would like to see my recipes, tips and adventures in cooking every week go to www.ucancook.net and enter your email on the right side. Alternatively, email me at [email protected] and I will set you up! For even more tips and techniques, follow You Can Cook on Facebook.
Comments

Milkshakes for Breakfast?

4/14/2016

Comments

 
Picture
I'm away this week, but wanted to share my new favorite smoothie...chocolate peanut butter cup.

Here are a few ways to make a smoothie breakfast almost as simple as grabbing a protein bar:
- Keep your ingredients together, like they are in my photo below.
- Make the ingredients easy to add: put a scoop in the flax seed, get honey that dispenses easily and buy some Trader Joe's organic peanut butter - stir it once and you can pour it from the jar.
- Find a blender with a frozen drink button; you can press it once and walk away.

If you've been having trouble getting your kids to eat breakfast, try giving them this peanut butter chocolate milkshake oops I mean smoothie. It makes one adult or two kid-sized servings. I probably don't know your children, but I would be quite surprised if they won't drink it.

Picture
If you would like to see my recipes, tips and adventures in cooking every week go to www.ucancook.net and enter your email on the right side. Alternatively, email me at [email protected] and I will set you up!
Comments

Two Simple Snacks for a cold day

4/4/2016

Comments

 
Picture
Today's cold weather in Boston calls for a night by the fire at home - and some good snacks. The problem is, most of the snacks that come from a box - even the "healthy" ones - are full of preservatives, stabilizers and other things we don't really want to eat. Sometimes, it's fun to go all out, for example making homemade potato chips. But other times, you just want a quick snack. If you've grown tired of apples or bananas and peanut butter, here are two quick suggestions.

If you were a kid before about 1980, do you remember eating popcorn from a pan?

Do you remember how delicious it tasted? How fresh and crispy? How the salt would cling to each delicious kernel?

I'd like to challenge you to re-create that taste. It's simple, cheap and if you follow my instructions you will NOT crack your teeth on raw kernels OR have to scrub blackened popcorn from the bottom of your favorite pan.

You need only three things: a 3 quart pot with a lid, 3 Tbs. of oil and 1/3 cup of fresh popcorn. And here's a tip: you don't have to magically intuit the size of your pot; if you look on the bottom of the outside of the pot; almost every one will have a small imprint which includes the size of the pan - who knew?

Picture
Next step: fresh popcorn. There is a bit of science to fresh popcorn: the reason it pops is that there is a tiny bit of moisture in every kernel. When that moisture is heated to boiling, the kernel explodes, creating a piece of popcorn. I spend about 50 cents extra to buy Orville Redenbacher popcorn in a plastic jar with a screw-on top. In case you're wondering, that's about $4 for a jar of popcorn that makes at least 20 servings of my favorite snack. No matter what you buy, it's important to store it tightly sealed, so the moisture inside each kernel doesn't evaporate.

Finally oil. Many of us have plastic containers of vegetable oil (Wesson or Canola) in our pantries. Grab that oil, open the top and sniff it. It should not smell of anything, but if it's older than a year, it probably does. Believe it or not, oil does go bad. If your oil has an "off" smell, throw it out and buy new; your food will taste a lot better. If you don't use much of the stuff, buy it in small containers.

If you have only olive oil on hand, go ahead and use it, but it's not ideal. Olive oil breaks down at high heat (it has a low "smoke point") and may scorch your pan and your popcorn. Since I cook on an electric stove, even the hottest burner doesn't usually get hot enough to do this, but if you have natural gas, watch out.

Now that you've assembled your ingredients, put the oil in the pan and turn it on high. After about a minute, pour in your popcorn, cover the pan and shake. Once it starts to pop, shake frequently until the popping stops (or until you hear less than one pop every 5 seconds). If you wait just until the popping has almost stopped, you should have only a handful of unpopped kernels and an unblemished pan: success! Salt and serve.

The first video below explains the recipe, and the second shows you how to tell when the corn is done popping.

Picture

Now for another homemade snack: hot chocolate. Like popcorn, the tools are few: a pyrex measuring cup, a small whisk, Hershey's cocoa powder, sugar and milk. With a bit of supervision, even a 6 year old can prepare this.

Start by adding 2 teaspoons of cocoa powder and 2 Tbs. of sugar to the measuring cup. Stir to combine.

Next add about a cup of milk. Put the unstirred mixture in your microwave and heat for 90 seconds. At this point, the mixture is going to look like a huge mistake, but it's not! Remove from microwave, whisk to combine and taste. If it's too sweet, add more milk and continue heating in 30 second increments. You can also add 1/2 tsp. vanilla.

When the mixture is heated to your satisfaction, whisk again and serve. If you feel like your whisk is not doing the job, try holding it between your palms and rubbing them back and forth to twirl the whisk. The more narrow the handle, the better this works - you can even whip cream this way!

Photos of each step in making hot chocolate: sugar and cocoa; added milk; after microwaving and when whisked.

Both of these snacks take under 5 minutes to prepare, taste great (especially compared to their packaged cousins), have no chemicals and are tasty and REAL. Because after all, if you are going to eat "fun food", it should be as delicious as possible!


​​If you would like to see my recipes, tips and adventures in cooking every week go to www.ucancook.net and enter your email on the right side. Alternatively, email me at [email protected] and I will set you up!
​
Comments

Winning Brussels Sprouts

3/28/2016

Comments

 
Picture
I'm not sure about your house, but in my home brussels sprouts are a deeply unpopular vegetable, the stuff of righteous and absolute refusal in any form. It is rumored that they were to be part of the food fight in Animal House, but were rejected on the grounds that no college student would have allowed them on their plate.

However, we now know that brussels sprouts are one of a handful of the superfoods sometimes known as "The Mighty Cruciferous" (which actually sounds like a losing sports team to me), and that they are worth eating, if only we can get them past our tastebuds.

Being somewhat distinctive in shape and texture, they are hard to disguise. I've cut them into tiny ribbons for salad, but as soon as my suspicious family took the first bite, the jig was up. Even I must admit, that salad was not my favorite.

I've tried battering them and sending them for a swim in the deep fryer, served up with a side of ketchup. This iteration was also soundly rejected, although I enjoyed the resulting 6 servings of leftovers more than I enjoyed eating the leftover salad.

Enter a food that even a picky toddler can love: bacon. Two years ago, scientists released a study showing that although the price of bacon had nearly doubled, consumption had remained constant. This is what is known by economists as inelastic demand. In other words, bacon has the economic properties of crack.

In my delicious preparation, you take an old cookie sheet lined with foil (because it's not "winning" if you have to clean up bacon grease), and lay down four strips of bacon. Turn the oven to 450 and put the bacon in (put the bacon in a cold oven - no preheating - win!).

Meanwhile, rinse the brussels sprouts, cut off the stem end, pull off any yellow outer leaves and cut each sprout in half.

Within 15-20 minutes, the bacon should be crispy, and the cookie sheet should be covered in fat. Remove the bacon (place it on a paper towel to dry) and put the brussels spouts and any separated leaves on the cookie sheet. Stir until they are coated in bacon grease, then put them back in the oven. In about another 15-20 minutes, you will have brussels spouts so delicious that you will struggle not to eat them all yourself. Salt lightly if needed, and serve.

The leftover bacon is a moral question that only you can answer. In a perfect world, it would be crumbled on top of the brussels spouts, adding extra crispy goodness to this most delicious of cruciferous vegetables. In the real world however, note that the spouts in my photos have no bacon at all.  Oops.


To recap my recipe for brussels spouts:
Family eating superfood: WIN!
Two ingredient recipe: WIN!
Easy cleanup: WIN!
Four leftover pieces of crispy bacon: WIN!

Go team cruciferous!

 ​​If you would like to see my recipes, tips and adventures in cooking every week go to www.ucancook.net and enter your email on the right side. Alternatively, email me at [email protected] and I will set you up!
​
Comments

A Tale of Stale

1/27/2016

Comments

 
During a Halloween party several years ago, a lovely friend brought a package of frosted cookies from a local grocery store. They looked delicious, but with a LOT of food on hand, I quickly put them in the cabinet above my refrigerator for "later". For some reason, "later" didn't come until the following August, when I pulled them out while looking for my grandmother's china. It was just before dinner and I was hungry so I did the thing I was told in college chemistry to NEVER do: I tasted the experiment.

That little nibble was actually delicious! So much so that I quickly finished the cookie, and then was horrified by the implications of what I'd done. I waited for a full 24 hours, expecting symptoms like vomiting, stomach pains and shortness of breath...but nothing happened. That cookie was still edible (quite tasty even) nearly 10 months after purchase. In spite of their deliciousness, I quickly disposed of the remaining treats, afraid I might succumb to temptation again.
Picture
Here is a label for cookies very similar to those I so foolishly ate. Not to overstate the obvious, but there are a lot of ingredients listed that you and I don't cook with.

When we make our own desserts, we don't use chemicals that keep our treats fresh for 10+ months, so the desserts need to be made just before we eat them in order to taste great. Preparing a dessert the day before is fine, and for something like a tiramisu or cheesecake where the flavors need to blend, two days before can be even better. But when you make something a week early and "pop it in the freezer" (even homemade ice cream) it will simply not be as good.

I became convinced of this when I took a platter of tiny cupcakes to an event at my church. The cupcakes had been in the freezer for a couple of months, but had been made from scratch and well-wrapped and frozen as soon as they'd cooled. I'd topped them with my daughter's fresh homemade strawberry buttercream, which is a topic for it's own post - it's unbelievably good. But after the event, several of my cupcakes had gone uneaten, and many more were in the trash (most with the buttercream licked off). I might have had a different result had I brushed the tops of the cupcakes with simple syrup before frosting them, but once I tasted the leftovers, I knew: their time in the freezer had left them with an off-putting, stale flavor.

I would hate for anyone to feel bad about taking a homemade dessert to a party or event, but you might consider making a simple dessert rather than concocting something complex in advance and freezing it. Alternatively, prepping the ingredients - toasting the nuts, combining the dry ingredients, etc. in advance will make quick work of the actual recipe when you do make it. Since the cupcake incident, I've learned that freezing leftover cake batter (instead of a baked cake) can work well: seal in a ziploc, squeeze the air out and freeze flat. Once it thaws (about 4 hours at room temperature for sandwich-sized ziplocs), you can clip off one corner of the bag and quickly fill cupcake pans. In the case of my sad little cupcakes, preparing new cupcakes from a boxed cake mix would have also been a substantial improvement.

Here are a few quick and simple desserts:
​Almond Cake (15 minutes plus cooking time)
Apple Crisp (20 minutes, including peeling the apples, plus cooking time)
Chocolate Fudge Brownies (5-10 minutes  plus cooking time, allow 3 hours to chill)
​Chocolate Mousse (10 minutes plus 1 hour to chill)

A plate of fresh-made chocolate chip cookies are always a hit, and will taste amazingly better than purchased cookies or those made from pre-made dough. My favorite recipe uses butter flavored Crisco - hardly a health food - but because the butter-flavored Crisco is actually dairy-free it can be made vegan by using vegan chocolate chips (Trader Joe's chocolate chips for example) and substituting almond milk for the milk. For extra deliciousness, sprinkle each cookie with a pinch of kosher salt before baking.

Dessert has only one purpose: to taste fabulous. If it fails at that one thing, it's not worth eating.

Sweet dreams,

Chris

If you would like to hear about all my recipes, tips and adventures in cooking, go to www.ucancook.net and enter your email on the right side. Alternatively, email me at [email protected] and I will set you up!

Comments

The 70's are calling and they want you to try fondue!

1/11/2016

Comments

 
Picture
On a bitter cold night, there is nothing better than sharing some serious comfort food with a group of friends. The problem with much comfort food however is that it takes a good deal of time and planning to prepare. Now, I have no problem spending two days to make a couple of loaves of sourdough bread or a really intricate chocolate torte, but we are all looking for simpler ways to entertain. For that, I'd like to raise up a child of the 70's, the humble fondue.

I'll bet that most of you could - either by asking your parents or visiting a well-stocked antique store - lay your hands on a fondue pot. If those sources fail you, Amazon will provide. The question is, what can you do with it? I want to share two fondue recipes that will have you swapping stories over bubbling pots of cheese and chocolate in less time than it take to text your friends and invite them over.

A word about fondue forks: you can make do without them. For cheese fondue, you can substitute long toothpicks or thin italian breadsticks, and for chocolate, marshmallows speared on tiny pretzels sticks work much better than a fork, and the long toothpicks work well for dried fruit or poundcake. That said, if you get your hands on some of the wooden handled, color-tipped forks, go wild! Just don't put them in the dishwasher - the 70s were all about hand-washing.

To start your fondue party, serve a salad following my "magic salad" rule of one fruit, one nut and one cheese (suggested combinations are with the recipe). Serve with a simple vinaigrette - given the main course and dessert, you will want to start on a lighter note.
Picture
The main course is of course cheese fondue. While there are many ways to make cheese fondue, I prefer to keep it simple: use a bag of good quality pre-grated cheese, a bit of chopped onion, some beer and a couple of tablespoons of flour. The recipe comes together in under five minutes, and - bonus - your guests can help you prepare it!

The next question is what to dip? Start with sliced apples (Granny Smith work well) and cubed french bread, and if you like, include thin italian breadsticks, par-cooked broccoli or even lightly microwaved mushrooms (dry well before serving). This is not an exhaustive list - after all, what doesn't taste great with a bit of cheese?

For dessert, clean your fondue pot of any leftover cheese and pile in chopped dark chocolate. Add cream and stir until melted; then stir in a few tablespoons of liqueur. The recipe for chocolate fondue has many permutations; I'm sure you can think of several just while reading!

For a dessert fondue, consider dipping mini-marshmallows speared on thin pretzels, fruit that has been washed and well dried, pound cake, or animal crackers for kids. For the more adventurous, chunks of cheesecake, thin crisp cookies, dried fruits, or even a toasted nut or two or two are delicious. Like cheese, what doesn't taste good dipped in chocolate?

One more thing about fondue: it's not considered good form to drop things into the fondue pot, in fact, if you do this, you are supposed to kiss the person to your left. So do take care when planning your seating arrangements...we've heard some stories about those wild 70's, and who knows if fondue played a role?

Happy dipping,

​Chris

If you would like to hear about all my recipes, tips and adventures in cooking, go to www.ucancook.net and enter your email on the right side. Alternatively, email me at [email protected] and I will set you up!

Comments

Back Pocket Dessert: Quick, Simple and Tasty

1/4/2016

Comments

 
Picture

​Now that the holiday rush is over and the decorations put away, isn't it wonderful to spend an evening with friends? I mean seriously, what else is there to do this month? You really don't need a reason; last fall, I invited friends over and we shared a bottle of good wine to celebrate one's job loss, another's awful job and the third quitting her job. It was fabulous.

But when such lovely occasions arise, the question - if you're hosting - is what to serve? My main housekeeping strategy is one I call "lowering my standards" (I got this good advice from my mother), but even I need to clean the place when people are showing up, and this all takes time. This is where a "back pocket dessert" really comes in handy. A true back pocket dessert should be able to be produced in 15 minutes or less including hands-on time and cleanup, made with stuff you already have in the house and taste fabulous. Now my staples may be different than yours, but I'd like to share one of my favorites: Almond Cake. This delicious cake has only 7 ingredients: almond flour, butter, eggs, sugar, almonds, almond extract and flour. Obviously this is not good for anyone with a tree nut allergy, but for the rest of us, it's great! The ingredients mix in one bowl, and aside from the chore of cutting a circle of parchment to put in the bottom of your cake pan, the cake is in the oven in about the time it takes to preheat it - and your friends will swoon over this dessert. It tastes like marzipan made into a crispy, buttery cake; you can even add some liqueur or top it with sliced almonds and sugar (as in the photo above) if you want to take it to the next level.

Picture
A couple of words about almond flour. This ingredient (I buy the Bob's Red Mill brand at the grocery) is simply ground up nuts, but is the key to several other great recipes including a flourless queen of sheeba torte and french macarons. If you celebrate Passover, this flour will allow you to make amazing flourless desserts for the holiday. Because almond flour is just ground almonds, it's kind of expensive, but you don't use a lot at one time and it keeps for a solid year in the freezer. My only caution is that people who are allergic might not expect ground nuts in a cake or cookies, so make sure you let everyone know. Anaphylactic shock is a terrible way to end a friendly gathering.

Besides quick preparation time and amazing flavor, another advantage to this back pocket dessert is that it's super portable. Since it's baked and transported in a cake pan, you could just about punt it over a goal post and it would still look and taste great. Several years ago, I brought a torte that I had spent a couple of hours glazing in three colors of chocolate to a holiday party. I had made the torte in a springform pan, removed the rim to glaze the torte and then placed the glazed torte on a plate for transport. I drove to the party with my seat all the way back, the plate with the torte between my legs. Everything was fine until I realized I had almost missed a turn, so I banked the torte with my knees and made a right...but then realized a quick left immediately followed! As the car lurched up the steep driveway, the torte skidded off the plate, flying towards the (vacant) passenger seat. I reached out my hand and palmed it right back onto the plate. After parking the car, I looked down. My hand was clean, but my beautiful, 3-color, watermarked chocolate torte had a giant handprint covering the entire top! I quickly went into the party, and when the hostess asked me what I'd brought, I told her "flying chocolate torte". We still laugh about that, but thankfully once the first couple of pieces were cut, you really couldn't tell. With this almond cake, you turn it out to remove the parchment but can return it to the pan for transport; safe in the pan, it could go to a party under the seat of your car and as long as it didn't get dirty, it would be perfectly good! So ideal.

So rather than think too much about the long nights, brutal cold or massive piles of snow, call a couple of friends, give your house a cursory cleaning, and make yourself an almond cake. It goes well with coffee, fresh berries, whipping cream or all three, and is good at any time of day your friends can join you. Please do this; you will have a wonderful time! 

Chris

Comments

doing less and making more - 3 recipes that are fresh and quick

11/3/2015

Comments

 
Picture
Here in New England the leaves are turning quickly and the ground is littered with their beautifully colored refuse. The markets are full of fall squash, new crop apples and other culinary delights. But surrounded by piles of excess Halloween candy and a refrigerator full of party leftovers, I am much more interested in cleaning out than preparing new.

So how little effort can I expend and still make a fresh-tasting meal?

The least effort involves my freezer. I have an inviolable rule: I don't put it in unless I know I'll be delighted when I take it out. Beef Bourginon, excess strawberry buttercream or homemade Asian dumplings -- yes. Aging leftovers or dried out chicken -- no (unless I plan to feed the chicken to my dog, and then I mark it as such and throw it in - he will be delighted, I know). I see some delicious cauliflower cheese soup and my husband - who has a permanent pass on cauliflower due to a nasty college incident involving cauliflower and alcohol - is away this week, so there's a good possibility! Another nice go-to: cryovaced marinated meat for grilling. Because it is sealed in a vacuum, this meat can be stored in the freezer for much longer than traditional grocery-wrapped meat without loss of flavor, up to 6 months (3 months for hamburger). Thaw it using your microwave's defrost cycle - which really works - start the grill and with a sauteed veggie or over a salad - voila! Dinner. But if the freezer is bare, what other options are there?

Don't pick up the takeout menu yet, here are a couple of ideas!

Years ago, I signed up for an Italian cooking class, which was to include a meal. At the last minute, I could not attend and sent my husband. While he never got his meal (and came home extremely hungry - as an aside, who does a cooking class without a LOT of food???), he did bring home a recipe for red sauce that is so quick it takes almost no more time than opening a jar. Add in some sauteed sausage and a few veggies from the bottom of your produce bin, and with a bit of pasta, you have a real meal. The world's simplest recipe for red sauce is here.

Picture
Another nice go-to is homemade mac and cheese with added peas or broccoli. There are many elaborate recipes for mac and cheese, but the simplest uses whatever pasta you have on hand, one onion, some butter, flour and milk and a bag of pre-grated cheese. It cooks in about 15 minutes (the time needed to boil water and cook your pasta) and it's a kid-friendly treat. The recipe is here.
Picture
Finally, chicken soup is a very simple and fast meal. Saute a few veggies and use "Better than Bullion" to make 6 cups of chicken broth. Throw in fine pasta and leftover chicken and dinner is served; for heartier appetites, add extra chicken and pasta. The speed with which this soup cooks is limited only by the size of your carrot slices and noodles; the fine egg noodles that I like cook in just 3 minutes. If you prefer (or don't have any chicken or turkey on hand), you can use an egg for your protein instead. The recipe is here.

When I was first married, my husband and I used to love frozen Chicken Kiev - it was our go-to to-tired-to-cook meal. But increasingly, we realized that the chicken was not meat-like, and we were finding things in there that we didn't want to eat. We tried to upgrade by purchasing a better brand, but quite frankly pre-formed chicken is pre-formed chicken, and no manufacturer uses truly quality chicken to create chicken kiev. The recipes above are meals that come together in under 15 minutes but are fresh, tasty and real. Packaged food and takeout menus have a place in our lives, but if you're up for the challenge of just a couple of extra minutes, you won't be disappointed.

I'd love to hear from you - what is your favorite fresh and fast meal?? Do you do something special with those convenient and tasty grocery store roast chickens? Have a coucous or pasta favorite you'd like to share? Please comment below!

​
Comments

Breakfast of Champions - on a Tuesday

10/6/2015

Comments

 
There's a saying among architects and builders: "Good, Fast, Cheap - pick two" and there's some truth to that in cooking as well. Every food magazine on the newstand trumpets the need to use the "finest" ingredients at all times! Like all of us, I am constantly making tradeoffs.

However, all three of my favorite weekday breakfasts allow you to skirt the edges of this dictum. It's true that "fast" is in the eye of the beholder, but know that the more you cook, the faster you will be.

At this point, it's worth noting that I prefer a high-protein breakfast because - for me - eating more protein means that crazy famished hunger and foot-dragging mid-morning exhaustion are much less likely to occur. I'd also note that while I want to eat "healthy" food, I refuse to eat food I don't like. While a bowl of bran flakes and a banana would I guess be nutritious, I'm unwilling to choke them down - and fortunately, I don't have to.
Picture
My go-to choice these days is a smoothie. Now, I am not a small eater (nor am I a small person), so this is not a few slices of fruit and some kale spun with skim milk and ice. No, my favorite smoothie is a delicious peanut butter milkshake with a solid 30+ grams of protein plus potassium, fiber, calcium and a bit of honey that will stave off hunger for the entire morning. You can make it in under three minutes and consume it during your morning commute. The ingredients, except the banana and milk, keep for quite a while and can be stored in the cabinet closest to your blender. The recipe for my delicious banana-peanut butter-honey smoothie is here.

Picture
Next up: a veggie omelet that takes about 5 minutes to make and clean up, but it's so delicious! The ingredients are simple: eggs, feta (or if you prefer, cheddar), onion, red pepper and a bit of olive oil. Heat the oil while chopping the veggies; saute the veggies while beating your eggs. Scoop the sautéed filling onto your plate, pour the eggs into the pan, add cheese and your filling and cook until done. A good non-stick pan makes this easy, and you can practice tossing your ingredients like a chef! For kids, a 1-egg omelet (made in an 8" skillet) is a great way to start the day. Here's a photo of each step in the recipe.

Picture
Finally, homemade granola with yogurt. To be fair, this is more about "good" and "cheap" than fast - but one recipe will keep you in delicious, healthy granola for a long time. I started my love affair with homemade granola at Whole Foods, where a carton containing just over a cup of granola retails for around $6 and was usually 1/2 gone by the time I got home from the grocery store. Even for a really tasty snack, this was unexpectedly expensive, so I decided to try to make my own. The recipe I've created is adaptable and allows you to use the nuts, fruit and other add-ins that you like best. If you prefer "good" and "fast", try the homemade granola at Whole Foods instead - it's the bomb.  But making your own is shockingly simple and you will be nibbling it right out of the pan. The recipe is here, and makes a solid three quarts for you to enjoy.

There are some amazing waffle, muffin and crepe recipes I can't wait to share with you, and for a truly special breakfast, try my apple pancake recipe here. But we live most of our lives during the week, and there's no reason that we can't eat well on those days too.

Comments

Tame that Dragon: Dumping your Diet Soda Fix

2/18/2015

Comments

 
"Rat Poison". That's how I described my daily Diet Dr. Pepper fix to my kids (who would eagerly steal any sip - or can - they could get their little hands on). I was drinking up to three of these time bombs a day, a relic of a high energy workplace with a giant refrigerator full of free soda. I left the job years ago, but the habit lingered on.

I read all the bad news about diet pop: it causes cancer, weight gain and migraines. But it was sooo delicious! I knew that if I wanted to kick the habit, I had to find something equally delicious to drink, preferably something that (a) I could afford to drink in quantity, and (b) wasn't unhealthy when consumed in said quantity.

After months of trial and error, I have three winning candidates! All are quick to make, delicious and will not send you to an early grave.
Picture

The simplest is seltzer water with juice. Pour out or drink 1/4 of a can of seltzer and then re-fill the can with grapefruit, orange, cranberry or another juice, and you have a delicious soda substitute. Of course, add some vodka to that and you have an even more delicious adult beverage. Bonus health points for using juice with calcium!

Picture
The next - requiring the use of a knife and cutting board - is cold water with fruit slices. Think of it like Sangria (again, with the alcohol...) with water instead of wine. I keep it in a quart mason jar stored in my refrigerator. Once you've cut the fruit, drink within 3 days. Fruits that work well include citrus, berries, melon and cucumber, a veggie that occasionally switches teams.

Picture
Finally, a cold-brewed iced coffee with milk and a bit of sugar is a tasty treat. There are many ways to flavor your coffee including:
  • milk, sugar and vanilla,
  • homemade caramel sauce, and
  • Vietnamese style, with sweetened condensed milk and half and half.
Here is a great cold-brewed coffee recipe from Pioneer Woman as well as a photo of my go-to substitute, Dunkin decaf with extra milk and two pumps of caramel swirl.

These are my favorites, but I'm still new on this no-pop journey; if you'd care to share, please comment on your favorite soda sub!
Comments
<<Previous
    Picture

    Author

    Chris, cooking instructor, disability advocate and mom. Food geek and passionate believer in fresh, simple and homemade.

    Enter your email address:

    Delivered by FeedBurner

    Categories

    All
    Best Practices
    Chocolate
    Common Sense
    Cookies
    Cool Tools
    Dessert
    Entertaining
    From The Garden
    Healthy
    Holiday Cooking
    Kitchen Adventures
    Quick
    Snack
    Taste Test!

    RSS Feed

    Archives

    June 2016
    May 2016
    April 2016
    March 2016
    February 2016
    January 2016
    December 2015
    November 2015
    October 2015
    May 2015
    February 2015
    January 2015
    November 2014

    The typeface at the top of this page is Goudy Old Style, the same typeface used in my first copy of The Fanny Farmer Cookbook. My copy is a successor of The Boston Cooking-School Cookbook, first published by Fanny Farmer in 1896. It was one of the first cookbooks to use the standard measures that are common today.