you can cook
  • You Can Cook!
  • About Me
  • Recipe Box
    • Appetizers >
      • Buffalo Chicken Dip
      • Cream Cheese Appetizer
      • Sweet and Salty Nuts
      • Thai Peanut Sauce
    • Beverages >
      • Blueberry Lemonade
      • Cosmopolitan
    • Breakfast >
      • Apple Pancake
      • Homemade Granola
      • Peanut Butter Cup Smoothie
      • Stick-to-your-ribs smoothie
      • Veggie Omelet
      • Yeasted Waffles
    • Main Dishes >
      • Beef Stew
      • Chicken Fajitas
      • Choley
      • Grilled Chicken
      • Low and Slow Chicken Breasts
      • Roast Turkey
      • Rub for Pulled Pork (and other meats too!)
      • Salmon Burgers
      • Simple Homemade Mac & Cheese
      • Simple Red Sauce
      • Steak and Potato Salad
    • Sides >
      • Bacon-Roasted Brussel Sprouts
      • Creamy Polenta
      • Homemade Potato Chips
      • "Magic" Salad Recipe
    • Soup >
      • Apple Cheddar Soup
      • Butternut Squash Soup
      • Chicken Noodle Soup
      • Creamy Tomato Basil Soup
      • Smokey Beef Chili
    • Sweets and Treats >
      • Almond Cake
      • Apple Crisp
      • Bruna Kakor
      • Butterscotch Pecan Sandies
      • Chocolate Fudge Brownies
      • Chocolate Mousse
      • Compost Cookies
      • New York Times Chocolate Chip Cookies
      • Pumpkin Pie
      • Salted Caramel Sauce
  • Classes
  • Contact Me
you can cook

Snow Day Soup...Again

2/14/2015

Comments

 
Picture
Another day, another blizzard in Boston. Twelve to eighteen inches...yawn. Winds like a category 2 hurricane...is that all you've got?  Been there, done that, have the t-shirt. Just don't take my power, please!

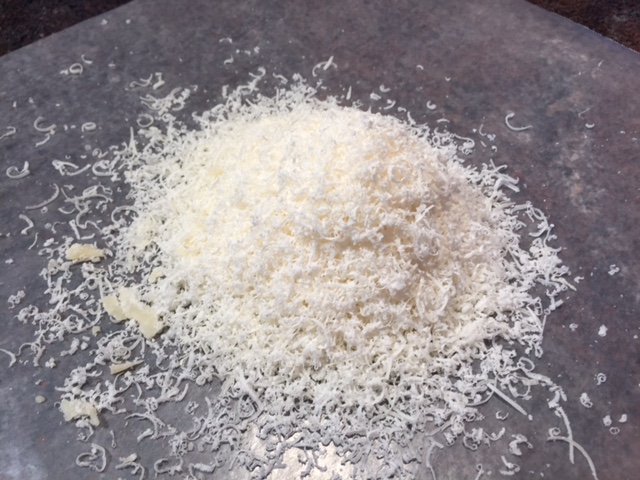
If you haven't yet made your pre-blizzard run to the grocery store, pick up four granny smith apples, a package of high quality cheddar cheese (Cabot extra sharp comes pre-grated and it's perfect for this recipe) and four cups of chicken broth. Everything else you need, you almost certainly have in your pantry or refrigerator.

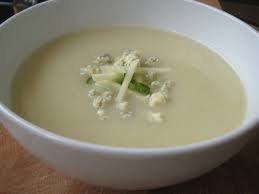
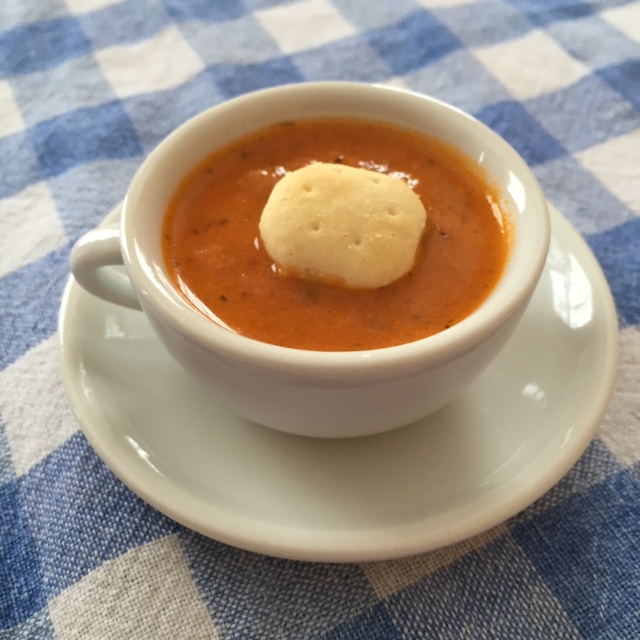
Once the snow starts to fly, you can make your delicious apple cheddar soup. Think of soup that tastes like a giant pot of cheese fondue only with the apples right in the soup! You don't have to go to the trouble of dipping them, just eat them up. Of course, this soup is best served with a fresh loaf of bread, so add that to your pre-blizzard shopping list too.

There is only one tricky part about the soup; one piece of special equipment that can make or break this recipe, and that is an immersion (or "stick") blender. If someone gave you this cool tool and you haven't yet taken it out of the box, go find that box now. Unpack it, click the top and bottom of the blender together, plug it in and you are ready to go. If you are using a regular blender to puree your soup, read the following carefully:

DO NOT FILL THE BLENDER MORE THAN HALFWAY FULL!!!!

I know that all caps may seem harsh, but this is important. We all like to save time, and we all think we are smarter than the instructions in the recipe. We think "my blender's lid won't fly off when I start it, spewing boiling hot soup to the farthest reaches of my kitchen." We think "If I fill it just a little bit more, it will only take two batches." We think, "I know how much my blender can hold."

Don't. Do. It.

When you turn on a blender full of hot soup, the process of pureeing releases a burst of hot steam which will propel the lid of a full (or more than 1/2 full) blender into the stratosphere, immediately followed by the blender's contents. Please, learn from my vast experience in this matter, and either use an immersion blender or fill your blender less than 1/2 full.

Scrubbing  your ceiling of hot, cheesy soup is no way to spend a blizzard. Trust me, I know.

Here is the recipe for Apple Cheddar Soup. Enjoy...and stay warm.

For a short video of a fabulous apple peeler, see my "Cool Tools" post here.


Comments

Adventures in Cooking: Homemade Potato Chips

1/31/2015

Comments

 
Picture
Michael Pollan is an author and foodie. His most famous book is probably "The Omnivore's Dilemma", but my personal favorite is "Food Rules: An Eater's Manual" (folk art illustration). The book is derived from mail Pollan received from all over the world about different cultural norms around food. He compiled all of these letters into 80 or so "rules" that are observed across many cultures and diets. Some are common sense: "Chew your food 15 times."  Some are thought provoking: "If your grandmother wouldn't have recognized it, it's not food."  Some are humorous: "If it comes through the window of your car, it's not food." But my favorite is this one:

"You can eat as much junk food as you like, as long as you cook it yourself."

It is with a nod to Michael Pollan that I share these tips for homemade potato chips.

Mmm...ever had them? One of my favorite restaurants serves them with truffle oil, but let me assure you that you do not need truffle oil to enjoy these little bites of heaven.

Eww...ever made them? Soggy, oily and burnt?  Well, not today! This is an area of cooking where a bit of knowledge is power. Three bits actually:

Tip one: Russets only. No Yukons, no red skins, no sweets. You need lots of starch, and Russets have it!

Tip two: Slice your Russets on a mandolin (or Bohrer V-slicer, see my "cool tools" post here) to no more than 1/8" thick, preferably thinner.

Tip three: Soak your sliced Russets in ice water for at least 30 minutes, discard the water, rinse and dry well (a salad spinner helps quite a bit with this).

Deep fry to a lovely golden brown, remove to a rack or paper towels, salt, and enjoy.  AS MUCH AS YOU WANT! Because you made every one of those chips yourself!  Recipe is here.

A quick word about deep frying: I use a Fry Daddy that my husband purchased for me as a joke after I started deep frying ALL my uneaten veggies the night before my CSA pickup (well, except the lettuce). 

But you do not need a deep fryer to enjoy homemade potato chips. A wok is perfect, a cast iron skillet works well as long as you don't fill it more than 1/2 way (bonus points - you're improving the seasoning!), and a saucepan - preferably heavy - is good too.


You need 2-3" of oil, preferably something that comes in a Wesson-like plastic bottle. Vegetable, peanut, canola are all good. Olive oil breaks down at high heat, so don't waste it deep frying.

You want to get the oil as close to 350 as possible, and while a candy thermometer will measure this for you, if you don't have one, you need to depend on another tool that nearly everyone has: your good common sense. While the oil is heating, put in a small chip. As the oil heats, it will start to bubble, crisp and brown, and when it turns golden brown, take it out - it's done, and you are ready to fry his little potato friends. If the oil starts smoking or your chips begin to burn in less than 90 seconds, turn the heat down; your oil is too hot.

See? No fancy tools needed, just (as I tell my kids) use the brain God gave you.

And enjoy those chips!!
Picture
Comments

Snow Day Soup!

1/27/2015

Comments

 
Picture
"It's not the strongest of the species that survive, not the most intelligent. It is the one most adaptable to change." -- quote inaccurately attributed to Charles Darwin.

Given the 28 inches of snow outside, it seemed a good day for some tomato soup, and I had a delicious new recipe to try. The basics - diced tomatoes, carrots, celery, onion, basil, chicken broth and a bit of cream - looked promising.  However, the devil is in the details.

My initial concern was loading the vegetables into a crockpot without browning them first. Time saving, yes, but what about the flavor created when fat and my vegetables meet at high heat? I browned the veggies in my stockpot, ditching the crockpot (which takes waay too long anyway).

The next red flag was the recipe's 2 tablespoons of dried basil. Maybe your dried basil is fresher than mine, but two tablespoons of almost any dried basil would leave a dish bitter and stale. Since I didn't happen to have any fresh basil on hand in the middle of a blizzard, I grabbed the next best thing: four small frozen cubes of basil, sold for a pittance at Trader Joes. Each little cube is sealed in plastic to avoid freezer burn. Genius!

But then came the worst crime against good soup; a roux made with a stick of butter and 1/2 cup of flour. Look at the photo below left and tell me that soup needs to be thickened!  I left the roux out, saving both my time and 2 tablespoons of butter per serving.

A quick blend with my stick blender (a necessary cool tool if you like to make soup), some fresh Parmesan (below middle) and a bit of cream later, it was lunch!

My daugher is 14, but I still have her toy IKEA tea set. The cups and saucers make great little dishes for condiments, and in this case, for photographing food. The soup looks so pretty with one tiny oyster cracker on top! Of course we ate from much larger bowls, but we did have oyster crackers just like the picture.

If you'd like to make your own creamy tomato soup, here is a link to the recipe.

With Pintrest and all the recipes on the internet, you will run across some duds (see my Pintrest "Wall of Shame" board here). Don't be afraid to use your cooking skills and good common sense to make the necessary adjustments!

Finally, if you live in New England, I hope that you are enjoying your blizzard as much as I am. Stay warm and enjoy your soup.

Chris

Comments
    Picture

    Author

    Chris, cooking instructor, disability advocate and mom. Food geek and passionate believer in fresh, simple and homemade.

    Enter your email address:

    Delivered by FeedBurner

    Categories

    All
    Best Practices
    Chocolate
    Common Sense
    Cookies
    Cool Tools
    Dessert
    Entertaining
    From The Garden
    Healthy
    Holiday Cooking
    Kitchen Adventures
    Quick
    Snack
    Taste Test!

    RSS Feed

    Archives

    June 2016
    May 2016
    April 2016
    March 2016
    February 2016
    January 2016
    December 2015
    November 2015
    October 2015
    May 2015
    February 2015
    January 2015
    November 2014

    The typeface at the top of this page is Goudy Old Style, the same typeface used in my first copy of The Fanny Farmer Cookbook. My copy is a successor of The Boston Cooking-School Cookbook, first published by Fanny Farmer in 1896. It was one of the first cookbooks to use the standard measures that are common today.