you can cook
  • You Can Cook!
  • About Me
  • Recipe Box
    • Appetizers >
      • Buffalo Chicken Dip
      • Cream Cheese Appetizer
      • Sweet and Salty Nuts
      • Thai Peanut Sauce
    • Beverages >
      • Blueberry Lemonade
      • Cosmopolitan
    • Breakfast >
      • Apple Pancake
      • Homemade Granola
      • Peanut Butter Cup Smoothie
      • Stick-to-your-ribs smoothie
      • Veggie Omelet
      • Yeasted Waffles
    • Main Dishes >
      • Beef Stew
      • Chicken Fajitas
      • Choley
      • Grilled Chicken
      • Low and Slow Chicken Breasts
      • Roast Turkey
      • Rub for Pulled Pork (and other meats too!)
      • Salmon Burgers
      • Simple Homemade Mac & Cheese
      • Simple Red Sauce
      • Steak and Potato Salad
    • Sides >
      • Bacon-Roasted Brussel Sprouts
      • Creamy Polenta
      • Homemade Potato Chips
      • "Magic" Salad Recipe
    • Soup >
      • Apple Cheddar Soup
      • Butternut Squash Soup
      • Chicken Noodle Soup
      • Creamy Tomato Basil Soup
      • Smokey Beef Chili
    • Sweets and Treats >
      • Almond Cake
      • Apple Crisp
      • Bruna Kakor
      • Butterscotch Pecan Sandies
      • Chocolate Fudge Brownies
      • Chocolate Mousse
      • Compost Cookies
      • New York Times Chocolate Chip Cookies
      • Pumpkin Pie
      • Salted Caramel Sauce
  • Classes
  • Contact Me
you can cook

Adventures in Cooking: beef stew like a chef

7/10/2016

Comments

 
The difference between a chef and a home cook is not as large as you might think, and you can do most of what they can do at home. With this recipe, we're going to highlight some of those differences so you can try them too.

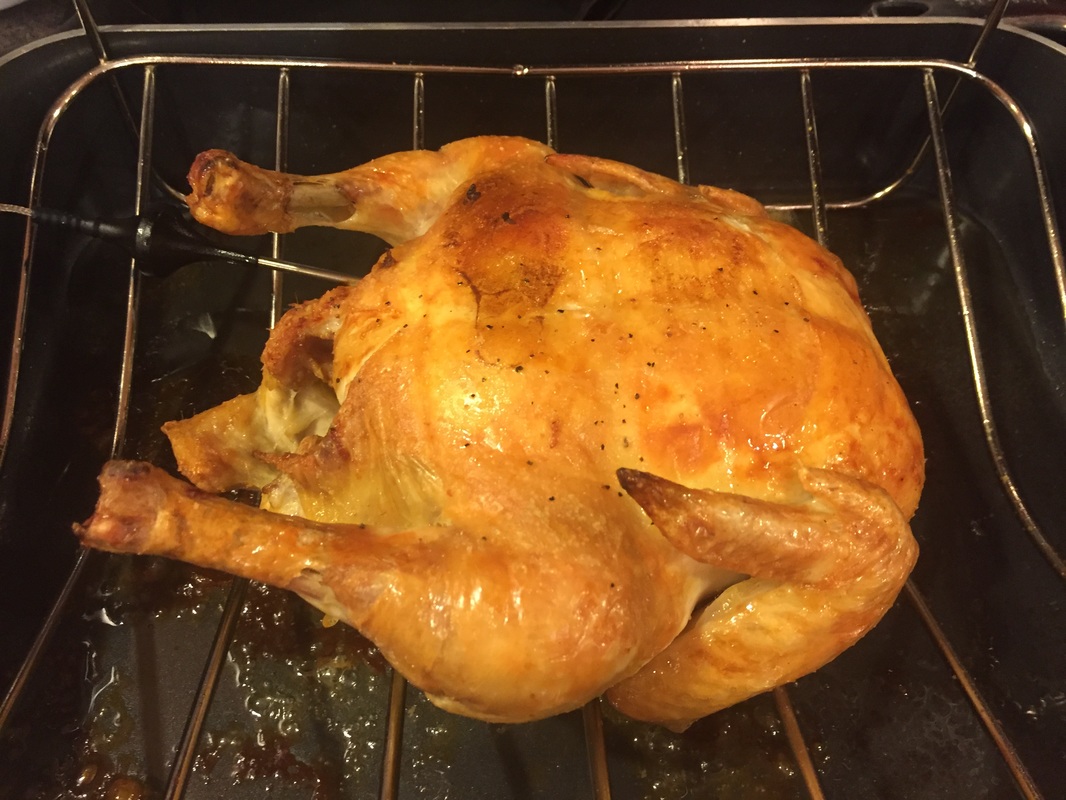
First, chefs use really good meat. If you want to make the best stew you've ever eaten, buy some grass-fed beef. Whole Foods is a reliable source for this ingredient, which you can often buy already cubed for stew.

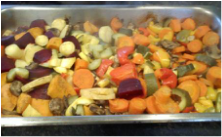
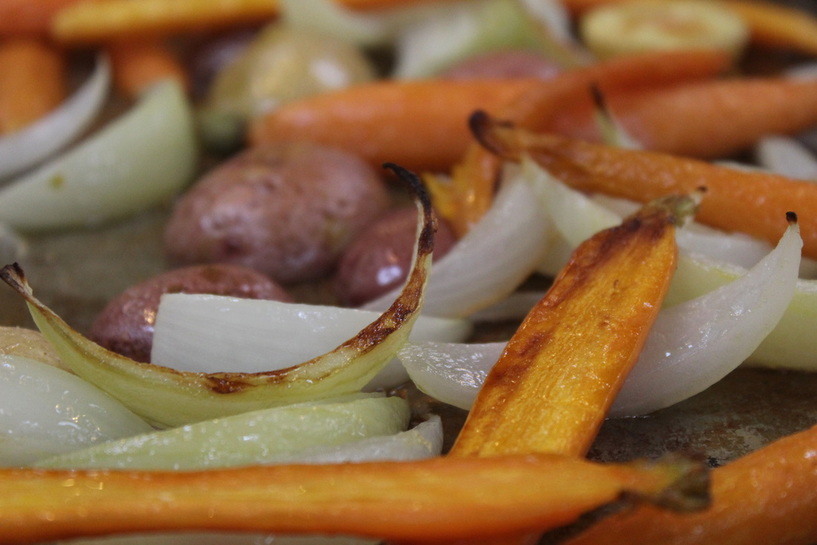
Second, chefs saute vegetables to form a flavor base for the stew; this is called a "mirepoix" (pronounced mir-pwa'). A lot more vegetables than you would think necessary (usually onion or leeks, celery, carrot and garlic) are diced and cooked in a bit of fat until they are softened.

Third, chefs sear the meat. When meat is seared, a "Maillard reaction" occurs, creating even more flavor. When searing, they space the meat in the pan so that it does not touch. It takes 2-3 batches to do this, but if you add too much meat at once, the meat throws off water so that instead of searing, it actually steams instead, and you lose out on those flavors.

Fourth, once all the sauteing and searing is done, chefs remove everything and "deglaze" the pan with a liquid, usually wine or broth. This not only captures all the flavors created above, but - bonus - it cleans up the bottom of the pan very nicely!

Fifth, chefs add fresh herbs. Thyme is great, but sage and rosemary play well too as does some fresh flat-leafed parsley at the end. More complex flavor!

Finally, chefs braise. They put all the ingredients back in the pan, add enough beef broth or wine to cover much of the beef and bring it a boil. Then they cover the pot tightly with foil or parchment, put the lid on and slide it into a 325 oven until the beef is meltingly tender and irresistible. If adding potatoes, they wait until about 1 hour before the end and add the potatoes in 1-1/2" cubes, cooking the stew until the potatoes are just done.

It's not every night that you want to cook like a chef, but for those nights that you do, beef stew is a great recipe to try.

Chris

​​​If you would like to see my recipes, tips and adventures in cooking every week go to www.ucancook.net and enter your email on the right side. Alternatively, email me at [email protected] and I will set you up! For even more tips and techniques, follow You Can Cook on Facebook.
Comments

Impossibly delicious - and simple - vegetables

5/16/2016

Comments

 
Picture
Picture
I've often started my posts with stories of cooking disaster; an overcooked turkey, a failed salad made of shredded brussels sprouts, and the time I stuffed a roast chicken with a weed I believed to be sage. But with roast vegetables, I have no failures to share because it is almost impossible to do it incorrectly.

The basic recipe is simple: line a cookie sheet with foil, place evenly cut, clean dry fresh vegetables on the sheet and toss lightly with olive oil and salt. Making sure they are no more than one layer deep, bake at 450 degrees for 12 - 20 minutes, until the vegetables are crisp-tender (i.e. you can pierce them with a fork).

My son (21) attends the Riverview School in Sandwich, MA and in his dorm, they cook dinner together most nights. He recently send me a picture of the roast vegetables he prepared for his dorm. If a bunch of young 20-something men can cook roast vegetables - and enjoy eating them - you can be pretty sure you can cook and enjoy them too.

A word about salt. Salt has a bad name, and part of that is well-deserved. If you look at the back of a can of soup, frozen dinner or many other prepared foods, the amount of salt per serving is shocking; sometimes as much as your entire recommended daily intake. However, when you cook food that is REAL (i.e. not manufactured), adding a bit of salt is often a crucial step for great flavor. So when you make this recipe, add more than a pinch; unless you're on a salt-restricted diet, it's not going to hurt you.

Here is a partial list of vegetables that taste great roasted:
  • Asparagus (snap off woody base of stem, usually about 1", and roast whole)
  • Beets (boil until the peel slips off and cut to 3/4" cubes)
  • Broccoli (break into equal sized florets, about 1")
  • Brussels sprouts (trim and halve, also see my recipe for brussels sprouts roasted with bacon)
  • Butternut squash (peel and cut into 3/4" cubes)
  • Carrots (cut into 1" pieces, peel if desired) 
  • Cauliflower (break into equal sized florets, about 1")
  • Garlic (peel and trim end but leave bulbs whole)
  • Onion (peel and cut into 3/4" pieces)
  • Parsnip (peel and cut into 3/4" pieces)
  • Potatoes (especially the waxier types such as red, blue or yukon gold; cut into 3/4" cubes)
  • Sweet Potatoes (peel and cut into 3/4" - 1" cubes; they cook more quickly than regular potatoes, so cut the sweet potatoes larger if roasting together)

Picture
This technique is great for when you have guests; it looks elegant but is very simple (and if you are spending time on the main course, the veggies need to be quick and easy). Buy a few of the vegetables above, and wash, dry and cut them up. Put in a ziploc bag and toss with oil and salt up to 1 day in advance. Preheat your oven to 450 degrees, and 20 - 30 minutes before you plan to serve dinner, pour the vegetables from the bag onto a lined jellyroll pan in a single layer and slide them in. Remove when done, and pour into serving dish. The only caveat with this is that if you are using vegetables whose color might bleed (beets, red onions, multi-colored carrots), bag those separately. A beautiful array of roast vegetables is a dramatic and delicious add to any meal.

Another way to do this is on the grill. If you have a grill basket, you can use that, but if not, do what countless generations of scouts have done: roast them in a foil packet with a couple of holes punched on each side.

Here are some great combinations:
Asparagus, multicolored peppers and shallots (pictured before roasting below)
Potato, carrot and onion

Beets, white onion, butternut squash 
Butternut, carrot, parsnip and red onion
Sweet potato and white potato ("crazy taters")
Red, white and blue miniature potatoes (you can buy this mixture)

My personal favorites are asparagus, multi-colored carrots (just trim off the top) and broccoli. I have eaten an entire pound of asparagus prepared this way; ditto for farmstand carrots.
Picture
If you've read this far, you've probably just spent more time reading than it would take you to prepare a pound of roast vegetables. With farmer's markets starting up (or having started if you live in a lovely warm place), there is no better way to celebrate each delicious bite. Buy a couple of interesting new vegetables - or even some reliable old ones - and give it a try. You won't be disappointed!

​​If you would like to see my recipes, tips and adventures in cooking every week go to www.ucancook.net and enter your email on the right side. Alternatively, email me at [email protected] and I will set you up! For even more tips and techniques, follow You Can Cook on Facebook.
Comments

They Really are the Best Chocolate Chip Cookies I've Ever Had

4/13/2016

Comments

 
Picture
One of the great things about the internet is that you can learn all sorts of interesting new things without ever leaving your desk. For example, you can survey best-chocolate-chip-cookie contests and look for a consistent winner. In this case, the frequent favorite is the New York Times Chocolate Chip Cookie Recipe.

I made a batch yesterday to share with friends, and in that process both determined that they are superior in every way to my prior favorite recipe, and that this fabulous recipe can be adapted to make it a bit simpler to prepare.

The adaptations are just two: first, the recipe calls for cake flour (7-8% protein) and bread flour (14-16% protein) used in equal amounts. The average protein content is thus about 10 - 12%...exactly the same as the all-purpose flour that you probably have in your cupboards and canisters...so use that instead. I have not yet done the side-by-side comparison, but I can assure you that just using regular flour tastes great.

The second adaptation concerns shaping the cookies. Let me be clear: making golf-ball sized scoops out of rock-hard dough was not fun. So for subsequent batches, I scooped the freshly made dough, chilled it and then quickly popped my flat-golf-ball-sized cookie dough balls onto the sheet for baking. Bonus: you can store them in your freezer and quickly whip up a batch for a last-minute treat.

One note about the chocolate. I would love to make these cookies with 1-1/4# (20 oz. or about 3-1/3 cups) of artisinal chocolate disks, but frankly I'm just too lazy to order them on-line or make a pilgrimage to a store that carries them. You can now buy high quality dark chocolate chips by Guittard and other manufacturers at your local Marketbasket or other grocery store; even Nestle's Special Dark chips work well. Of course if you would like to buy several bars of high-end chocolate and chop them for this recipe, you should!

The recipe's measures are shown by both weight and volume, and for this recipe and many others, consider is purchasing a scale. The Escali scale that I use costs just $23.50, and weighs everything from a gram of beads to 5 pounds of bread dough (it may weigh more than 5#, but I've never tried it). One reason to use a scale is that it makes baking really speedy - you pour ingredients into the bowl right from their containers (press and hold the on button to reset the weight or "tare" the scale when adding a new ingredient). It's also much more accurate than volume measurement, and - bonus! - results in fewer dishes. I've had my scale for at least 5 years, and it's still accurate to the gram.

One more thing about this chocolate chip cookie recipe: the dough really does need to chill at least overnight. The chilling period causes the flour to break down slightly into it's component parts (one of which is actually sugar) and the water in the dough to evaporate - both of which lead to a cookie that is crisp on the outside and chewy within; in short, the cookie of your dreams.
Picture
Here is my (adapted) NY Times cookie recipe.

I also want to include a link to the Butter Flavored Crisco chocolate chip cookie recipe. Butter Flavored Crisco has no dairy (surprise!), and so if you substitute almond or soy milk for the 2Tbs of milk and use non dairy chocolate chips, you can have dairy free chocolate chip cookie that is also extremely good. Trader Joe's regular chocolate chips are also non-dairy, but it should be noted are packaged on machines that also package dairy and so are not safe for those with serious dairy allergies.

Even a simple batch of chocolate chip cookies deserve to taste great. If you buy pre-made dough, it will taste a LOT better than Chips Ahoy, and if you make cookies using the Butter Flavored Crisco recipe, they will be a LOT better than the pre-made dough. But to reach the pinnacle of chocolate chip cookie goodness, try the adapted NYTimes Chocolate Chip Cookie recipe - you may never go back.

For those interested, the plate in the top photo is indeed depression glass, a gift to my grandmother from my grandfather for their very first Christmas in 1932. Here is the note she sent when she gave me the dish:
Picture
It reads: "Dear Christy, Grandad gave me this for Christmas the very first year we were married, it is for cake, sandwiches, cookies or whatever. It will be 60 years old next Christmas. It is called Depression Glass - should be quite valuable. If you don't have cupboard space, let Peggy (my mother) keep it for you."

My grandmother was a child of the depression, and loved and valued her beautiful things. She passed away in 2007 at age 93, and I miss her still.

​
​​If you would like to see my recipes, tips and adventures in cooking every week go to www.ucancook.net and enter your email on the right side. Alternatively, email me at [email protected] and I will set you up!
Comments

Don't Be Fooled!

3/21/2016

Comments

 
Picture
When I moved into my first apartment, I thought it would be great to have a few pots of herbs on my balcony. I didn't know what I'd use, but somehow sage captured my imagination. I was lucky enough to purchase the last plant at the garden center and it grew large over the summer. By October, I had still not used my sage and so I decided to roast a chicken and stuff it with some homemade dressing.

I harvested my sage and chopped up what I thought was an appropriate amount. Stirring the sage into my dressing, I decided that it didn't quite have the taste I wanted, so I added more, and after another taste, more again. When my dressing was almost green with sage, I decided I'd added enough and stuffed my chicken. The chicken baked to a shiny golden brown, and I proudly served both the bird and its contents.

"What is this?" my husband asked, pointing to the dressing. "It's homemade dressing, with sage from our balcony." I replied. He tasted cautiously. "That's not sage." We both tasted, and confirmed that he was right. After looking up sage in a plant book, I confirmed that I had lovingly nurtured a weed which I had then used to stuff a roast chicken. Surprisingly (given that he is a decent cook himself) he continued to eat my food with no further reference to this potentially dangerous error. 

While this early attempt at raising herbs was a misstep, there is something to be said for having a few pots of them outside your kitchen door - and this month and next are a good time to start. Most herbs are basically weeds (my "sage" notwithstanding), and are very tolerant of Darwinian gardening. If you'd like to try growing an herb or two, buy some cheap clay pots, potting soil, and one or more of the following perennial herbs:
- Chive (onion taste, pretty edible flowers in the spring, can also be used in landscaping. Great on potatoes or eggs)
- Mint (extremely invasive - grow only in a pot!  Delicious in summer drinks or as a garnish)
- Rosemary (1 - 2' tall, bring indoors below 20 degrees. Try adding to grilled chicken marinade)
- Sage (pretty gray-green leaves on a 12" tall plant; try it in Butternut Squash Soup)
- Thyme (tough little 6" creeping plant; also great in grilled chicken marinade)

Chive
Mint
Rosemary
Thyme
You will be surprised how much these herbs improve the flavor of your cooked food, and the initial plant costs about the same as buying a single package of cut herbs in the grocery store. All you need is a partly sunny location and a discerning palate. But don't buy the last plant unless you know what it's supposed to look like. Here are more photos to help:
Sage
Random Weed
Mature Sage Plant
​​If you would like to see my recipes, tips and adventures in cooking every week go to www.ucancook.net and enter your email on the right side. Alternatively, email me at [email protected] and I will set you up!
Comments

A Tale of Stale

1/27/2016

Comments

 
During a Halloween party several years ago, a lovely friend brought a package of frosted cookies from a local grocery store. They looked delicious, but with a LOT of food on hand, I quickly put them in the cabinet above my refrigerator for "later". For some reason, "later" didn't come until the following August, when I pulled them out while looking for my grandmother's china. It was just before dinner and I was hungry so I did the thing I was told in college chemistry to NEVER do: I tasted the experiment.

That little nibble was actually delicious! So much so that I quickly finished the cookie, and then was horrified by the implications of what I'd done. I waited for a full 24 hours, expecting symptoms like vomiting, stomach pains and shortness of breath...but nothing happened. That cookie was still edible (quite tasty even) nearly 10 months after purchase. In spite of their deliciousness, I quickly disposed of the remaining treats, afraid I might succumb to temptation again.
Picture
Here is a label for cookies very similar to those I so foolishly ate. Not to overstate the obvious, but there are a lot of ingredients listed that you and I don't cook with.

When we make our own desserts, we don't use chemicals that keep our treats fresh for 10+ months, so the desserts need to be made just before we eat them in order to taste great. Preparing a dessert the day before is fine, and for something like a tiramisu or cheesecake where the flavors need to blend, two days before can be even better. But when you make something a week early and "pop it in the freezer" (even homemade ice cream) it will simply not be as good.

I became convinced of this when I took a platter of tiny cupcakes to an event at my church. The cupcakes had been in the freezer for a couple of months, but had been made from scratch and well-wrapped and frozen as soon as they'd cooled. I'd topped them with my daughter's fresh homemade strawberry buttercream, which is a topic for it's own post - it's unbelievably good. But after the event, several of my cupcakes had gone uneaten, and many more were in the trash (most with the buttercream licked off). I might have had a different result had I brushed the tops of the cupcakes with simple syrup before frosting them, but once I tasted the leftovers, I knew: their time in the freezer had left them with an off-putting, stale flavor.

I would hate for anyone to feel bad about taking a homemade dessert to a party or event, but you might consider making a simple dessert rather than concocting something complex in advance and freezing it. Alternatively, prepping the ingredients - toasting the nuts, combining the dry ingredients, etc. in advance will make quick work of the actual recipe when you do make it. Since the cupcake incident, I've learned that freezing leftover cake batter (instead of a baked cake) can work well: seal in a ziploc, squeeze the air out and freeze flat. Once it thaws (about 4 hours at room temperature for sandwich-sized ziplocs), you can clip off one corner of the bag and quickly fill cupcake pans. In the case of my sad little cupcakes, preparing new cupcakes from a boxed cake mix would have also been a substantial improvement.

Here are a few quick and simple desserts:
​Almond Cake (15 minutes plus cooking time)
Apple Crisp (20 minutes, including peeling the apples, plus cooking time)
Chocolate Fudge Brownies (5-10 minutes  plus cooking time, allow 3 hours to chill)
​Chocolate Mousse (10 minutes plus 1 hour to chill)

A plate of fresh-made chocolate chip cookies are always a hit, and will taste amazingly better than purchased cookies or those made from pre-made dough. My favorite recipe uses butter flavored Crisco - hardly a health food - but because the butter-flavored Crisco is actually dairy-free it can be made vegan by using vegan chocolate chips (Trader Joe's chocolate chips for example) and substituting almond milk for the milk. For extra deliciousness, sprinkle each cookie with a pinch of kosher salt before baking.

Dessert has only one purpose: to taste fabulous. If it fails at that one thing, it's not worth eating.

Sweet dreams,

Chris

If you would like to hear about all my recipes, tips and adventures in cooking, go to www.ucancook.net and enter your email on the right side. Alternatively, email me at [email protected] and I will set you up!

Comments

The One Tool Every Cook Should Own

12/26/2015

Comments

 
Picture
Like many of us, I learned to cook in my mother's kitchen, using my mother's kitchen knives. And what knives they were! She had purchased them from the Cutco Company upon the occasion of her marriage in 1961. One of the best features of these knives - and key factor in her purchase decision - was that they *never* needed to be sharpened. I started cooking when those knives had seen about 15 years of daily use. New to the kitchen, I thought it was normal to "cut" fresh vegetables by sawing them to little shreds while holding your knife in a white-knuckled grip. Although my mother very sadly passed away in 2002, my dad still uses those knives. And they have not been sharpened to this day.

Fifteen years into my own marriage, my Chicago Cutlery knives (a wedding gift) had made a few trips to the knife sharpener. Wanting a more convenient and cost-effective solution, I attended a knife sharpening seminar at Williams Sonoma. After watching a lengthy demonstration of a $300 electric knife sharpener, I pulled a friendly-looking clerk aside to ask what other choices there were (I may have used the phrase "a knife sharpener for real people"). He was refreshingly honest and pulled out a hand-held device encased in plastic. It cost $20.99, and he told me that he used it himself and it worked really well. I bought one, and have had razor sharp knifes ever since.

You might think that a $15 (the price has gone down!) knife sharpener should not be used on your good knives, and I'd ask you to check with the store you purchased from if you are concerned. But as long as your knife is not serrated (serrated means it has little teeth, like a bread knife) and is honed from steel (not stamped), it can be sharpened. You do not want to sharpen stamped knives or ceramic knives (photos below), but any other knife with a steel cutting surface will work (see the photos at the bottom)

These are knives that CANNOT be sharpened using a knife sharpener.
Stamped
Ceramic
Serrated
To use the sharpener, draw it through the "coarse" V-shaped channel about 10 times (a few more if the knife is extremely dull to start), and then draw it through the "fine" V-shaped channel about 10 times. Pull the knife through the channel in one smooth motion, handle to tip. After you've done this, try to cut the edge of a piece of paper; if the knife slides through easily, it's sharp! If it does not, draw it through the "fine" channel another 10 times. Once you've done a couple, this will take no more than 1 minute per knife. Here are a couple of photos of knives that can be sharpened (note that the blade and handle are different materials). The knives on the left are 25 year old Chicago Cutlery, and on the right, a Wusthof 5" chef knife (the workhorse of my knives). I sharpen these knives at least once a month, and use the one on the right nearly every day.
These are knives that CAN be sharpened with a knife sharpener.
I can't promise you that your onions will chop themselves, but I can tell you it will go faster and you'll enjoy your chopping a lot more. If you'd like to order one of these extremely useful devices (or give yourself a gift you wish you'd received for the holidays), you can find it here.

I've posted a video to the You Can Cook Facebook timeline as well, because seeing is believing, and I was shocked at how easy this was to use and how much it has improved my knives...and by extension my enjoyment of the time I spend in the kitchen. Stir fry, anyone??
Comments

The Trouble with Turkey...And How To Solve It

11/16/2015

Comments

 
Picture
"Mommy, this white meat's dry."

I was only about 12 years old, but I still remember the look on my mother's face when my 4 year old cousin blurted out those words during a lull in the Thanksgiving dinner conversation. Although I could tell that Mom was extremely unhappy, I knew that my preschool-aged cousin had stated an inconvenient truth: while not quite at the level of a Chevy Chase Christmas Family Vacation turkey, this was one dry bird, and there was not enough gravy in all of Milwaukee to hide that fact.

The first turkey I roasted on my own was for my husband and I. There was a promotion at the grocery: save $200 in receipts, and get a free turkey! Given that there were just two of us, it took a good long time to save those receipts and by the time we were ready to pick up our prize - just days before Thanksgiving - the only turkeys left were 25 pounds and up. At first we were excited by our bargain, but the enormity of the "deal" began to hit when we sat down to eat the roasted bird - just the two of us - and could barely see over the top. Let me say that the bird was not the most moist (probably due to my fears about cooking it completely) and we had a very long, dry winter.

At this time of year, nearly anyone who writes about food has all sorts of tips on how to ensure a moist juicy bird. It's really confusing, and you could find yourself practically making mandalas of turkey feathers on your kitchen floor if you followed them all. I have prayed many times to the moist turkey gods, and decided that I needed instead to hone in on a small number of things that actually matter and move on. So here is my list:

1. Buy a fresh (never frozen) bird.
2. Roast it breast side down for the first 30 minutes.
3. Cook it only until it's done.
4. Don't stuff it (sorry).
5. Let the bird rest for at least 15 minutes before eating.

Buying a fresh bird is easy; it says "never frozen" on the label. And here's another inconvenient truth: since some enormous percentage of turkeys are sold during the last two weeks in November, exactly when do you think the frozen turkeys actually got that way (here's a hint: do you think the turkey industry times their crop so that every turkey is ready to harvest in late October)? Another benefit: fresh turkeys often have far less injected water which not only bulks up frozen turkeys and increases their price but can add an off-putting, chemical taste. I've seen frozen birds that have up to 12% "added juices" - i.e. water, salt and preservatives. Fresh birds, which commonly have 3% or less added juices, can be purchased starting the weekend before Thanksgiving.

Roasting breast side down to start is a little more trouble, but so worth it. Breast meat has much less fat and because it's on top of the bird as it roasts, the juice that it does have drips down onto the thighs. By starting the bird upside down, you reverse this process and by flipping it after 30 minutes, you allow the top of the bird to become brown and crispy, just as if you had cooked it "right side up" the whole time.

This recommendation leads to two questions; first, how am I supposed to know which side is up AND how the heck am I supposed to flip a slippery 450 degree turkey???

The easiest way to tell which side is up is that the tail (a small, hard, diamond-shaped protrusion near the large cavity) is on the bottom. Also, if the bird is right side up, the large cavity would be also to hold stuffing without the stuffing falling out. Thus, if you put the turkey in the roasting pan "upside down" (to start the cooking process), the tail will be on the top and the opening of the large cavity will be less visible. See the pictures and video in the recipe below for more detail.

Flipping a turkey is a bit tougher. For some, the way to go is to make two giant wads of paper towels and use that to grip and flip the slippery bird. Being a bit of a green-freak, I can't bear to waste paper towels this way, so I usually use two clean dishtowels; I also enlist my husband to help me. With two sturdy spatulas and two absorbent cloth towels we can turn the bird over safely and pop it back in the oven. See the video in the recipe below for more detail; unfortunately, our family of three cannot eat two turkeys in two weeks, so I made my video with a chicken (sorry!).

Cooking it until it's done is simple: use a meat thermometer and cook ONLY until the thermometer (pierced into the thickest part of the turkey thigh) reads 165 degrees. See the recipe video for the thermometer placement, and read my post on dry chicken here for more information about thermometers and why they matter. The little plastic thermometers that come in many birds are useless, and I usually remove them before cooking.

I'm sorry to say that while stuffing the bird leads to GREAT tasting stuffing, it leads to not-so-great tasting turkey. The reason is that a stuffed bird takes longer to cook, leaving the outside (especially the breast) meat dry. Stuffing baked in a covered dish, especially made with a bit of turkey or chicken broth, is a tasty alternative that - bonus! - is a lot less hassle than un-stuffing a turkey cavity just as you are trying to serve the entire meal.

Finally, please do let the bird rest; after all, he's had a tough day. Take the turkey out of the oven and put a little sheet of foil on top to keep it cozy (this is often called "tenting") for at least 15 minutes. Believe it or not, scientists have tested this (scientifically!) and found that while the bird is resting, it's lovely juices are being re-absorbed into the cells of the meat, making that turkey all the more delicious when you finally do make the first cut.

Just flipped
Fully Cooked
Under a tent
For an actual recipe with instructions for cooking a turkey, click here.

Years ago, I worked with a strict vegetarian who became a great friend. I once asked her what she ate for Thanksgiving, and she said that with all the sides, Thanksgiving is the best holiday ever for vegetarians! So if worst comes to worst and you accidentally cook a turkey so dry it could be an extra in the next Christmas Family Vacation movie, open more wine, make sure your cat is safely away from your decor, check that no one is smoking stogies near an open sewer and pass the sides. I'm quite confident they will be delicious!
Comments

Don't Microwave That Meat...But If You Must, Here's How

11/9/2015

Comments

 
Years ago, when my son's teenage appetite was just starting to kick into high gear, he asked me to microwave him a particularly delicious-looking dinner roll from the freezer. Having shown zero interest in cooking (in spite of considerable exposure at home), his cooking skills were limited to little more than cooking single serving microwavable containers of Kraft mac & cheese for three minutes. So when his hunger became too intense, he took it upon himself to microwave the roll.
Picture
I came downstairs nearly three minutes later to find the kitchen full of choking smoke, my son standing next to the microwave paralyzed with fear. With the long kitchen island between us, I yelled:

"Open the Door!"
"Open the Door!"
"Open the Door!"

To which he shook his head violently, too scared of what might issue forth from the smoking microwave. I ran around the island and threw open the door, causing the smoke alarms to go off, and he and I fled the kitchen with thick gray smoke in pursuit.

Later, after the kitchen had cleared, I went back and looked at the offending roll. Strangely, after being microwaved for nearly three minutes - a rather long time for a small roll - it looked pretty normal on the outside, with only one narrow gray streak (the photos below are my re-creation of this memorable event). However when I cut it open in the name of kitchen science, I found a solid black mass that looked exactly like Hawaiian lava, covered in a thin coating of a bread-like substance. My son did not microwave rolls again.

When you microwave food, it's the water and fat that really cook (or are "excited" by the microwaves). So if you microwave meat, the juices that make your meat taste so delicious are being heated to boiling so they can cook the meat around them. Once so heated, those juices are gone. Microwaving dries meat by removing water; microwaving bread does the same thing, which is why a slice of bread - or dinner roll or tortilla - will become tough and chewy if overheated for even 5 seconds.

Most restaurants do not have microwaves. Those that do, refer to the microwave as "Chef Mike". It is not a complimentary term.

Microwaving cooks unevenly. Have you ever noticed that a plate of leftovers is much warmer on the outside of the plate than at the center? By the time the inside is cooked, the outside is tough and dry.

Microwaving gives the meet a strange, stale flavor and a rubbery texture. If you taste-test leftovers re-heated on the stove vs. in the microwave, you will usually notice a big difference.

Finally, microwaving will never brown meat, because of course it only cooks the water in the food. You can steam food all day in a microwave, but create the lovely crust which gives meat extra savory flavor? Not going to happen.

There are a few exceptions to the "don't microwave meat" rule however.

Microwaving meaty soups, stews and other dishes with a LOT of liquid is generally OK. Watch out for such foods with pasta though; the pasta - like bread - can become quite tough.
Picture
If you need to thaw uncooked meat and have a microwave with a defrost setting, you can use the microwave to thaw up to about 3 pounds of meat (more than that and you will overcook parts of the meat to completely thaw the whole). To use this extremely handy feature, figure out the weight of the meat you want to thaw, hit the "defrost" button (called "auto/time defrost" on my GE microwave) and input the weight. The microwave should prompt you to turn the meat at least once, and the first few times you use this feature, watch to see the outside edges of the meat aren't overcooking. This is a much easier - and faster - way to thaw meat than under running water in the sink.

If you want to reheat leftovers and don't have time to cover and bake them, arrange the food on a plate:
1. If heating meat and a starch, put the meat in the middle of your plate or bowl and cover it with the starch. Cover the whole thing with another plate and microwave until the underside of the bottom plate is warm or hot.
2. If heating only meat, put the thickest part of the meat to the outside of the dish; imagine four chicken drumsticks with the bones in the middle and the meaty parts to the outside. Cook on 50% power until done, rotating or flipping meat at least once.

Let me be clear here - there are many ways to cook, and microwaving meat might work really well for you. If it works, keep doing it! And if you do have a truly delicious recipe that includes meat prepared in the microwave, please comment and share; I'm happy to be proven wrong in the name of food that tastes great. But if you've been thinking there might be better ways to cook meat, perhaps it's time to try them. 

Finally, if you've read this far, I want to share a recipe I've rescued from the microwave: buffalo chicken dip. For this absolutely tasty and heinously unhealthy recipe, click here. Your friends and family will thank you - as soon as their food coma lifts.

And please, please, please....don't microwave fish or seafood...unless exacting revenge on some ill-behaving officemates. And if you do so, don't eat it. Just leave it in the microwave, unclaimed, until the parties involved have been sufficiently disgusted by the smell. Then sneak quietly away.

Comments

Dry chicken

10/27/2015

Comments

 
Picture
"All delicious chickens are alike, each tough dry chicken is dry and tough in it's own way." -- misquoted from Tolstoy's Anna Karenina.

At a banquet last weekend, I was served a visually appealing plate with a breast of chicken and a single wing bone at its center. The salad and rolls had been delicious, the dinner conversation scintillating and fun, and I dug eagerly into my chicken meal. But alas, my dinner knife could scarcely cut the sad little bird! What had happened??

There are many enemies of a moist, tender chicken breast, but the single best way to prevent chicken tragedies is to cook the chicken for exactly the right amount of time. Once the meat reaches 165 degrees, it is ready to eat. Any lower and you are risking a trip to the ER (Salmonella is no joke). Any more, and your chicken will be a dry, sad and tasteless husk, suitable only for dog treats.

I had always thought my mom was a great cook, however when I got to college I was amazed at the deliciousness of the food in the dining hall! As my fellow students complained bitterly about the food service meals, I realized that perhaps my mother was not the culinary wizard I'd once thought. However, there were several dishes that she made really well, and one of these was "oven fried chicken breasts". Any child of the 60s and 70s will remember a time when boneless chicken breasts were very expensive, and so these oven fried chicken breasts were a special treat, perhaps something one might request for a birthday dinner. Perfect, I thought, for my first dinner party. Concerned about poisoning my guests, I cooked the chicken until I was SURE it was done and put a lovely golden brown chicken breast each plate. Imagine my shock when my friends could barely cut them with steak knives! This was my first lesson in the perils of overcooking chicken.

Crockpots can be another danger zone. What could be simpler than filling a crockpot in the morning and letting it cook all day? My first crockpot, a gift from my mother-in-law, came with an instruction book that read in part, "It is practically impossible to cook anything (in a crockpot) for too long." Let me tell you, it's entirely possible, and I've done it. You do not want to know what broccoli cooked for 11 hours looks like (well OK, I'll tell you - gray mush). If you want to use chicken in a crockpot recipe, consider boneless, skinless thighs. They have enough fat and connective tissue to stand up to a long-cooking crockpot recipe and emerge with good texture and flavor. Chicken breasts, not so much.

Picture
So how can one avoid creating chicken chew toys? By using a thermometer to measure the temperature of the chicken. You can get an instant read thermometer or one you leave in the bird as it cooks (both $10 - $20 at Target or similar). Or if like me you are easily distracted by more interesting things like a good friend's email or a tasty chocolate dessert, you can get one of my favorite cool tools:  a Rosle electronic thermometer. The way this helpful tool works is that you place the probe in the thickest, meatiest part of the chicken and then plug the other end into the digital unit. Put the chicken into the oven, snaking the cable out of the oven door, then set the unit for the desired temp (in this case pick "poultry"). Once your chicken reaches 165 degrees, the thermometer beeps and you take the chicken out. Voila! Moist, tender chicken. Every. Single. Time.​
I began experimenting with roast chicken breasts after visiting one of my favorite barbeque restaurants in Manchester, NH. If you're from the South, you probably don't believe good barbeque exists in New Hampshire but really, KC's is a great place with the packed parking lot, caddies of sauces and naughty t-shirts to prove it. Normally at such a restaurant, it's the ribs, brisket or pulled pork that win your heart, but my first love at KC's is the chicken. So much so that after several delicious visits - to a restaurant 45 minutes from my house! - I accosted the owner in the bar to find out where he buys his chicken breasts and why they are so good. He revealed that they are ordinary Purdue chicken breasts and his only secret is the barbecue mantra, low and slow. I have been cooking them that way - either to eat as is or to put into other recipes like pot pies, chicken salad or enchiladas - ever since. To make incredibly tender slow roasted chicken breasts, see my recipe here.

There are other variables that matter too: organic or conventional; bone or no bone; skin on or off; flipped during cooking or not flipped. But for a huge taste upgrade, get a thermometer and use it. You will be shocked at how much it helps.

Here is a link to a Rosle digital meat thermometer.

Here is a link to an instant read thermometer.

Here is a link to an old-school leave-in meat thermometer.

Finally, if you peer into your oven and find a dry, overcooked chicken drowning in a pool of it's own juices, call me to commiserate! And if you like, my dog Bentley will be happy to take any leftovers off your hands.
Picture
Comments

Cool Tools Throwback

5/2/2015

Comments

 
Picture
How could something our ancestors hauled across the prairie in a Conestoga wagon possibly qualify as a cool tool?

Let me assure you that it most definitely does. After all, what would you say about a pan costing less than $25 that lasts your entire life? A pan that can be used to saute, deep fry, caramelize and bake? A pan that keeps your food hot while you're eating your meal? A non-stick pan that you can heat up to 500 degrees? About the only thing you can't do with this pan is scramble an egg, and even that is possible if you use enough butter.

I'm talking about a 10" cast iron skillet.

But before we talk about all the delicious things you can make in this pan, let's address a couple of issues up front. There are two, and they are related: the mythical "seasoning" process that cast-iron requires, and cleaning the pan once this seasoning has been achieved.

I recently watched a horrific YouTube video about cleaning a cast-iron pan. First the video advised a thorough rinsing of the (still hot!) pan, followed by a gentle wiping clean. Next, viewers were advised to pour a 1/2 cup of salt in the pan and get to work with a wad of paper towels and some serious elbow grease. I assure you that if my 25+ year old pan required such TLC, I would have sold it at a rummage sale 24 years ago.

Here's all you need to know:

Start by buying a pan that is "pre-seasoned". The best brand is Lodge, and the pre-seasoned 10" pan that I own sells for $14.97 on Amazon. Free delivery with Amazon Prime!

You can also season the pan by either wiping it with vegetable oil and baking it for an hour at 350 degrees OR cooking 1/2# of bacon in it. I know which I prefer!

After use, clean the pan by gently scrubbing it out with a Dobie pad (or similar), using a little soap if needed. After all, do I really want this morning's apple pancake tasting like last night's fajitas? I can speak from experience on this: apple pancake and cumin is not a good flavor blend.

Wipe it dry, or if you are cursed with an electric stove like I am, leave the wet pan on a burner that you have just turned off and let it sit until it's completely dry.

If by chance, you scrub a little too hard and see a bit of shiny metal showing through your  seasoning, just repeat the seasoning process above (yay, more crispy bacon!).

The only negative about cast iron is the weight; the 10" skilled I use weighs over 4# when empty. I store mine either on the stovetop or in the oven since I use it every day.

Many years ago, my husband and I visited my 85 year old grandma at her home in Longview, Washington. When we arrived, she had prepared a crispy pork roast in her 60+ year old cast iron dutch oven. "I'm not much of a cook" she said, as we sat down to her meal, but I can assure you, that pork roast was good!

Here are a few or my favorite cast iron pan recipes:

Apple Pancake

Salted Caramel Sauce

Chicken Fajitas

Steak and potato salad (bonus, use up your leftovers!)

Comments
<<Previous
    Picture

    Author

    Chris, cooking instructor, disability advocate and mom. Food geek and passionate believer in fresh, simple and homemade.

    Enter your email address:

    Delivered by FeedBurner

    Categories

    All
    Best Practices
    Chocolate
    Common Sense
    Cookies
    Cool Tools
    Dessert
    Entertaining
    From The Garden
    Healthy
    Holiday Cooking
    Kitchen Adventures
    Quick
    Snack
    Taste Test!

    RSS Feed

    Archives

    June 2016
    May 2016
    April 2016
    March 2016
    February 2016
    January 2016
    December 2015
    November 2015
    October 2015
    May 2015
    February 2015
    January 2015
    November 2014

    The typeface at the top of this page is Goudy Old Style, the same typeface used in my first copy of The Fanny Farmer Cookbook. My copy is a successor of The Boston Cooking-School Cookbook, first published by Fanny Farmer in 1896. It was one of the first cookbooks to use the standard measures that are common today.