you can cook
  • You Can Cook!
  • About Me
  • Recipe Box
    • Appetizers >
      • Buffalo Chicken Dip
      • Cream Cheese Appetizer
      • Sweet and Salty Nuts
      • Thai Peanut Sauce
    • Beverages >
      • Blueberry Lemonade
      • Cosmopolitan
    • Breakfast >
      • Apple Pancake
      • Homemade Granola
      • Peanut Butter Cup Smoothie
      • Stick-to-your-ribs smoothie
      • Veggie Omelet
      • Yeasted Waffles
    • Main Dishes >
      • Beef Stew
      • Chicken Fajitas
      • Choley
      • Grilled Chicken
      • Low and Slow Chicken Breasts
      • Roast Turkey
      • Rub for Pulled Pork (and other meats too!)
      • Salmon Burgers
      • Simple Homemade Mac & Cheese
      • Simple Red Sauce
      • Steak and Potato Salad
    • Sides >
      • Bacon-Roasted Brussel Sprouts
      • Creamy Polenta
      • Homemade Potato Chips
      • "Magic" Salad Recipe
    • Soup >
      • Apple Cheddar Soup
      • Butternut Squash Soup
      • Chicken Noodle Soup
      • Creamy Tomato Basil Soup
      • Smokey Beef Chili
    • Sweets and Treats >
      • Almond Cake
      • Apple Crisp
      • Bruna Kakor
      • Butterscotch Pecan Sandies
      • Chocolate Fudge Brownies
      • Chocolate Mousse
      • Compost Cookies
      • New York Times Chocolate Chip Cookies
      • Pumpkin Pie
      • Salted Caramel Sauce
  • Classes
  • Contact Me
you can cook

Milkshakes for Breakfast?

4/14/2016

Comments

 
Picture
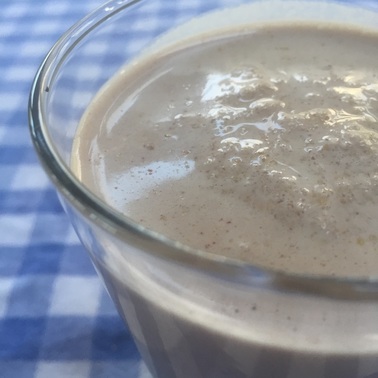
I'm away this week, but wanted to share my new favorite smoothie...chocolate peanut butter cup.

Here are a few ways to make a smoothie breakfast almost as simple as grabbing a protein bar:
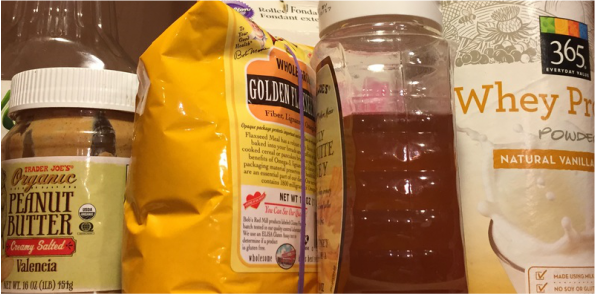
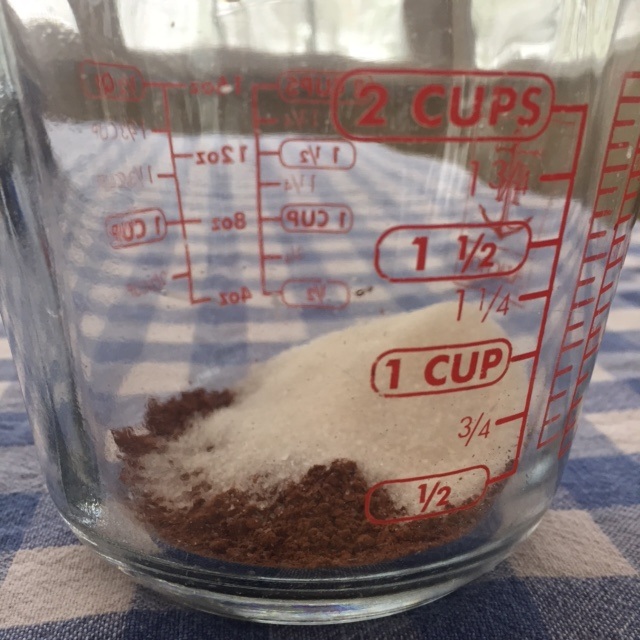
- Keep your ingredients together, like they are in my photo below.
- Make the ingredients easy to add: put a scoop in the flax seed, get honey that dispenses easily and buy some Trader Joe's organic peanut butter - stir it once and you can pour it from the jar.
- Find a blender with a frozen drink button; you can press it once and walk away.

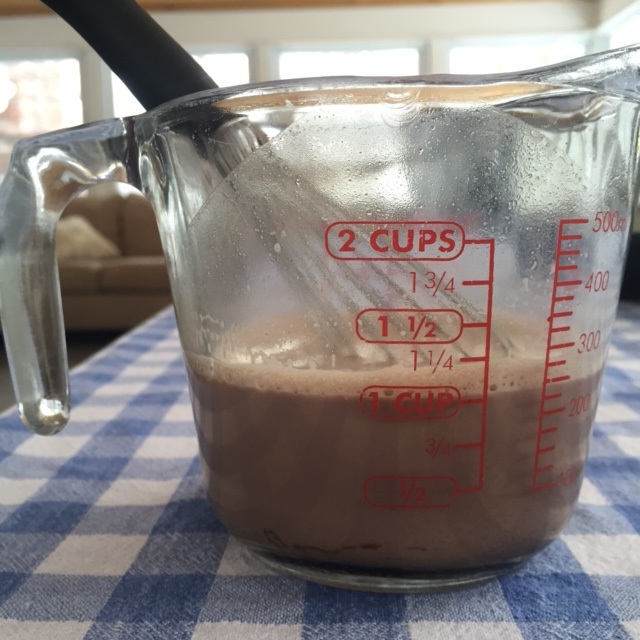
If you've been having trouble getting your kids to eat breakfast, try giving them this peanut butter chocolate milkshake oops I mean smoothie. It makes one adult or two kid-sized servings. I probably don't know your children, but I would be quite surprised if they won't drink it.

Picture
If you would like to see my recipes, tips and adventures in cooking every week go to www.ucancook.net and enter your email on the right side. Alternatively, email me at [email protected] and I will set you up!
Comments

They Really are the Best Chocolate Chip Cookies I've Ever Had

4/13/2016

Comments

 
Picture
One of the great things about the internet is that you can learn all sorts of interesting new things without ever leaving your desk. For example, you can survey best-chocolate-chip-cookie contests and look for a consistent winner. In this case, the frequent favorite is the New York Times Chocolate Chip Cookie Recipe.

I made a batch yesterday to share with friends, and in that process both determined that they are superior in every way to my prior favorite recipe, and that this fabulous recipe can be adapted to make it a bit simpler to prepare.

The adaptations are just two: first, the recipe calls for cake flour (7-8% protein) and bread flour (14-16% protein) used in equal amounts. The average protein content is thus about 10 - 12%...exactly the same as the all-purpose flour that you probably have in your cupboards and canisters...so use that instead. I have not yet done the side-by-side comparison, but I can assure you that just using regular flour tastes great.

The second adaptation concerns shaping the cookies. Let me be clear: making golf-ball sized scoops out of rock-hard dough was not fun. So for subsequent batches, I scooped the freshly made dough, chilled it and then quickly popped my flat-golf-ball-sized cookie dough balls onto the sheet for baking. Bonus: you can store them in your freezer and quickly whip up a batch for a last-minute treat.

One note about the chocolate. I would love to make these cookies with 1-1/4# (20 oz. or about 3-1/3 cups) of artisinal chocolate disks, but frankly I'm just too lazy to order them on-line or make a pilgrimage to a store that carries them. You can now buy high quality dark chocolate chips by Guittard and other manufacturers at your local Marketbasket or other grocery store; even Nestle's Special Dark chips work well. Of course if you would like to buy several bars of high-end chocolate and chop them for this recipe, you should!

The recipe's measures are shown by both weight and volume, and for this recipe and many others, consider is purchasing a scale. The Escali scale that I use costs just $23.50, and weighs everything from a gram of beads to 5 pounds of bread dough (it may weigh more than 5#, but I've never tried it). One reason to use a scale is that it makes baking really speedy - you pour ingredients into the bowl right from their containers (press and hold the on button to reset the weight or "tare" the scale when adding a new ingredient). It's also much more accurate than volume measurement, and - bonus! - results in fewer dishes. I've had my scale for at least 5 years, and it's still accurate to the gram.

One more thing about this chocolate chip cookie recipe: the dough really does need to chill at least overnight. The chilling period causes the flour to break down slightly into it's component parts (one of which is actually sugar) and the water in the dough to evaporate - both of which lead to a cookie that is crisp on the outside and chewy within; in short, the cookie of your dreams.
Picture
Here is my (adapted) NY Times cookie recipe.

I also want to include a link to the Butter Flavored Crisco chocolate chip cookie recipe. Butter Flavored Crisco has no dairy (surprise!), and so if you substitute almond or soy milk for the 2Tbs of milk and use non dairy chocolate chips, you can have dairy free chocolate chip cookie that is also extremely good. Trader Joe's regular chocolate chips are also non-dairy, but it should be noted are packaged on machines that also package dairy and so are not safe for those with serious dairy allergies.

Even a simple batch of chocolate chip cookies deserve to taste great. If you buy pre-made dough, it will taste a LOT better than Chips Ahoy, and if you make cookies using the Butter Flavored Crisco recipe, they will be a LOT better than the pre-made dough. But to reach the pinnacle of chocolate chip cookie goodness, try the adapted NYTimes Chocolate Chip Cookie recipe - you may never go back.

For those interested, the plate in the top photo is indeed depression glass, a gift to my grandmother from my grandfather for their very first Christmas in 1932. Here is the note she sent when she gave me the dish:
Picture
It reads: "Dear Christy, Grandad gave me this for Christmas the very first year we were married, it is for cake, sandwiches, cookies or whatever. It will be 60 years old next Christmas. It is called Depression Glass - should be quite valuable. If you don't have cupboard space, let Peggy (my mother) keep it for you."

My grandmother was a child of the depression, and loved and valued her beautiful things. She passed away in 2007 at age 93, and I miss her still.

​
​​If you would like to see my recipes, tips and adventures in cooking every week go to www.ucancook.net and enter your email on the right side. Alternatively, email me at [email protected] and I will set you up!
Comments

Two Simple Snacks for a cold day

4/4/2016

Comments

 
Picture
Today's cold weather in Boston calls for a night by the fire at home - and some good snacks. The problem is, most of the snacks that come from a box - even the "healthy" ones - are full of preservatives, stabilizers and other things we don't really want to eat. Sometimes, it's fun to go all out, for example making homemade potato chips. But other times, you just want a quick snack. If you've grown tired of apples or bananas and peanut butter, here are two quick suggestions.

If you were a kid before about 1980, do you remember eating popcorn from a pan?

Do you remember how delicious it tasted? How fresh and crispy? How the salt would cling to each delicious kernel?

I'd like to challenge you to re-create that taste. It's simple, cheap and if you follow my instructions you will NOT crack your teeth on raw kernels OR have to scrub blackened popcorn from the bottom of your favorite pan.

You need only three things: a 3 quart pot with a lid, 3 Tbs. of oil and 1/3 cup of fresh popcorn. And here's a tip: you don't have to magically intuit the size of your pot; if you look on the bottom of the outside of the pot; almost every one will have a small imprint which includes the size of the pan - who knew?

Picture
Next step: fresh popcorn. There is a bit of science to fresh popcorn: the reason it pops is that there is a tiny bit of moisture in every kernel. When that moisture is heated to boiling, the kernel explodes, creating a piece of popcorn. I spend about 50 cents extra to buy Orville Redenbacher popcorn in a plastic jar with a screw-on top. In case you're wondering, that's about $4 for a jar of popcorn that makes at least 20 servings of my favorite snack. No matter what you buy, it's important to store it tightly sealed, so the moisture inside each kernel doesn't evaporate.

Finally oil. Many of us have plastic containers of vegetable oil (Wesson or Canola) in our pantries. Grab that oil, open the top and sniff it. It should not smell of anything, but if it's older than a year, it probably does. Believe it or not, oil does go bad. If your oil has an "off" smell, throw it out and buy new; your food will taste a lot better. If you don't use much of the stuff, buy it in small containers.

If you have only olive oil on hand, go ahead and use it, but it's not ideal. Olive oil breaks down at high heat (it has a low "smoke point") and may scorch your pan and your popcorn. Since I cook on an electric stove, even the hottest burner doesn't usually get hot enough to do this, but if you have natural gas, watch out.

Now that you've assembled your ingredients, put the oil in the pan and turn it on high. After about a minute, pour in your popcorn, cover the pan and shake. Once it starts to pop, shake frequently until the popping stops (or until you hear less than one pop every 5 seconds). If you wait just until the popping has almost stopped, you should have only a handful of unpopped kernels and an unblemished pan: success! Salt and serve.

The first video below explains the recipe, and the second shows you how to tell when the corn is done popping.

Picture

Now for another homemade snack: hot chocolate. Like popcorn, the tools are few: a pyrex measuring cup, a small whisk, Hershey's cocoa powder, sugar and milk. With a bit of supervision, even a 6 year old can prepare this.

Start by adding 2 teaspoons of cocoa powder and 2 Tbs. of sugar to the measuring cup. Stir to combine.

Next add about a cup of milk. Put the unstirred mixture in your microwave and heat for 90 seconds. At this point, the mixture is going to look like a huge mistake, but it's not! Remove from microwave, whisk to combine and taste. If it's too sweet, add more milk and continue heating in 30 second increments. You can also add 1/2 tsp. vanilla.

When the mixture is heated to your satisfaction, whisk again and serve. If you feel like your whisk is not doing the job, try holding it between your palms and rubbing them back and forth to twirl the whisk. The more narrow the handle, the better this works - you can even whip cream this way!

Photos of each step in making hot chocolate: sugar and cocoa; added milk; after microwaving and when whisked.

Both of these snacks take under 5 minutes to prepare, taste great (especially compared to their packaged cousins), have no chemicals and are tasty and REAL. Because after all, if you are going to eat "fun food", it should be as delicious as possible!


​​If you would like to see my recipes, tips and adventures in cooking every week go to www.ucancook.net and enter your email on the right side. Alternatively, email me at [email protected] and I will set you up!
​
Comments
    Picture

    Author

    Chris, cooking instructor, disability advocate and mom. Food geek and passionate believer in fresh, simple and homemade.

    Enter your email address:

    Delivered by FeedBurner

    Categories

    All
    Best Practices
    Chocolate
    Common Sense
    Cookies
    Cool Tools
    Dessert
    Entertaining
    From The Garden
    Healthy
    Holiday Cooking
    Kitchen Adventures
    Quick
    Snack
    Taste Test!

    RSS Feed

    Archives

    June 2016
    May 2016
    April 2016
    March 2016
    February 2016
    January 2016
    December 2015
    November 2015
    October 2015
    May 2015
    February 2015
    January 2015
    November 2014

    The typeface at the top of this page is Goudy Old Style, the same typeface used in my first copy of The Fanny Farmer Cookbook. My copy is a successor of The Boston Cooking-School Cookbook, first published by Fanny Farmer in 1896. It was one of the first cookbooks to use the standard measures that are common today.