you can cook
  • You Can Cook!
  • About Me
  • Recipe Box
    • Appetizers >
      • Buffalo Chicken Dip
      • Cream Cheese Appetizer
      • Sweet and Salty Nuts
      • Thai Peanut Sauce
    • Beverages >
      • Blueberry Lemonade
      • Cosmopolitan
    • Breakfast >
      • Apple Pancake
      • Homemade Granola
      • Peanut Butter Cup Smoothie
      • Stick-to-your-ribs smoothie
      • Veggie Omelet
      • Yeasted Waffles
    • Main Dishes >
      • Beef Stew
      • Chicken Fajitas
      • Choley
      • Grilled Chicken
      • Low and Slow Chicken Breasts
      • Roast Turkey
      • Rub for Pulled Pork (and other meats too!)
      • Salmon Burgers
      • Simple Homemade Mac & Cheese
      • Simple Red Sauce
      • Steak and Potato Salad
    • Sides >
      • Bacon-Roasted Brussel Sprouts
      • Creamy Polenta
      • Homemade Potato Chips
      • "Magic" Salad Recipe
    • Soup >
      • Apple Cheddar Soup
      • Butternut Squash Soup
      • Chicken Noodle Soup
      • Creamy Tomato Basil Soup
      • Smokey Beef Chili
    • Sweets and Treats >
      • Almond Cake
      • Apple Crisp
      • Bruna Kakor
      • Butterscotch Pecan Sandies
      • Chocolate Fudge Brownies
      • Chocolate Mousse
      • Compost Cookies
      • New York Times Chocolate Chip Cookies
      • Pumpkin Pie
      • Salted Caramel Sauce
  • Classes
  • Contact Me
you can cook

Pumpkin Pie: Good, Better and Best!

11/23/2015

Comments

 
Picture
With Thanksgiving on the horizon, I'm thinking about my pies. After all, dessert is my favorite part of the meal, and with a smaller family gathered around our table, I have to be quite choosy; nine guests mean that I can have two pies at most. And one of them MUST be pumpkin.

The "Good" recipe is the one on the back of a can of Libby's pumpkin; you can find it on-line here. If you make it with a pre-rolled crust, it's almost always better than a pie you purchase, in fact, it's quite good! Cool the pie slowly to prevent cracking and once cool, refrigerate for at least 3 hours before serving. 

The "Better" recipe is one that makes a few changes to the recipe above, most notably substituting half-and-half for the evaporated milk but using the same crust. Because it makes a thicker custard than the Libby's recipe, this pie rarely cracks after baking. It is also less bland, with more intense pumpkin and spice flavors. The recipe requires no more time than the Libby's recipe above and has the same number of ingredients. To make the "Better" pie, use a pre-rolled crust and fill it with this pumpkin custard, beginning the recipe at step 5. 

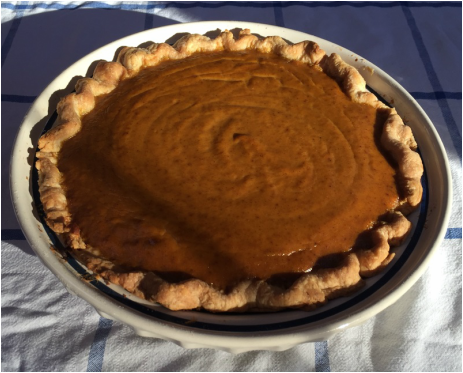
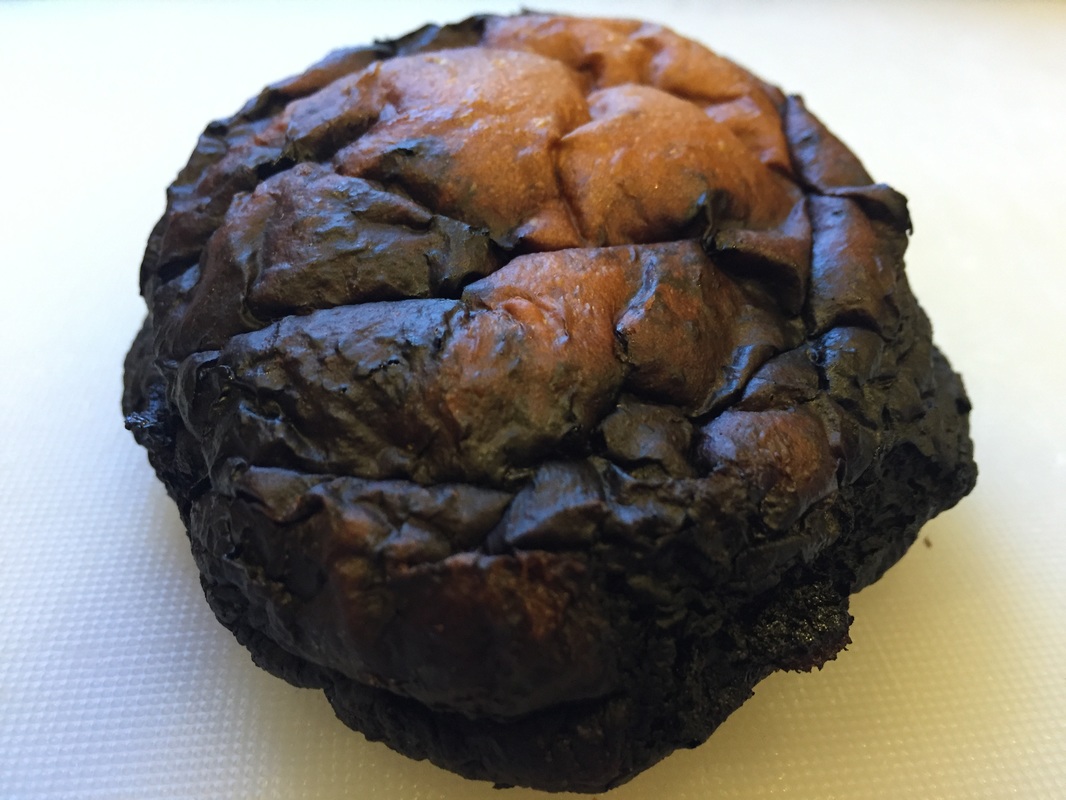
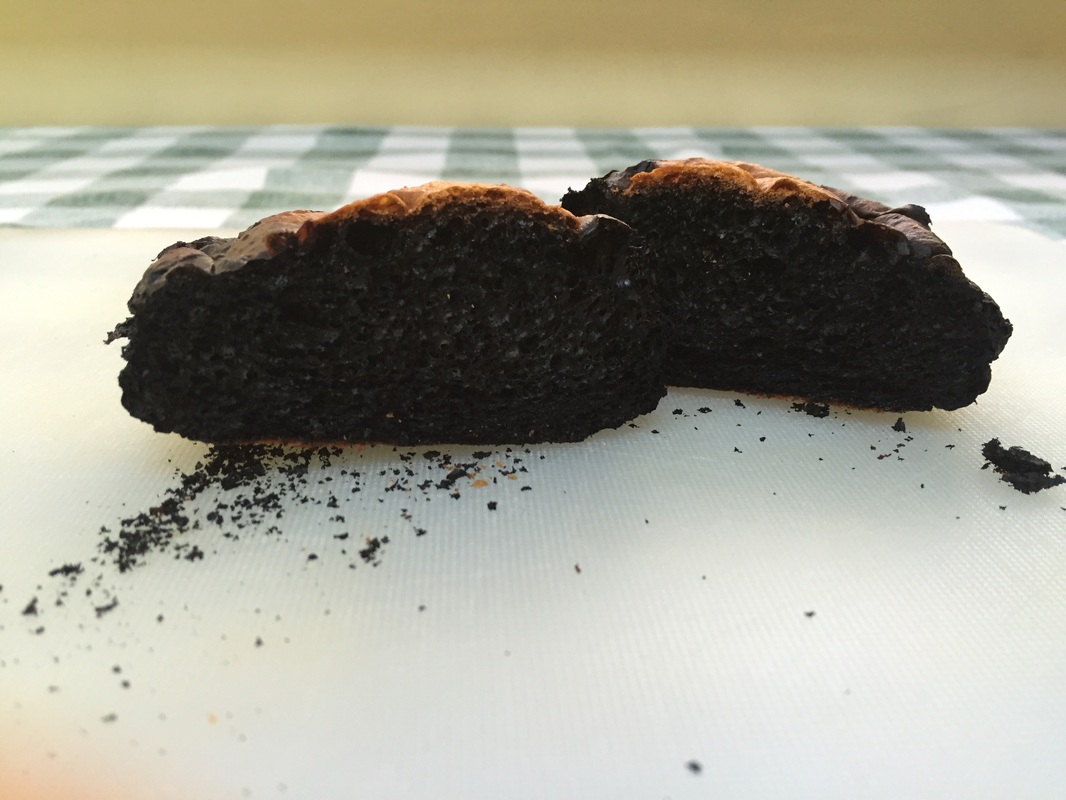
For the "Best" recipe, you will need to make your own piecrust (this King Arthur Flour piecrust is great), and pre-bake ("blind bake") it. I cannot lie, this will take some time, but when you make your own crust, it has a buttery flavor and a lightness that a pre-rolled crust will never achieve. When you blind bake the crust, it becomes crispy under the velvety soft custard. Most pies have a thin, limp bottom crust which is a shame, given that the bottom crust has the same amount of fat and calories as it's delicious top-crust cousin. When you serve this pie, it will come cleanly out of the pie pan and when you cut it with your fork, the crisp bottom crust will flake away. To make the "best" pumpkin pie (pictured above), make your own crust and follow my pumpkin pie recipe. As with all three pies, cool completely and refrigerate at least 3 hours before serving; serve with whipped cream or (if you must) Cool Whip.

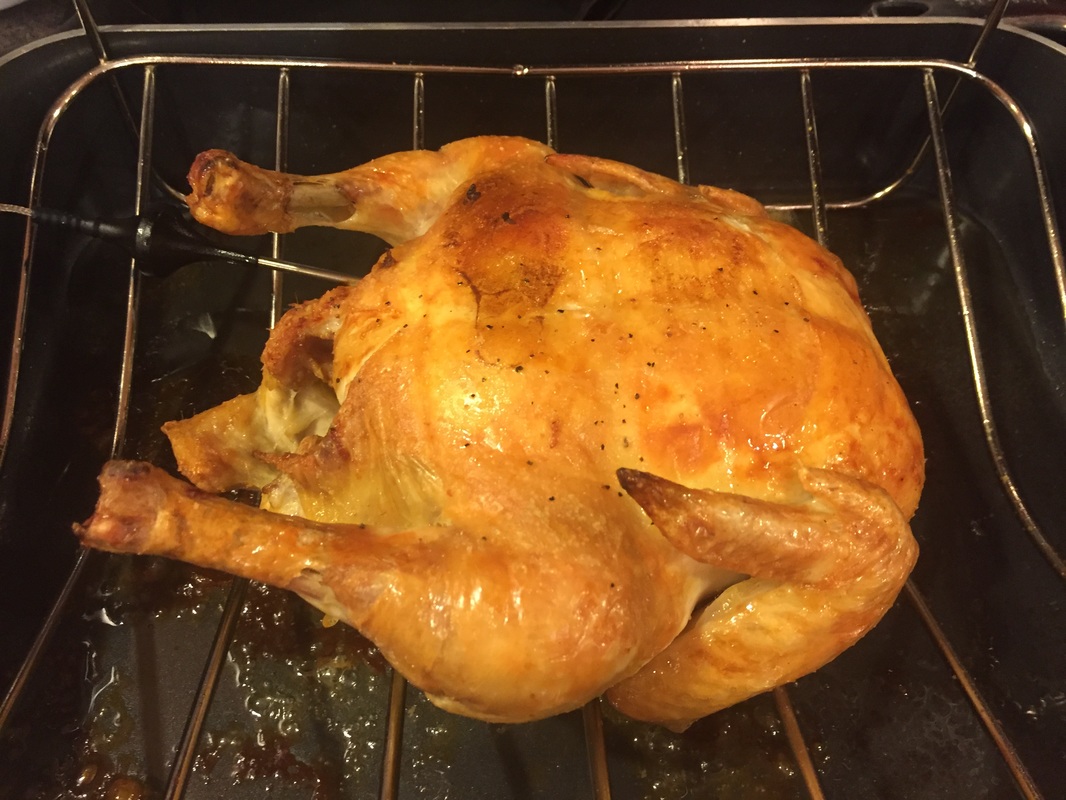
When my mother prepared Thanksgiving dinner, it was a big (and stressful) production. I've never really thanked my brother for taking over the preparation of the turkey for her; he had this amazing baste and would cook the turkey on the Weber grill, not only preparing the bird but also creating a lovely outdoor haven where we kids could go and drink beer (Thanks Mark!). Mom really enjoyed putting a homemade pumpkin pie on the table, but for her making homemade crust was a bridge too far. If like Mom, you don't enjoy these adventures in cooking...then don't do it! Thanksgiving is about family and friends; the food is just the vehicle for bringing us all together. We can bond over any of the pies above, a pie from a box, or no pie at all. 

Happy Thanksgiving to you and your family,

Chris

Comments

The Trouble with Turkey...And How To Solve It

11/16/2015

Comments

 
Picture
"Mommy, this white meat's dry."

I was only about 12 years old, but I still remember the look on my mother's face when my 4 year old cousin blurted out those words during a lull in the Thanksgiving dinner conversation. Although I could tell that Mom was extremely unhappy, I knew that my preschool-aged cousin had stated an inconvenient truth: while not quite at the level of a Chevy Chase Christmas Family Vacation turkey, this was one dry bird, and there was not enough gravy in all of Milwaukee to hide that fact.

The first turkey I roasted on my own was for my husband and I. There was a promotion at the grocery: save $200 in receipts, and get a free turkey! Given that there were just two of us, it took a good long time to save those receipts and by the time we were ready to pick up our prize - just days before Thanksgiving - the only turkeys left were 25 pounds and up. At first we were excited by our bargain, but the enormity of the "deal" began to hit when we sat down to eat the roasted bird - just the two of us - and could barely see over the top. Let me say that the bird was not the most moist (probably due to my fears about cooking it completely) and we had a very long, dry winter.

At this time of year, nearly anyone who writes about food has all sorts of tips on how to ensure a moist juicy bird. It's really confusing, and you could find yourself practically making mandalas of turkey feathers on your kitchen floor if you followed them all. I have prayed many times to the moist turkey gods, and decided that I needed instead to hone in on a small number of things that actually matter and move on. So here is my list:

1. Buy a fresh (never frozen) bird.
2. Roast it breast side down for the first 30 minutes.
3. Cook it only until it's done.
4. Don't stuff it (sorry).
5. Let the bird rest for at least 15 minutes before eating.

Buying a fresh bird is easy; it says "never frozen" on the label. And here's another inconvenient truth: since some enormous percentage of turkeys are sold during the last two weeks in November, exactly when do you think the frozen turkeys actually got that way (here's a hint: do you think the turkey industry times their crop so that every turkey is ready to harvest in late October)? Another benefit: fresh turkeys often have far less injected water which not only bulks up frozen turkeys and increases their price but can add an off-putting, chemical taste. I've seen frozen birds that have up to 12% "added juices" - i.e. water, salt and preservatives. Fresh birds, which commonly have 3% or less added juices, can be purchased starting the weekend before Thanksgiving.

Roasting breast side down to start is a little more trouble, but so worth it. Breast meat has much less fat and because it's on top of the bird as it roasts, the juice that it does have drips down onto the thighs. By starting the bird upside down, you reverse this process and by flipping it after 30 minutes, you allow the top of the bird to become brown and crispy, just as if you had cooked it "right side up" the whole time.

This recommendation leads to two questions; first, how am I supposed to know which side is up AND how the heck am I supposed to flip a slippery 450 degree turkey???

The easiest way to tell which side is up is that the tail (a small, hard, diamond-shaped protrusion near the large cavity) is on the bottom. Also, if the bird is right side up, the large cavity would be also to hold stuffing without the stuffing falling out. Thus, if you put the turkey in the roasting pan "upside down" (to start the cooking process), the tail will be on the top and the opening of the large cavity will be less visible. See the pictures and video in the recipe below for more detail.

Flipping a turkey is a bit tougher. For some, the way to go is to make two giant wads of paper towels and use that to grip and flip the slippery bird. Being a bit of a green-freak, I can't bear to waste paper towels this way, so I usually use two clean dishtowels; I also enlist my husband to help me. With two sturdy spatulas and two absorbent cloth towels we can turn the bird over safely and pop it back in the oven. See the video in the recipe below for more detail; unfortunately, our family of three cannot eat two turkeys in two weeks, so I made my video with a chicken (sorry!).

Cooking it until it's done is simple: use a meat thermometer and cook ONLY until the thermometer (pierced into the thickest part of the turkey thigh) reads 165 degrees. See the recipe video for the thermometer placement, and read my post on dry chicken here for more information about thermometers and why they matter. The little plastic thermometers that come in many birds are useless, and I usually remove them before cooking.

I'm sorry to say that while stuffing the bird leads to GREAT tasting stuffing, it leads to not-so-great tasting turkey. The reason is that a stuffed bird takes longer to cook, leaving the outside (especially the breast) meat dry. Stuffing baked in a covered dish, especially made with a bit of turkey or chicken broth, is a tasty alternative that - bonus! - is a lot less hassle than un-stuffing a turkey cavity just as you are trying to serve the entire meal.

Finally, please do let the bird rest; after all, he's had a tough day. Take the turkey out of the oven and put a little sheet of foil on top to keep it cozy (this is often called "tenting") for at least 15 minutes. Believe it or not, scientists have tested this (scientifically!) and found that while the bird is resting, it's lovely juices are being re-absorbed into the cells of the meat, making that turkey all the more delicious when you finally do make the first cut.

Just flipped
Fully Cooked
Under a tent
For an actual recipe with instructions for cooking a turkey, click here.

Years ago, I worked with a strict vegetarian who became a great friend. I once asked her what she ate for Thanksgiving, and she said that with all the sides, Thanksgiving is the best holiday ever for vegetarians! So if worst comes to worst and you accidentally cook a turkey so dry it could be an extra in the next Christmas Family Vacation movie, open more wine, make sure your cat is safely away from your decor, check that no one is smoking stogies near an open sewer and pass the sides. I'm quite confident they will be delicious!
Comments

Don't Microwave That Meat...But If You Must, Here's How

11/9/2015

Comments

 
Years ago, when my son's teenage appetite was just starting to kick into high gear, he asked me to microwave him a particularly delicious-looking dinner roll from the freezer. Having shown zero interest in cooking (in spite of considerable exposure at home), his cooking skills were limited to little more than cooking single serving microwavable containers of Kraft mac & cheese for three minutes. So when his hunger became too intense, he took it upon himself to microwave the roll.
Picture
I came downstairs nearly three minutes later to find the kitchen full of choking smoke, my son standing next to the microwave paralyzed with fear. With the long kitchen island between us, I yelled:

"Open the Door!"
"Open the Door!"
"Open the Door!"

To which he shook his head violently, too scared of what might issue forth from the smoking microwave. I ran around the island and threw open the door, causing the smoke alarms to go off, and he and I fled the kitchen with thick gray smoke in pursuit.

Later, after the kitchen had cleared, I went back and looked at the offending roll. Strangely, after being microwaved for nearly three minutes - a rather long time for a small roll - it looked pretty normal on the outside, with only one narrow gray streak (the photos below are my re-creation of this memorable event). However when I cut it open in the name of kitchen science, I found a solid black mass that looked exactly like Hawaiian lava, covered in a thin coating of a bread-like substance. My son did not microwave rolls again.

When you microwave food, it's the water and fat that really cook (or are "excited" by the microwaves). So if you microwave meat, the juices that make your meat taste so delicious are being heated to boiling so they can cook the meat around them. Once so heated, those juices are gone. Microwaving dries meat by removing water; microwaving bread does the same thing, which is why a slice of bread - or dinner roll or tortilla - will become tough and chewy if overheated for even 5 seconds.

Most restaurants do not have microwaves. Those that do, refer to the microwave as "Chef Mike". It is not a complimentary term.

Microwaving cooks unevenly. Have you ever noticed that a plate of leftovers is much warmer on the outside of the plate than at the center? By the time the inside is cooked, the outside is tough and dry.

Microwaving gives the meet a strange, stale flavor and a rubbery texture. If you taste-test leftovers re-heated on the stove vs. in the microwave, you will usually notice a big difference.

Finally, microwaving will never brown meat, because of course it only cooks the water in the food. You can steam food all day in a microwave, but create the lovely crust which gives meat extra savory flavor? Not going to happen.

There are a few exceptions to the "don't microwave meat" rule however.

Microwaving meaty soups, stews and other dishes with a LOT of liquid is generally OK. Watch out for such foods with pasta though; the pasta - like bread - can become quite tough.
Picture
If you need to thaw uncooked meat and have a microwave with a defrost setting, you can use the microwave to thaw up to about 3 pounds of meat (more than that and you will overcook parts of the meat to completely thaw the whole). To use this extremely handy feature, figure out the weight of the meat you want to thaw, hit the "defrost" button (called "auto/time defrost" on my GE microwave) and input the weight. The microwave should prompt you to turn the meat at least once, and the first few times you use this feature, watch to see the outside edges of the meat aren't overcooking. This is a much easier - and faster - way to thaw meat than under running water in the sink.

If you want to reheat leftovers and don't have time to cover and bake them, arrange the food on a plate:
1. If heating meat and a starch, put the meat in the middle of your plate or bowl and cover it with the starch. Cover the whole thing with another plate and microwave until the underside of the bottom plate is warm or hot.
2. If heating only meat, put the thickest part of the meat to the outside of the dish; imagine four chicken drumsticks with the bones in the middle and the meaty parts to the outside. Cook on 50% power until done, rotating or flipping meat at least once.

Let me be clear here - there are many ways to cook, and microwaving meat might work really well for you. If it works, keep doing it! And if you do have a truly delicious recipe that includes meat prepared in the microwave, please comment and share; I'm happy to be proven wrong in the name of food that tastes great. But if you've been thinking there might be better ways to cook meat, perhaps it's time to try them. 

Finally, if you've read this far, I want to share a recipe I've rescued from the microwave: buffalo chicken dip. For this absolutely tasty and heinously unhealthy recipe, click here. Your friends and family will thank you - as soon as their food coma lifts.

And please, please, please....don't microwave fish or seafood...unless exacting revenge on some ill-behaving officemates. And if you do so, don't eat it. Just leave it in the microwave, unclaimed, until the parties involved have been sufficiently disgusted by the smell. Then sneak quietly away.

Comments

doing less and making more - 3 recipes that are fresh and quick

11/3/2015

Comments

 
Picture
Here in New England the leaves are turning quickly and the ground is littered with their beautifully colored refuse. The markets are full of fall squash, new crop apples and other culinary delights. But surrounded by piles of excess Halloween candy and a refrigerator full of party leftovers, I am much more interested in cleaning out than preparing new.

So how little effort can I expend and still make a fresh-tasting meal?

The least effort involves my freezer. I have an inviolable rule: I don't put it in unless I know I'll be delighted when I take it out. Beef Bourginon, excess strawberry buttercream or homemade Asian dumplings -- yes. Aging leftovers or dried out chicken -- no (unless I plan to feed the chicken to my dog, and then I mark it as such and throw it in - he will be delighted, I know). I see some delicious cauliflower cheese soup and my husband - who has a permanent pass on cauliflower due to a nasty college incident involving cauliflower and alcohol - is away this week, so there's a good possibility! Another nice go-to: cryovaced marinated meat for grilling. Because it is sealed in a vacuum, this meat can be stored in the freezer for much longer than traditional grocery-wrapped meat without loss of flavor, up to 6 months (3 months for hamburger). Thaw it using your microwave's defrost cycle - which really works - start the grill and with a sauteed veggie or over a salad - voila! Dinner. But if the freezer is bare, what other options are there?

Don't pick up the takeout menu yet, here are a couple of ideas!

Years ago, I signed up for an Italian cooking class, which was to include a meal. At the last minute, I could not attend and sent my husband. While he never got his meal (and came home extremely hungry - as an aside, who does a cooking class without a LOT of food???), he did bring home a recipe for red sauce that is so quick it takes almost no more time than opening a jar. Add in some sauteed sausage and a few veggies from the bottom of your produce bin, and with a bit of pasta, you have a real meal. The world's simplest recipe for red sauce is here.

Picture
Another nice go-to is homemade mac and cheese with added peas or broccoli. There are many elaborate recipes for mac and cheese, but the simplest uses whatever pasta you have on hand, one onion, some butter, flour and milk and a bag of pre-grated cheese. It cooks in about 15 minutes (the time needed to boil water and cook your pasta) and it's a kid-friendly treat. The recipe is here.
Picture
Finally, chicken soup is a very simple and fast meal. Saute a few veggies and use "Better than Bullion" to make 6 cups of chicken broth. Throw in fine pasta and leftover chicken and dinner is served; for heartier appetites, add extra chicken and pasta. The speed with which this soup cooks is limited only by the size of your carrot slices and noodles; the fine egg noodles that I like cook in just 3 minutes. If you prefer (or don't have any chicken or turkey on hand), you can use an egg for your protein instead. The recipe is here.

When I was first married, my husband and I used to love frozen Chicken Kiev - it was our go-to to-tired-to-cook meal. But increasingly, we realized that the chicken was not meat-like, and we were finding things in there that we didn't want to eat. We tried to upgrade by purchasing a better brand, but quite frankly pre-formed chicken is pre-formed chicken, and no manufacturer uses truly quality chicken to create chicken kiev. The recipes above are meals that come together in under 15 minutes but are fresh, tasty and real. Packaged food and takeout menus have a place in our lives, but if you're up for the challenge of just a couple of extra minutes, you won't be disappointed.

I'd love to hear from you - what is your favorite fresh and fast meal?? Do you do something special with those convenient and tasty grocery store roast chickens? Have a coucous or pasta favorite you'd like to share? Please comment below!

​
Comments
    Picture

    Author

    Chris, cooking instructor, disability advocate and mom. Food geek and passionate believer in fresh, simple and homemade.

    Enter your email address:

    Delivered by FeedBurner

    Categories

    All
    Best Practices
    Chocolate
    Common Sense
    Cookies
    Cool Tools
    Dessert
    Entertaining
    From The Garden
    Healthy
    Holiday Cooking
    Kitchen Adventures
    Quick
    Snack
    Taste Test!

    RSS Feed

    Archives

    June 2016
    May 2016
    April 2016
    March 2016
    February 2016
    January 2016
    December 2015
    November 2015
    October 2015
    May 2015
    February 2015
    January 2015
    November 2014

    The typeface at the top of this page is Goudy Old Style, the same typeface used in my first copy of The Fanny Farmer Cookbook. My copy is a successor of The Boston Cooking-School Cookbook, first published by Fanny Farmer in 1896. It was one of the first cookbooks to use the standard measures that are common today.