Glazing a Torte


While glazing a torte can in no way be compared to ending Apartheid, I thought that Nelson Mandela's quote was quite apt in this instance.
At a recent class, we were so engaged in making and eating our delicious desserts and dessert sauces, we ran out of time to glaze one of the tortes, a chocolate torte made with almond flour. So here, in 13 pictures, is how it works.
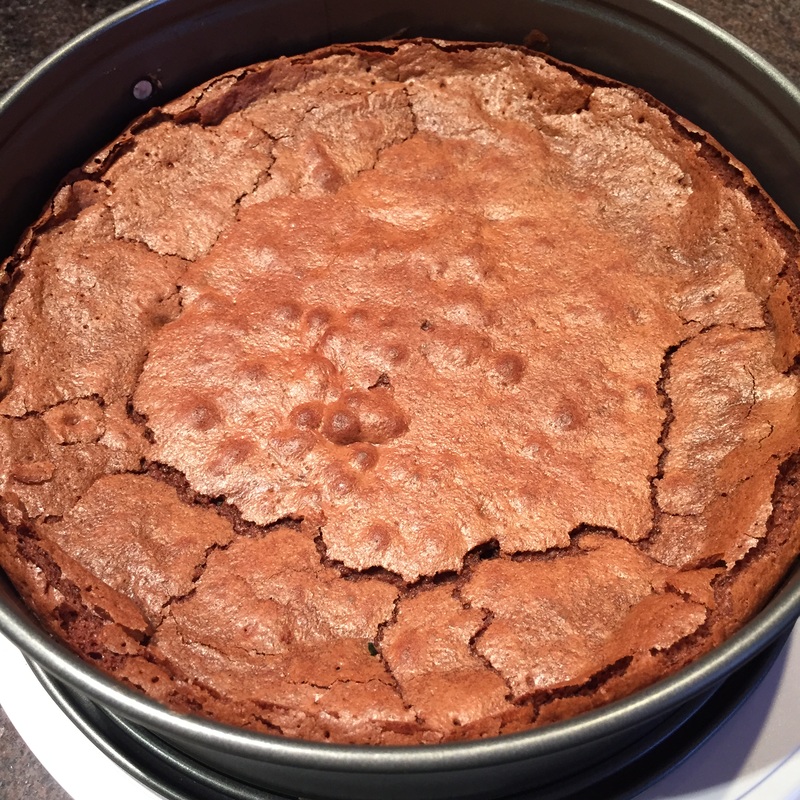
1. Start with a fully-baked Queen of Sheeba torte (recipe coming here).
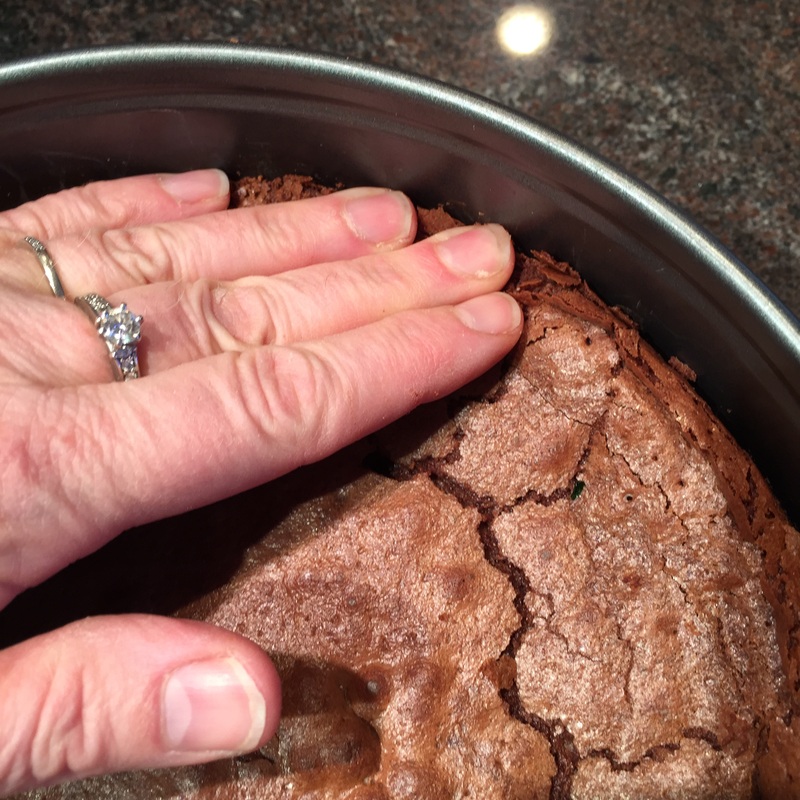
2. Use your fingers to gently press down the edges of the torte (while it's still in the pan) so it's level across the top.
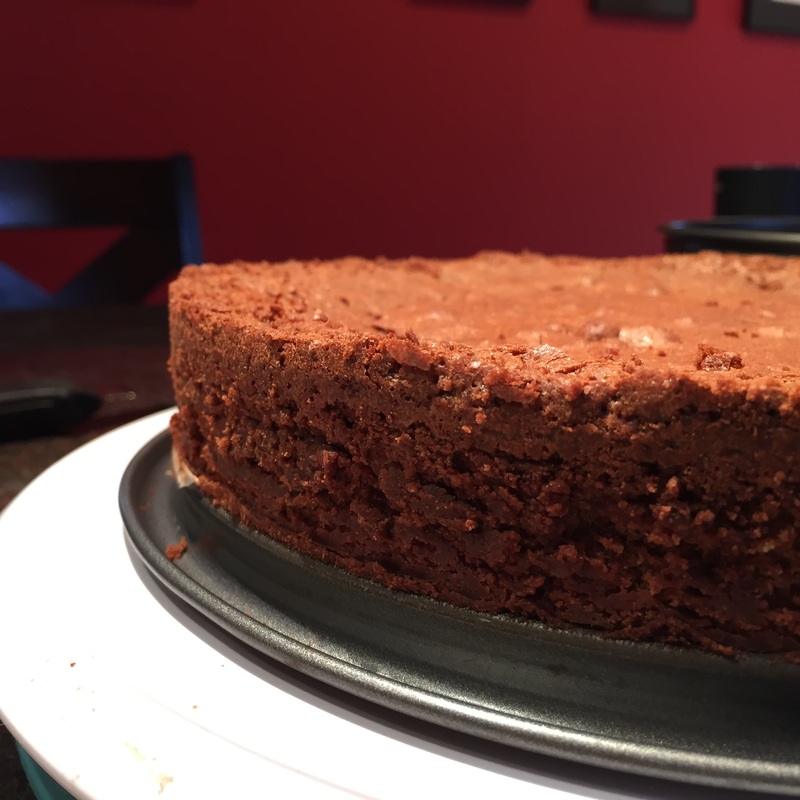
3. Remove the outside of the springform pan. See how level it is? Flip it over and peel off the waxed paper or parchment, and eat the crumbs from the paper. Delicious!!
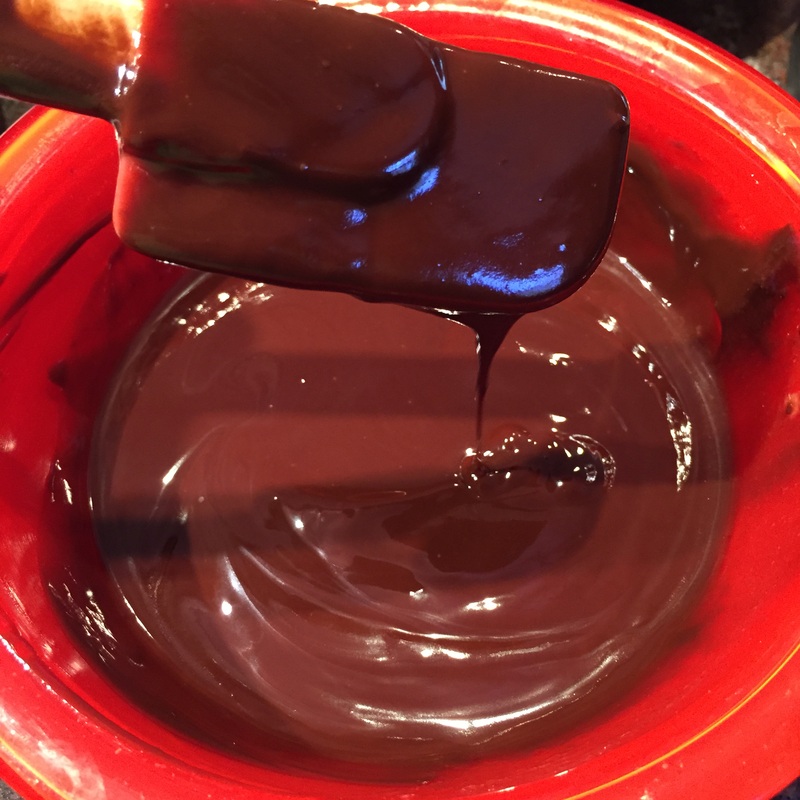
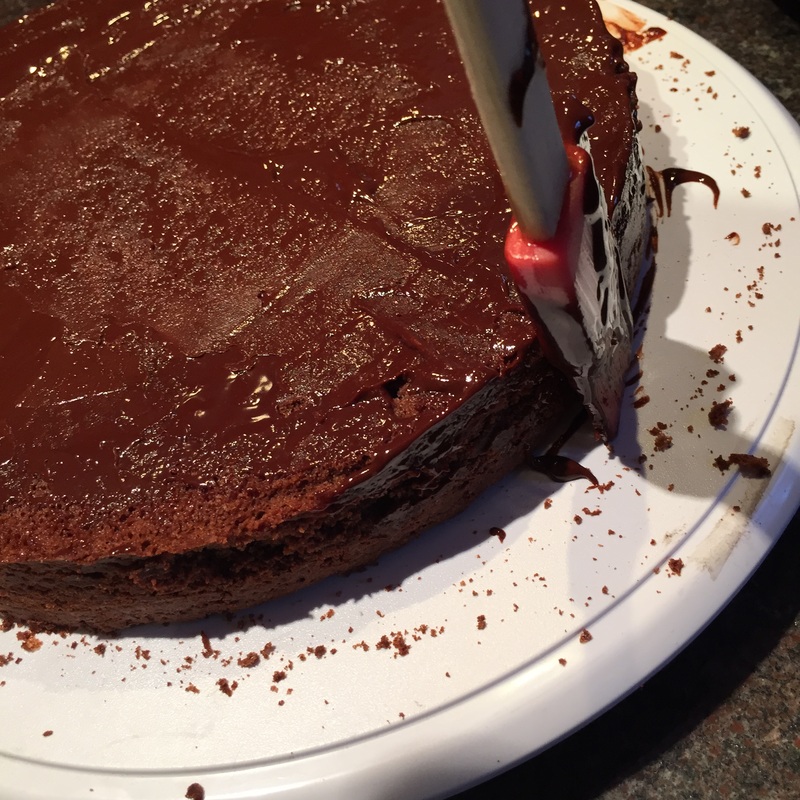
4. Next make your glaze (recipe coming here). It shouldn't be hot, but do you see how liquid it is as it falls from the red spatula?
5. Pour about 1/4 of the glaze onto your torte.
6 and 7. Use your spatula to spread the glaze all over the torte. It's not meant to look pretty, it just needs to seal in the crumbs. If you need more glaze, use a clean spoon to get it; be careful not to get crumbs in the glaze! Once it's covered, pop it in the refrigerator for at least 30 minutes to let the glaze set.
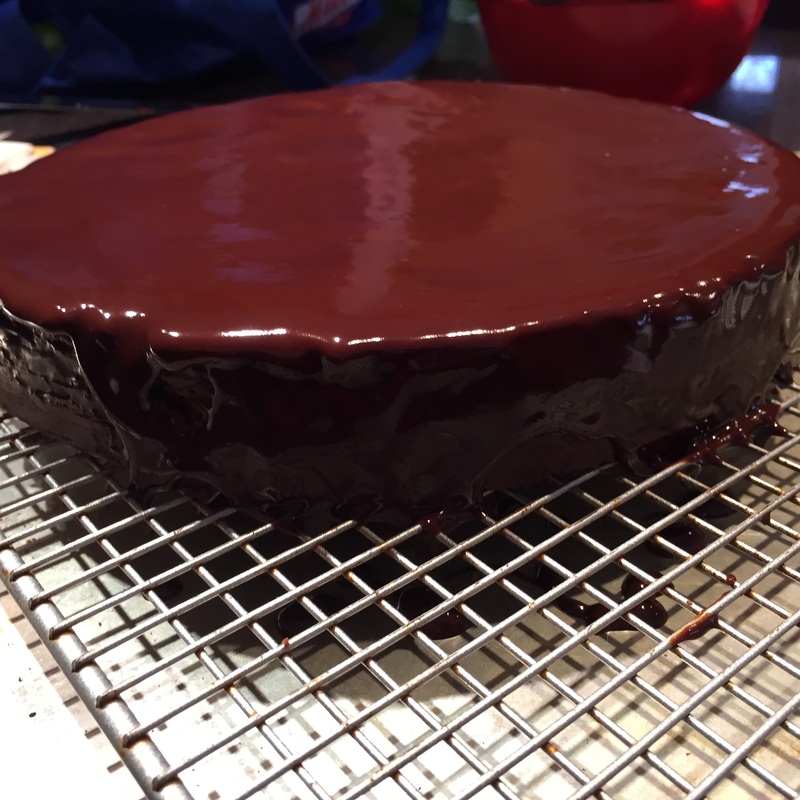
8, 9. Transfer the torte to a wire rack using a large spatula or cake mover. You may need to re-heat your glaze in the microwave (15-30 seconds on 50% power) to make sure it's still nice and liquid (but not hot)
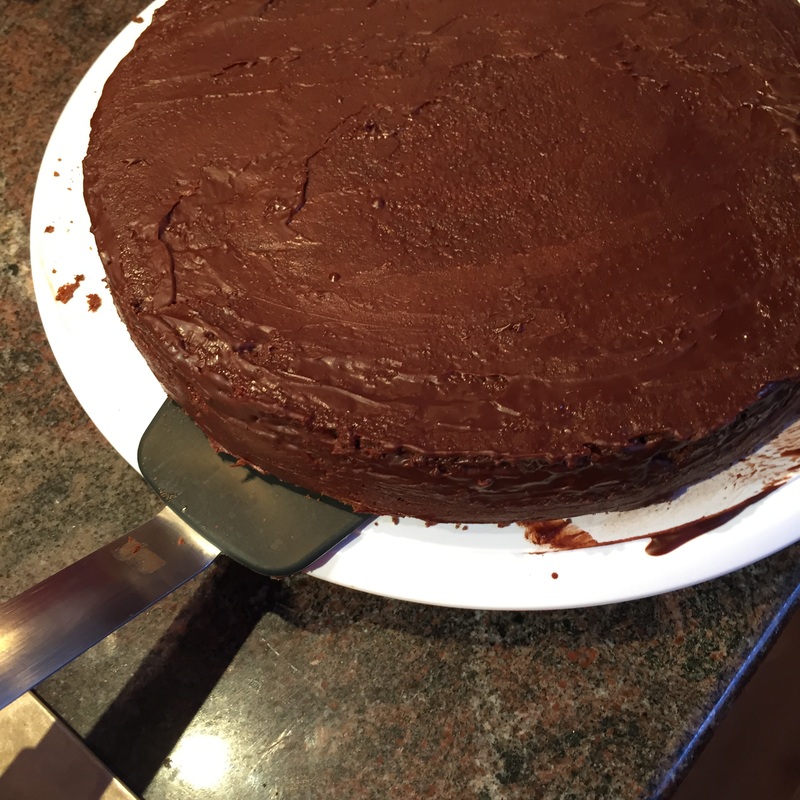
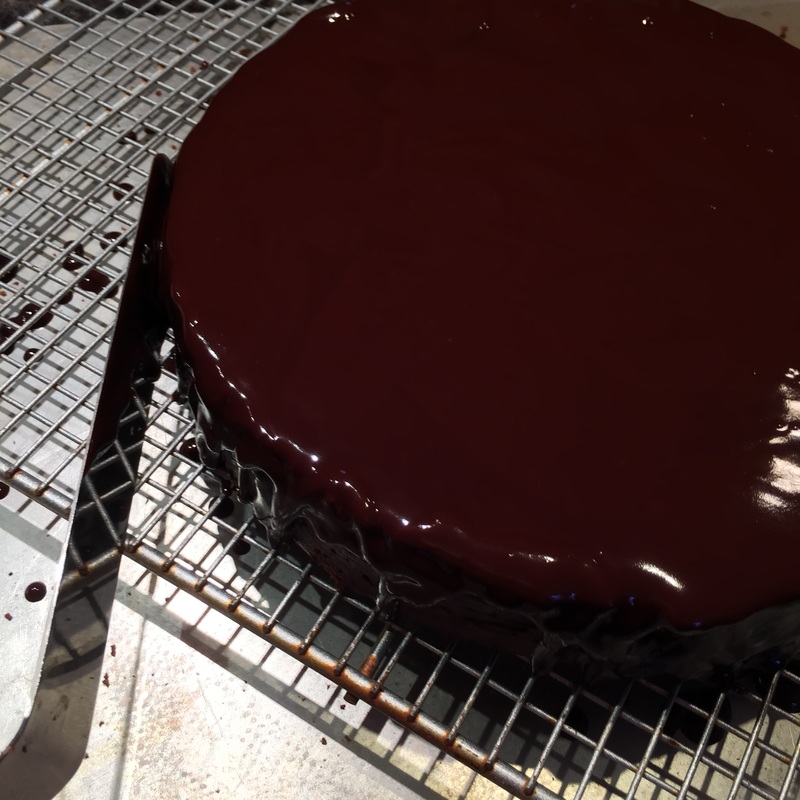
10. Now pour the glaze on the torte, tilting it carefully so the glaze covers the whole top and drips over the edges. Use a clean spatula to apply glaze to the sides as needed; spoon a bit of glaze onto the spatula and then smooth it over the sides, being careful not to touch the top and top edge.
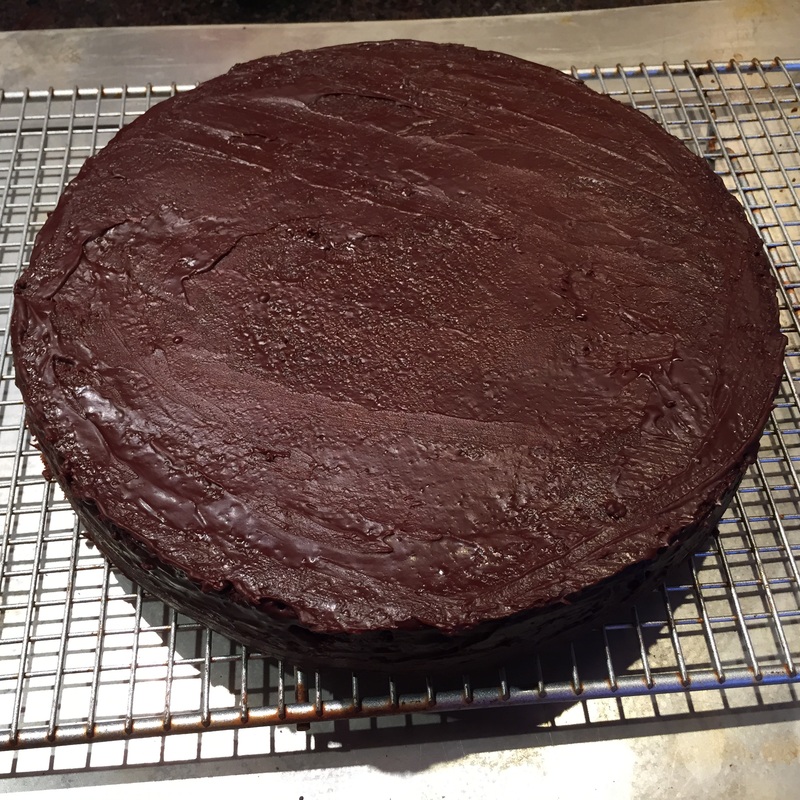
11 When you are finished, it will look like this! You can't see the slightly imperfect sides, but that's OK - we will cover them with toasted almonds. Transfer your torte to your serving dish, using the same large spatula or cake mover that you used to put it on the rack. Use a slightly damp paper towel to remove any chocolate glaze that becomes smeared on the serving dish.
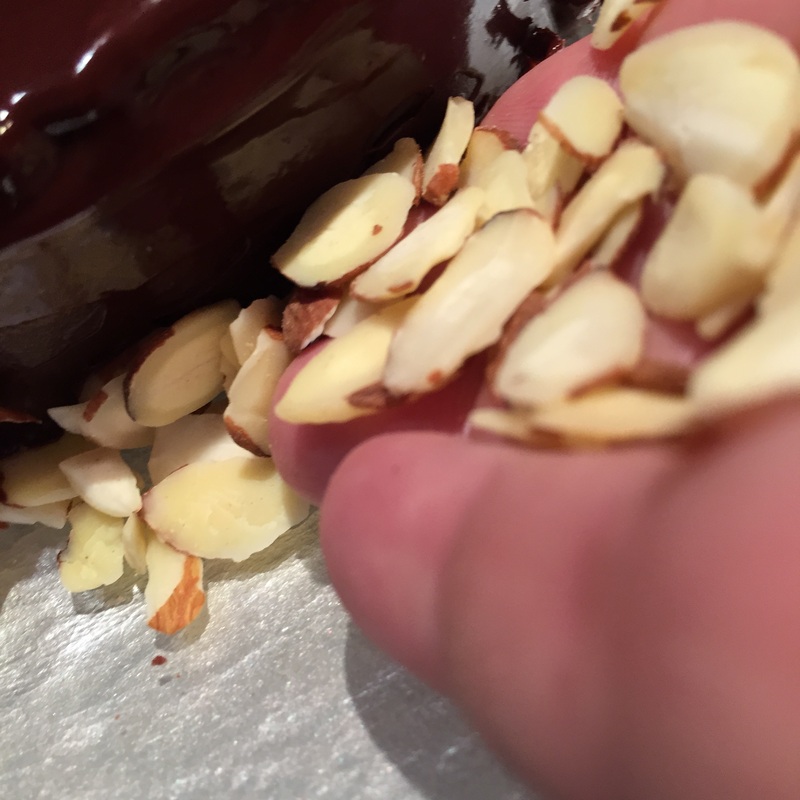
12. Apply the toasted almonds. Clearly a job best done with two hands, not one hand while the other tries to take a picture. It took me 8 tries just to get this photo, you should see the others!
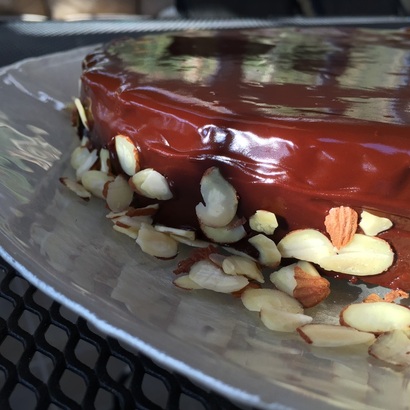
13. At last, your masterpiece is complete! Store it at room temperature or slightly cooler; if you place it in the refrigerator, the glaze may discolor upon returning to room temperature. Serve with berries or a fruit sauce.
A 9" torte serves 12-16, and I'm sure every single one of them will enjoy it.
At a recent class, we were so engaged in making and eating our delicious desserts and dessert sauces, we ran out of time to glaze one of the tortes, a chocolate torte made with almond flour. So here, in 13 pictures, is how it works.
1. Start with a fully-baked Queen of Sheeba torte (recipe coming here).
2. Use your fingers to gently press down the edges of the torte (while it's still in the pan) so it's level across the top.
3. Remove the outside of the springform pan. See how level it is? Flip it over and peel off the waxed paper or parchment, and eat the crumbs from the paper. Delicious!!
4. Next make your glaze (recipe coming here). It shouldn't be hot, but do you see how liquid it is as it falls from the red spatula?
5. Pour about 1/4 of the glaze onto your torte.
6 and 7. Use your spatula to spread the glaze all over the torte. It's not meant to look pretty, it just needs to seal in the crumbs. If you need more glaze, use a clean spoon to get it; be careful not to get crumbs in the glaze! Once it's covered, pop it in the refrigerator for at least 30 minutes to let the glaze set.
8, 9. Transfer the torte to a wire rack using a large spatula or cake mover. You may need to re-heat your glaze in the microwave (15-30 seconds on 50% power) to make sure it's still nice and liquid (but not hot)
10. Now pour the glaze on the torte, tilting it carefully so the glaze covers the whole top and drips over the edges. Use a clean spatula to apply glaze to the sides as needed; spoon a bit of glaze onto the spatula and then smooth it over the sides, being careful not to touch the top and top edge.
11 When you are finished, it will look like this! You can't see the slightly imperfect sides, but that's OK - we will cover them with toasted almonds. Transfer your torte to your serving dish, using the same large spatula or cake mover that you used to put it on the rack. Use a slightly damp paper towel to remove any chocolate glaze that becomes smeared on the serving dish.
12. Apply the toasted almonds. Clearly a job best done with two hands, not one hand while the other tries to take a picture. It took me 8 tries just to get this photo, you should see the others!
13. At last, your masterpiece is complete! Store it at room temperature or slightly cooler; if you place it in the refrigerator, the glaze may discolor upon returning to room temperature. Serve with berries or a fruit sauce.
A 9" torte serves 12-16, and I'm sure every single one of them will enjoy it.

 RSS Feed